Template:KF2WeaponInfo: Difference between revisions
Jump to navigation
Jump to search
(Fixed "width of fire-rate bar was to small") |
(Changed Secondary Ammo block) |
||
| Line 49: | Line 49: | ||
|- {{#ifexpr: {{#if: {{{PerkName|}}} | 1 | 0}} or {{#if: {{{Pricing|}}} | 1 | 0}} or {{#if: {{{Weight|}}} | 1 | 0}} || style="display: none;"}} | |- {{#ifexpr: {{#if: {{{PerkName|}}} | 1 | 0}} or {{#if: {{{Pricing|}}} | 1 | 0}} or {{#if: {{{Weight|}}} | 1 | 0}} || style="display: none;"}} | ||
| colspan="4" style="height: 12px;" | | | colspan="4" style="height: 12px;" | | ||
|- {{#ifexpr: {{#if: {{{InitialSpareMags|}}} | 1 | 0}} or {{#if: {{{ | |- {{#ifexpr: {{#if: {{{InitialSpareMags|}}} | 1 | 0}} or {{#if: {{{AmmoPricing|}}} | 1 | 0}} or {{#if: {{{Block|}}} | 1 | 0}} or {{#if: {{{Parry|}}} | 1 | 0}} or {{#if: {{{HealAmount|}}} | 1 | 0}} or {{#if: {{{HealAmountSolo|}}} | 1 | 0}} or {{#if: {{{HealRecharge|}}} | 1 | 0}} or {{#if: {{{HealRechargeSolo|}}} | 1 | 0}} or {{#if: {{{WeaponType|}}} | 1 | 0}} or {{#if: {{{SecondaryMagazineSize|}}} | 1 | 0}} or {{#if: {{{SecondaryAmmoCapacity|}}} | 1 | 0}} or {{#if: {{{SecondaryAmmoImage|}}} | 1 | 0}} or {{#if: {{{SecondaryAmmoCost|}}} | 1 | 0}} or {{#if: {{{SecondaryAmmoPricing|}}} | 1 | 0}} | style="background: #202224; border-top: #bd0000 solid 5px; color: #ffffff; margin-top: 12px; text-align: center;" | style="display: none;"}} | ||
| colspan="4" style="height: 30px;" | '''Weapon Information''' | | colspan="4" style="height: 30px;" | '''Weapon Information''' | ||
|- {{#ifexpr: {{#if: {{{InitialSpareMags|}}} | 1 | 0}} or {{#if: {{{ | |- {{#ifexpr: {{#if: {{{InitialSpareMags|}}} | 1 | 0}} or {{#if: {{{AmmoPricing|}}} | 1 | 0}} or {{#if: {{{Block|}}} | 1 | 0}} or {{#if: {{{Parry|}}} | 1 | 0}} or {{#if: {{{HealAmount|}}} | 1 | 0}} or {{#if: {{{HealAmountSolo|}}} | 1 | 0}} or {{#if: {{{HealRecharge|}}} | 1 | 0}} or {{#if: {{{HealRechargeSolo|}}} | 1 | 0}} or {{#if: {{{WeaponType|}}} | 1 | 0}} or {{#if: {{{SecondaryMagazineSize|}}} | 1 | 0}} or {{#if: {{{SecondaryAmmoCapacity|}}} | 1 | 0}} or {{#if: {{{SecondaryAmmoImage|}}} | 1 | 0}} or {{#if: {{{SecondaryAmmoCost|}}} | 1 | 0}} or {{#if: {{{SecondaryAmmoPricing|}}} | 1 | 0}} || style="display: none;"}} | ||
| colspan="4" style="height: 12px;" | | | colspan="4" style="height: 12px;" | | ||
|- {{#if: {{{InitialSpareMags|}}} | style="height: 20px" | style="display: none;"}} | |- {{#if: {{{InitialSpareMags|}}} | style="height: 20px" | style="display: none;"}} | ||
| colspan="2" style="padding-left: 12px; white-space: nowrap;" | '''Starting Ammo''' | | colspan="2" style="padding-left: 12px; white-space: nowrap;" | '''Starting Ammo''' | ||
| colspan="2" style="padding-right: 12px; text-align: right;" | {{{MagazineSize}}} {{#ifeq: {{{InitialSpareMags}}} | 0 || + {{#expr: {{{InitialSpareMags}}} * {{{MagazineSize}}}}}}} [[File:KF2_Ammo_Gray.png|baseline|10px|link=]] | | colspan="2" style="padding-right: 12px; text-align: right;" | {{{MagazineSize}}} {{#ifeq: {{{InitialSpareMags}}} | 0 || + {{#expr: {{{InitialSpareMags}}} * {{{MagazineSize}}}}}}} [[File:KF2_Ammo_Gray.png|baseline|10px|link=]] | ||
|- {{#if: {{{ | |- {{#if: {{{AmmoPricing|}}} | style="height: 20px" | style="display: none;"}} | ||
| colspan="2" style="padding-left: 12px; white-space: nowrap;" | '''Ammo | | colspan="2" style="padding-left: 12px; white-space: nowrap;" | '''Ammo Pricing''' | ||
| colspan="2" style="padding-right: 12px; text-align: right;" | [[File:KF2_Dosh_Gray.png|baseline|10px|link=]] {{{ | | colspan="2" style="padding-right: 12px; text-align: right;" | [[File:KF2_Dosh_Gray.png|baseline|10px|link=]] {{{AmmoPricing}}} | ||
|- {{#if: {{{Block|}}} | style="height: 20px" | style="display: none;"}} | |- {{#if: {{{Block|}}} | style="height: 20px" | style="display: none;"}} | ||
| colspan="2" style="padding-left: 12px; white-space: nowrap;" | '''Block''' <small>( | | colspan="2" style="padding-left: 12px; white-space: nowrap;" | '''Block''' <small>(damage multiplier)</small> | ||
| colspan="2" style="padding-right: 12px; text-align: right;" | ×{{#expr: {{{Block}}} round 1}} | | colspan="2" style="padding-right: 12px; text-align: right;" | ×{{#expr: {{{Block}}} round 1}} | ||
|- {{#if: {{{Parry|}}} | style="height: 20px" | style="display: none;"}} | |- {{#if: {{{Parry|}}} | style="height: 20px" | style="display: none;"}} | ||
| colspan="2" style="padding-left: 12px; white-space: nowrap;" | '''Parry''' <small>( | | colspan="2" style="padding-left: 12px; white-space: nowrap;" | '''Parry''' <small>(damage multiplier)</small> | ||
| colspan="2" style="padding-right: 12px; text-align: right;" | ×{{#expr: {{{Parry}}} round 1}} | | colspan="2" style="padding-right: 12px; text-align: right;" | ×{{#expr: {{{Parry}}} round 1}} | ||
|- {{#if: {{{HealAmount|}}} | style="height: 20px" | style="display: none;"}} | |- {{#if: {{{HealAmount|}}} | style="height: 20px" | style="display: none;"}} | ||
| colspan="2" style="padding-left: 12px; white-space: nowrap;" | '''Heal Amount''' {{#if: {{{HealAmountSolo|}}} | <small>( | | colspan="2" style="padding-left: 12px; white-space: nowrap;" | '''Heal Amount''' {{#if: {{{HealAmountSolo|}}} | <small>(coop)</small> |}} | ||
| colspan="2" style="padding-right: 12px; text-align: right;" | {{#expr: {{{HealAmount}}} round 0}} | | colspan="2" style="padding-right: 12px; text-align: right;" | {{#expr: {{{HealAmount}}} round 0}} | ||
|- {{#if: {{{HealAmountSolo|}}} | style="height: 20px" | style="display: none;"}} | |- {{#if: {{{HealAmountSolo|}}} | style="height: 20px" | style="display: none;"}} | ||
| colspan="2" style="padding-left: 12px; white-space: nowrap;" | '''Heal Amount''' <small>( | | colspan="2" style="padding-left: 12px; white-space: nowrap;" | '''Heal Amount''' <small>(solo)</small> | ||
| colspan="2" style="padding-right: 12px; text-align: right;" | {{#expr: {{{HealAmountSolo}}} round 0}} | | colspan="2" style="padding-right: 12px; text-align: right;" | {{#expr: {{{HealAmountSolo}}} round 0}} | ||
|- {{#if: {{{HealRecharge|}}} | style="height: 20px" | style="display: none;"}} | |- {{#if: {{{HealRecharge|}}} | style="height: 20px" | style="display: none;"}} | ||
| colspan="2" style="padding-left: 12px; white-space: nowrap;" | '''Heal Recharge Time''' {{#if: {{{HealRechargeSolo|}}} | <small>( | | colspan="2" style="padding-left: 12px; white-space: nowrap;" | '''Heal Recharge Time''' {{#if: {{{HealRechargeSolo|}}} | <small>(coop)</small> |}} | ||
| colspan="2" style="padding-right: 12px; text-align: right;" | {{#expr: {{{HealRecharge}}} round 1}}s | | colspan="2" style="padding-right: 12px; text-align: right;" | {{#expr: {{{HealRecharge}}} round 1}}s | ||
|- {{#if: {{{HealRechargeSolo|}}} | style="height: 20px" | style="display: none;"}} | |- {{#if: {{{HealRechargeSolo|}}} | style="height: 20px" | style="display: none;"}} | ||
| colspan="2" style="padding-left: 12px; white-space: nowrap;" | '''Heal Recharge Time''' <small>( | | colspan="2" style="padding-left: 12px; white-space: nowrap;" | '''Heal Recharge Time''' <small>(solo)</small> | ||
| colspan="2" style="padding-right: 12px; text-align: right;" | {{#expr: {{{HealRechargeSolo}}} round 1}}s | | colspan="2" style="padding-right: 12px; text-align: right;" | {{#expr: {{{HealRechargeSolo}}} round 1}}s | ||
|- {{#if: {{{WeaponType|}}} | style="height: 20px" | style="display: none;"}} | |- {{#if: {{{WeaponType|}}} | style="height: 20px" | style="display: none;"}} | ||
| colspan="2" style="padding-left: 12px; white-space: nowrap;" | '''Weapon Type''' | | colspan="2" style="padding-left: 12px; white-space: nowrap;" | '''Weapon Type''' | ||
| colspan="2" style="padding-right: 12px; text-align: right;" | {{{WeaponType}}} | | colspan="2" style="padding-right: 12px; text-align: right;" | {{{WeaponType}}} | ||
|- {{#ifexpr: ({{#if: {{{InitialSpareMags|}}} | 1 | 0}} or {{#if: {{{ | |- {{#ifexpr: ({{#if: {{{InitialSpareMags|}}} | 1 | 0}} or {{#if: {{{AmmoPricing|}}} | 1 | 0}} or {{#if: {{{Block|}}} | 1 | 0}} or {{#if: {{{Parry|}}} | 1 | 0}} or {{#if: {{{HealAmount|}}} | 1 | 0}} or {{#if: {{{HealAmountSolo|}}} | 1 | 0}} or {{#if: {{{HealRecharge|}}} | 1 | 0}} or {{#if: {{{HealRechargeSolo|}}} | 1 | 0}} or {{#if: {{{WeaponType|}}} | 1 | 0}}) and ({{#if: {{{SecondaryMagazineSize|}}} | 1 | 0}} or {{#if: {{{SecondaryAmmoCapacity|}}} | 1 | 0}} or {{#if: {{{SecondaryAmmoImage|}}} | 1 | 0}} or {{#if: {{{SecondaryAmmoCost|}}} | 1 | 0}} or {{#if: {{{SecondaryAmmoPricing|}}} | 1 | 0}}) || style="display: none;"}} | ||
| colspan="4" style="height: 6px;" | | | colspan="4" style="height: 6px;" | | ||
|- {{#ifexpr: {{#if: {{{SecondaryMagazineSize|}}} | 1 | 0}} or {{#if: {{{SecondaryAmmoCapacity|}}} | 1 | 0}} or {{#if: {{{SecondaryAmmoImage|}}} | 1 | 0}} or {{#if: {{{SecondaryAmmoCost|}}} | 1 | 0}} or {{#if: {{{SecondaryAmmoPricing|}}} | 1 | 0}} || style="display: none;"}} | |||
| colspan="4" style="padding: 0 12px;" | <small>Secondary Ammo</small> | |||
|- {{#if: {{{SecondaryMagazineSize|}}} | style="height: 20px" | style="display: none;"}} | |- {{#if: {{{SecondaryMagazineSize|}}} | style="height: 20px" | style="display: none;"}} | ||
| colspan="2" style="padding-left: 12px; white-space: nowrap;" | '''Magazine Size''' | | colspan="2" style="padding-left: 12px; white-space: nowrap;" | '''Magazine Size''' | ||
| colspan="2" style="padding-right: 12px; text-align: right;" | {{{SecondaryMagazineSize}}} [[File:{{{SecondaryAmmoImage}}}|baseline|10px|link=]] | | colspan="2" style="padding-right: 12px; text-align: right;" | {{{SecondaryMagazineSize}}} [[File:{{{SecondaryAmmoImage}}}|baseline|10px|link=]] | ||
|- {{#if: {{{SecondaryAmmoCapacity|}}} | style="height: 20px" | style="display: none;"}} | |- {{#if: {{{SecondaryAmmoCapacity|}}} | style="height: 20px" | style="display: none;"}} | ||
| colspan="2" style="padding-left: 12px; white-space: nowrap;" | '''Ammo Capacity''' | | colspan="2" style="padding-left: 12px; white-space: nowrap;" | '''Ammo Capacity''' | ||
| colspan="2" style="padding-right: 12px; text-align: right;" | {{{SecondaryAmmoCapacity}}} [[File:{{{SecondaryAmmoImage}}}|baseline|10px|link=]] | | colspan="2" style="padding-right: 12px; text-align: right;" | {{{SecondaryAmmoCapacity}}} [[File:{{{SecondaryAmmoImage}}}|baseline|10px|link=]] | ||
|- {{#ifexpr: {{#if: {{{SecondaryMagazineSize|}}} | 1 | 0}} and {{#if: {{{SecondaryAmmoCapacity|}}} | 1 | 0}} | style="height: 20px" | style="display: none;"}} | |- {{#ifexpr: {{#if: {{{SecondaryMagazineSize|}}} | 1 | 0}} and {{#if: {{{SecondaryAmmoCapacity|}}} | 1 | 0}} | style="height: 20px" | style="display: none;"}} | ||
| colspan="2" style="padding-left: 12px; white-space: nowrap;" | '''Starting Ammo''' | | colspan="2" style="padding-left: 12px; white-space: nowrap;" | '''Starting Ammo''' | ||
| colspan="2" style="padding-right: 12px; text-align: right;" | {{#expr: {{{SecondaryMagazineSize}}} + {{{SecondaryAmmoCapacity}}}}} [[File:{{{SecondaryAmmoImage}}}|baseline|10px|link=]] | | colspan="2" style="padding-right: 12px; text-align: right;" | {{#expr: {{{SecondaryMagazineSize}}} + {{{SecondaryAmmoCapacity}}}}} [[File:{{{SecondaryAmmoImage}}}|baseline|10px|link=]] | ||
|- {{#if: {{{SecondaryAmmoCost|}}} | style="height: 20px" | style="display: none;"}} | |- {{#if: {{{SecondaryAmmoCost|}}} | style="height: 20px" | style="display: none;"}} | ||
| colspan="2" style="padding-left: 12px; white-space: nowrap;" | '''Ammo Cost''' <small>( | | colspan="2" style="padding-left: 12px; white-space: nowrap;" | '''Ammo Cost''' <small>(per use)</small> | ||
| colspan="2" style="padding-right: 12px; text-align: right;" | [[File:KF2_Dosh_Gray.png|baseline|10px|link=]] {{{ | | colspan="2" style="padding-right: 12px; text-align: right;" | {{#expr: {{{SecondaryAmmoCost}}} round 0}} [[File:{{{SecondaryAmmoImage}}}|baseline|10px|link=]] | ||
|- {{#ifexpr: {{#if: {{{InitialSpareMags|}}} | 1 | 0}} or {{#if: {{{ | |- {{#if: {{{SecondaryAmmoPricing|}}} | style="height: 20px" | style="display: none;"}} | ||
| colspan="2" style="padding-left: 12px; white-space: nowrap;" | '''Ammo Pricing''' | |||
| colspan="2" style="padding-right: 12px; text-align: right;" | [[File:KF2_Dosh_Gray.png|baseline|10px|link=]] {{{SecondaryAmmoPricing}}} | |||
|- {{#ifexpr: {{#if: {{{InitialSpareMags|}}} | 1 | 0}} or {{#if: {{{AmmoPricing|}}} | 1 | 0}} or {{#if: {{{Block|}}} | 1 | 0}} or {{#if: {{{Parry|}}} | 1 | 0}} or {{#if: {{{HealAmount|}}} | 1 | 0}} or {{#if: {{{HealAmountSolo|}}} | 1 | 0}} or {{#if: {{{HealRecharge|}}} | 1 | 0}} or {{#if: {{{HealRechargeSolo|}}} | 1 | 0}} or {{#if: {{{WeaponType|}}} | 1 | 0}} or {{#if: {{{SecondaryMagazineSize|}}} | 1 | 0}} or {{#if: {{{SecondaryAmmoCapacity|}}} | 1 | 0}} or {{#if: {{{SecondaryAmmoImage|}}} | 1 | 0}} or {{#if: {{{SecondaryAmmoCost|}}} | 1 | 0}} or {{#if: {{{SecondaryAmmoPricing|}}} | 1 | 0}} || style="display: none;"}} | |||
| colspan="4" style="height: 12px;" | | | colspan="4" style="height: 12px;" | | ||
|- {{#ifexpr: {{#if: {{{Achievement_0_Name|}}} | 1 | 0}} or {{#if: {{{Achievement_1_Name|}}} | 1 | 0}} or {{#if: {{{Achievement_2_Name|}}} | 1 | 0}} or {{#if: {{{Achievement_3_Name|}}} | 1 | 0}} or {{#if: {{{Achievement_4_Name|}}} | 1 | 0}} or {{#if: {{{Achievement_5_Name|}}} | 1 | 0}} or {{#if: {{{Achievement_6_Name|}}} | 1 | 0}} or {{#if: {{{Achievement_7_Name|}}} | 1 | 0}} or {{#if: {{{Achievement_8_Name|}}} | 1 | 0}} or {{#if: {{{Achievement_9_Name|}}} | 1 | 0}} | style="background: #202224; border-top: #bd0000 solid 5px; color: #ffffff; margin-top: 12px; text-align: center;" | style="display: none;"}} | |- {{#ifexpr: {{#if: {{{Achievement_0_Name|}}} | 1 | 0}} or {{#if: {{{Achievement_1_Name|}}} | 1 | 0}} or {{#if: {{{Achievement_2_Name|}}} | 1 | 0}} or {{#if: {{{Achievement_3_Name|}}} | 1 | 0}} or {{#if: {{{Achievement_4_Name|}}} | 1 | 0}} or {{#if: {{{Achievement_5_Name|}}} | 1 | 0}} or {{#if: {{{Achievement_6_Name|}}} | 1 | 0}} or {{#if: {{{Achievement_7_Name|}}} | 1 | 0}} or {{#if: {{{Achievement_8_Name|}}} | 1 | 0}} or {{#if: {{{Achievement_9_Name|}}} | 1 | 0}} | style="background: #202224; border-top: #bd0000 solid 5px; color: #ffffff; margin-top: 12px; text-align: center;" | style="display: none;"}} | ||
| Line 142: | Line 147: | ||
| | | | ||
| InitialSpareMags=7 | | InitialSpareMags=7 | ||
| | | AmmoPricing=8 | ||
| Block=1 | | Block=1 | ||
| Parry=1 | | Parry=1 | ||
| Line 154: | Line 159: | ||
| SecondaryAmmoCapacity=0 | | SecondaryAmmoCapacity=0 | ||
| SecondaryAmmoCost=0 | | SecondaryAmmoCost=0 | ||
| SecondaryAmmoPricing=0 | |||
| | | | ||
| Achievement_0_Image=KF2_Achievement_109.jpg | | Achievement_0_Image=KF2_Achievement_109.jpg | ||
| Line 196: | Line 202: | ||
| | | | ||
| InitialSpareMags=7 | | InitialSpareMags=7 | ||
| | | AmmoPricing=8 | ||
| Block=1 | | Block=1 | ||
| Parry=1 | | Parry=1 | ||
| Line 206: | Line 212: | ||
| SecondaryAmmoCapacity=0 | | SecondaryAmmoCapacity=0 | ||
| SecondaryAmmoCost=0 | | SecondaryAmmoCost=0 | ||
| SecondaryAmmoPricing=0 | |||
| | | | ||
| Achievement_0_Image=KF2_Achievement_109.jpg | | Achievement_0_Image=KF2_Achievement_109.jpg | ||
| Line 334: | Line 341: | ||
| | | | ||
|- | |- | ||
| style="vertical-align: top;" | ''' | | style="vertical-align: top;" | '''AmmoPricing''' | ||
| style="width: 12px;" | | | style="width: 12px;" | | ||
| style="vertical-align: top;" | How much one magazine costs | | style="vertical-align: top;" | How much one magazine costs | ||
Revision as of 00:31, 29 July 2016
| Killing Floor 2 item | |||
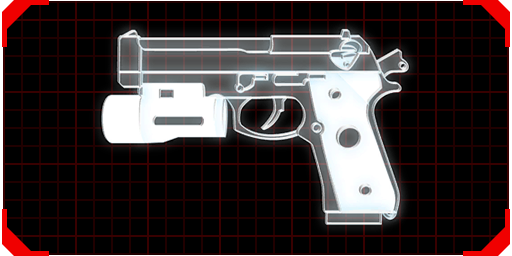
| 9mm Pistol | |||

| |||
| Damage | 15 | ||
| Fire Rate | 343 | ||
| Accuracy | 50 | ||
| Penetration | 0 | ||
| Magazine Size | 15 | ||
| Ammo Capacity | 225 | ||
| • Fire mode is semi-auto only. • This is the standard 9mm pistol. Simple and cheap (very cheap, frankly, to you), it is the basic sidearm for all Horzine operatives. | |||
| General Information | |||
| Perk | All | ||
| Pricing | |||
| Weight | |||
| Weapon Information | |||
| Starting Ammo | 15 + 105 | ||
| Ammo Pricing | |||
| Block (damage multiplier) | ×1 | ||
| Parry (damage multiplier) | ×1 | ||
| Heal Amount (coop) | 0 | ||
| Heal Amount (solo) | 0 | ||
| Heal Recharge Time (coop) | 0s | ||
| Heal Recharge Time (solo) | 0s | ||
| Weapon Type | Pistol | ||
| Secondary Ammo | |||
| Magazine Size | 0 | ||
| Ammo Capacity | 0 | ||
| Starting Ammo | 0 | ||
| Ammo Cost (per use) | 0 | ||
| Ammo Pricing | |||
| Related Achievements | |||
Syntax
{{KF2WeaponInfo
| Name=9mm Pistol
| PerkImage=KF2_No_Perk_White.png
| WeaponImage=KF29mm Pistol.png
| Damage=15.000000
| FireRate=342.857147
| Accuracy=50.000000
| Penetration=0.000000
| MagazineSize=15
| AmmoCapacity=225
| Description=• Fire mode is semi-auto only.<br />• This is the standard 9mm pistol. [...]
|
| PerkLink=Perks (Killing Floor 2)
| PerkName=All
| Pricing=0
| Weight=0
|
| InitialSpareMags=7
| AmmoPricing=8
| Block=1
| Parry=1
| HealAmount=0
| HealRecharge=0
| WeaponType=Pistol
| SecondaryAmmoImage=KF2_SecondaryAmmo_GasTank_Gray.png
| SecondaryMagazineSize=0
| SecondaryAmmoCapacity=0
| SecondaryAmmoCost=0
| SecondaryAmmoPricing=0
|
| Achievement_0_Image=KF2_Achievement_109.jpg
| Achievement_0_Name=School's Out Forever
| Achievement_1_Image=
| Achievement_1_Name=
| Achievement_2_Image=
| Achievement_2_Name=
| Achievement_3_Image=
| Achievement_3_Name=
| Achievement_4_Image=
| Achievement_4_Name=
| Achievement_5_Image=
| Achievement_5_Name=
| Achievement_6_Image=
| Achievement_6_Name=
| Achievement_7_Image=
| Achievement_7_Name=
| Achievement_8_Image=
| Achievement_8_Name=
| Achievement_9_Image=
| Achievement_9_Name=
}}
Explanation
| Name | Name of the weapon | Example: | 9mm Pistol | ||
| PerkImage | Name of the image of the corresponding perk | Example: | KF2_No_Perk_White.png | ||
| WeaponImage | Name of the image of the corresponding weapon | Example: | KF29mm Pistol.png | ||
| Damage | Damage value of the weapon | Example: | 15.000000 | ||
| FireRate | Fire Rate value of the weapon | Example: | 342.857147 | ||
| Accuracy | Accuracy value of the weapon | Example: | 50.000000 | ||
| Penetration | Penetration value of the weapon | Example: | 0.000000 | ||
| MagazineSize | Magazine capacity | Example: | 15 | ||
| AmmoCapacity | Maximum spare ammo | Example: | 225 | ||
| Description | Trader descripton of the weapon | Example: | • Fire mode is semi-auto only. • This is the standard 9mm pistol. Simple and cheap (very cheap, frankly, to you), it is the basic sidearm for all Horzine operatives. | ||
| PerkLink | Name of the page of the corresponding perk | Example: | Perks (Killing Floor 2) | ||
| PerkName | Name of the corresponding perk | Example: | All | ||
| Pricing | How much the weapon costs at the trader | Example: | 0 | ||
| Weight | How much the weapon weights | Example: | 0 | ||
| AmmoPricing | How much one magazine costs | Example: | 8 |