Fleshpound (Killing Floor 2)

The Fleshpound is a giant specimen in Killing Floor 2. It is classifed as a large enemy, and is considered to be of extremely high threat. The Fleshpound appears as an extremely muscular and tall figure with many metal plates on it. Most notably, they have a glowing core on their chest, which indicates their level of aggression and pumps adrenaline. The Fleshpound also possess 2 large grinders attached to its arms, which it has weaponized to devastating effect. The Fleshpound is quick to anger and will swiftly charge into the fray if it cannot get into range to attack; it will only calm down after dishing out pain. The Fleshpound is also able to speak with a distorted voice in a robotic manner. It is by far the most durable specimen on the roster.
Base Statistics
| Normal | Hard | Suicidal | Hell on earth | |
|---|---|---|---|---|
| Kill Reward | 200 | 200 | 200 | 200 |
| XP | 35 | 47 | 63 | 72 |
| Base Health (body) | 1125 | 1500 | 1650 | 1800 |
| Base Health (head) | 487 | 650 | 682 | 715 |
For kill reward calculations read Dosh Mechanics.
Fleshpounds have their base health value scaled accordingly to the number of players in the game.
| Normal | Hard | Suicidal | Hell on earth | |
|---|---|---|---|---|
| Body / Head (1 Player) | 1125 / 487 | 1500/ 650 | 1650 / 682 | 1800 / 715 |
| Body / Head (2 Player) | 1563 / 623 | 2085 / 832 | 2293 / 872 | 2502 / 915 |
| Body / Head (3 Player) | 2002 / 759 | 2670 / 1014 | 2937 / 1063 | 3204 / 1115 |
| Body / Head (4 Player) | 2441 / 896 | 3355 / 1196 | 3580 / 1254 | 3906 / 1315 |
| Body / Head (5 Player) | 2880 / 1032 | 3840 / 1378 | 4224 / 1445 | 4608 / 1515 |
| Body / Head (6 Player) | 3318 / 1168 | 4425 / 1560 | 4867 / 1636 | 5310 / 1716 |
Attacks

The base damage value further modified by the difficulty-specific multipliers.
XP Notes
- Killing with weapons other than your current perk grants the XP to the perk that weapons belongs to.
- Damaging with on-perk weapons and then finishing it off with an off-perk weapon divides the XP and grants it to both perks.
- Assist kills grants full XP.
Speed
Fleshpounds move slowly when docile, and sprint when enraged. Fleshpounds have specific conditions that have to be met before they enrage:
- After a Fleshpound has a player in his line of sight for 10-14 seconds; Getting hit by a Fleshpound while it is docile will NOT reset this timer.
- After a Fleshpound has taken 276 points of damage.
Once enraged, Fleshpounds will not stop raging until they successfully land an attack on a player, or 30 seconds after they have lost sight of players.
Movement speed is randomized within ± 10% range and further modified by a multiplier based on difficulty. This value is 0.87 on Normal and 1.05 on Hell On Earth.
| Normal | Hard | Suicidal | Hell on earth | |
|---|---|---|---|---|
| Speed (walking) | 204 - 249 | 234 - 286 | 234 - 286 | 246 - 300 |
| Speed (sprinting) | 470 - 574 | 540 - 660 | 540 - 660 | 567 - 693 |
| Chance to Sprint on Sight | 100% | 100% | 100% | 100% |
| Chance to Sprint when Shot | 100% | 100% | 100% | 100% |
For comparison, by default a healthy player character with the minimal weight walks at speed of 383 units/s, and sprints at speed of 460 units/s.
Resistances and Weaknesses

Damage Resistance
Fleshpounds boast an impressive array of resistances, and are only weak to Explosive damage.
| Piercing | Slashing | Bludgeon | Toxic | Fire | Microwave | Explosives | Freeze | Shells | |
|---|---|---|---|---|---|---|---|---|---|
| Damage Multipler | x0.75 | x0.5 | x0.6 | x0.25 | x0.3 | x1 | x1.5 | x1 | x1 |
Ballistic Resistance
Fleshpounds are resistant to every type of ballistic weaponry, though more vulnerable to some.
| Sub-machine Gun | Assault Rifle | Shotgun | Handgun | Rifle | |
|---|---|---|---|---|---|
| Damage Multiplier | x0.5 | x0.5 | x0.75 | x0.75 | x0.75 |
Hitzones
Fleshpounds have 2 weak spots, which are the head and the glowing plate on their chest. Their arm grinders deflect attacks.
When enraged, Fleshpounds uses their arm grinders as a shield, making it harder for the players to aim for their glowing chest plates. Consider aiming for their heads when they're running towards you, as firing at the arm grinders will deal only 20% of the weapon damage.
| Damage Multiplier | |
|---|---|
| Head | x1.1 |
| Chest Plate | x1.1 |
| Arm Grinders | x0.2 |
| All other | x1 |
Incapacitation Resistance

Miscellaneous Information
Affliction handling:

- Fleshpound cannot teleport nor get frustrated.
- (PvP) Rally boost: players do x1.2 more damage.
- Damage to doors = 120 / 160 / 200 / 680.
- ZED mass = 200.
- Should sprint when enraged.
- Fleshpound cannot evade a grenades once enraged.
- Rage begins when Fleshpound takes 276 points of accumulative damage.
- Chance to spawn already enraged: Normal - 0%, Hard - 0%, Suicidal - 25%, HOE - 33%.
- When enraged, Fleshpound takes only 25% of all incoming weapon powers towards its affliction threshold.
- Enraged Fleshpound will calm down as soon as it land a hit. LOS and hits performed during the Fleshpound's calm phase has no effect on the next rage starting time.
- Rage will end as soon as Fleshpound land a hit or 30 seconds will pass without seeing players. After 30 seconds without seeing players Fleshound will not be able to enrage. In that case to trigger its new frustration timer it will need to have players within its LOS. Note: After landing a hit the enraged Fleshpound will update its "last enemy seeing" timer and will immediately trigger a new frustration timer. To make sure that Fleshpound will not enrage anymore players should let it calm on its own.
- Enraged Fleshpound will attempt to play its taunt animation. Fleshpound can skip this animation completely if at the moment of enragement it will be doing melee attack or any other special move. In such case Fleshpound will be enraged without losing momentum.
- EMP effect (disrupt) prevents Fleshpound's pre-rage taunt and the rage itself.
- Fleshpound has a chance to block upon taking damage or when being aimed at. Fleshpound has a chance to evade certain damage sources. Fleshpound cannot block when enraged.
- Chance to block after taking damage: Normal - 0, Hard - 0.01, Suicidal - 0.2, HOE - 0.3. Health loss percentage to trigger block: all difficulties - 0.05. Block chains (max): Hard - 3, Suicidal - 4, HOE - 5. Block duration - 1.25s, cooldown - 6.5s.
- When blocking. Damage resistance: Melee attacks - x0.9, Gun attacks - x0.9. Affliction multiplier - x0.2 (ZED takes only 20% of all incoming powers). Solo game block chance multiplier: Hard - x0.1, Suicidal, HOE - x0.2.
Behavior
The Fleshpound is the largest ZED in the game, boasting incredible durability. While its damage output is not as high as the Scrake's, the Fleshpound is more likely to cause significant damage due to its large health pool and resistances.
Upon spawning, Fleshpounds emit a global roar that can be heard by all players regardless of their position.
Fleshpounds walk at a moderate pace towards where the team is, until a player enters their line of sight.
Upon sighting a player, a hidden frustration timer begins counting down; This timer is random between 10 to 14 seconds. Breaking line of sight does not stop the timer.
When the timer hits 0, Fleshpounds will enrage. This is indicated by their chest plates turning red and them playing a raging animation, where they pound the floor.
Fleshpounds will also enrage when they have taken 276 points of damage.
Either way, upon enraging, the Fleshpounds' frustration timer resets, and doesn't stop counting down again until the Fleshpound's raging state ends.
When enraged, Fleshpounds will begin to sprint at high speed at players. They have enough speed to outrun most players. While sprinting, Fleshpounds will cover their chest plate and part of their heads with their arm grinders, protecting their weak spots as they charge.
Fleshpounds deal considerably more damage while they are enraged, and they tend to attack multiple times in quick succession.
Incapacitating effects are only 25% effective on enraged Fleshpounds.
Fleshpounds will stop raging after they have landed an attack on a player. The frustration timer will begin counting down again as soon as the Fleshpound's attack animation finishes and its chest plate resets to a yellow glow.
Fleshpounds do not have a cooldown on their rage. They can enrage again immediately after calming down as long as they are continuously taking damage from players. Thus, if a player low on health is being beaten on by a raging Fleshpound, do NOT shoot at the Fleshpound as it will enrage again and kill the unfortunate player.
Fleshpounds also rarely miss their attacks, they have greater finesse and motor control than Scrakes. It is difficult to dodge Fleshpound attacks without movement speed bonuses.
Fleshpounds can block gunfire. When being aimed or shot at, Fleshpounds have a chance to move their arm grinders over their face. While blocking, they take 80% damage from all sources and incapacitating effects are only 20% effective. Fleshpounds cannot block when enraged.
On Suicidal and Hell On Earth, Fleshpounds do not gain any new abilities or animations.
Extermination Tactics
Fleshpounds are extremely durable ZEDs that should not be engaged alone unless you are properly equipped to exterminate it in a short time span, to ensure that it does minimal damage. While Fleshpounds do not do as much damage as Scrakes, they are a lot faster and more durable.
Fleshpounds function as moving glaciers that break apart holdouts and force inexperienced or unequipped teams to flee.
Fleshpounds should be treated as the highest threat targets whenever they show up. While Scrakes do not enrage until shot at, Fleshpounds are a lot quicker to anger and can do so off a timer, making it impossible to ignore this threat for any extended period of time.
Fleshpounds boast an incredible amount of effective health and usually require a coordinated team take-down effort, or a perk specialized for killing Fleshpounds (i.e Gunslinger, Sharpshooter, Demolitionist.
As with Scrakes, quick decapitation kills are the preferred method of extermination. This can either be done alone or with the help of your teammates.
It is also important to note that the playstyle that you should go for will change based on the composition of your team. If your team is a headshot focused team (For example: Sharpshooter, Commando, Support, Gunslinger, Medic, Eviscerator Berserker), it is preferred to exterminate Fleshpounds via decapitation. If your team is a body damage focused team (For example: Firebug, Support, Demolitionist, 2 Melee Berserkers, Medic), then extermination through sheer body damage is a viable tactic as well.
Gunslinger
Gunslingers can swiftly decapitate Fleshpounds with repeated headshots using Dual .500 Magnums or Dual .50 Desert Eagles. This is especially true with a Gunslinger that has the Rack'em Up skill, which massively increases headshot damage.
In fact, Gunslingers who have memorized where the Fleshpound's head will be during its raging animation are able to take off the Fleshpound's head before they can finish their raging animation. A level 20 or above Gunslinger with Rack'em Up can do enough damage with 10 Dual .500 Magnums shots to decapitate it.
Alternatively, if the player is less confident in tracking its head, one can begin shooting at its head with either the Dual .500 Magnums or Dual .50 Desert Eagles until it lowers its head to pound the floor during its rage animation, then switching to the other pair of Handguns to finish it off as it sprints towards you. You may take a hit while doing this, so use the melee bash (V) to flinch them as soon as they hit you. Back off and put some distance between you and the Fleshpound before you begin shooting again.
Sharpshooter
While Sharpshooters have a very powerful tool in the form of the Rail Gun, it is trickier to take out Fleshpounds than Scrakes. Even with all the possible damage boosting skills a level 25 Sharpshooter can have, it usually takes 2 shots to decapitate a Fleshpound, one of which must be a manual shot, to avoid the 50% damage penalty for using lock-on mode.
Using the Rail Gun, land the first shot on the Fleshpound's head as it is walking, which will stumble it and cause it to rage. When it finishes its rage animation, land the second shot as they are sprinting towards you. If the player is a lower level Sharpshooter (below 15), you need both shots to be manual shots. For a higher level Sharpshooter, the player can switch to lock-on mode for the second killing shot.
The Sharpshooter also has the option of using the M14 EBR and the Crossbow combo to kill Fleshpounds, but this is a lot trickier than Scrake takedowns as the Fleshpound's head can take nearly double the amount of damage Scrakes can.
As with the Gunslinger, if opting for the M14 EBR, a player that has memorized the Fleshpound's raging animation can track its head and repeatedly unload damage on its head. It is very possible to decapitate the Fleshpound just as it finishes its raging animation.
Alternatively, for Sharpshooters less confident with head tracking, shoot at its head with the M14 EBR while it is calm and stack Rack'Em up to maximum, then switch to the Crossbow for the finishing blow.
The easiest way to take down a Fleshpound with the M14 EBR is to toss 2 Freeze Grenades at it, freezing it in place long enough for a Sharpshooter to put 20 rounds into the Fleshpound's head, which is more than enough to decapitate it.
Demolitionist
Demolitionists are practically designated as the game's Fleshpound exterminator, as the Fleshpound has an extreme vulnerability to explosive damage.
In most multi-player games and difficulties, 3 direct hits with the RPG-7 does enough damage to kill a Fleshpound outright through sheer body damage. This is in the case of a Demolitionist who uses all the skills on the left side of their skill tree for maximum damage potential.
For a Demolitionist that uses crowd control and incapacitation skills, repeated shots with the RPG-7 will knock Fleshpounds down or send them flying a distance to give the team more time to deal damage to the Fleshpound.
With crowd control and incapacitation skills, the Demolitionist's 1/2 Stick of Dynamite will have enough stunning power to stun Fleshpounds. One can toss dynamite directly at a Fleshpound to stun it for easy shots with the RPG-7, or to run up to the stunned Fleshpound and stick multiple C4 Explosives charges to it. Alternatively, one can pre-plant C4 on the ground in the path where a Fleshpound would sprint over once enraged, detonating it after the first two shots with the RPG-7 as it runs over the placed C4.
Of all the Demolitionist weapons, only 2 can deal a truly significant amount of damage to Fleshpounds, these being the RPG-7 and C4 Explosives. Every other Demolitionist weapon serves better as crowd control or for incapacitating effects.
Never shoot Fleshpounds with the M79 Grenade Launcher or M16 M203 Assault Rifle, as these will instantly enrage Fleshpounds and yet they don't do a big enough amount of damage compared to the aforementioned weapons.
If your team has a dedicated Sharpshooter or Gunslinger who has shown that he can take down Fleshpounds alone through decapitation, it is usually better to not interfere and allow them to finish the kill. Instead, protect them from the lesser enemies to ensure they can pull off a clean kill.
Berserker
Berserkers have two ways to deal with Fleshpounds: At range, with the Eviscerator, or in melee combat, with the Pulverizer.
If you choose the Eviscerator method, a maximum of 4 headshots are needed to cut off the Fleshpound's head. The Eviscerator does enough damage to enrage a Fleshpound with a single shot. Generally, the pattern here is landing one shot on the Fleshpound's head while it is calm, then landing another as it finishes its rage animation and begins sprinting towards the player, blocking/taking a hit, then repeating the cycle until the Fleshpound is decapitated.
Unlike with Scrakes, EMP cannot force an enraged Fleshpound to calm down unless 2 EMP grenades are used, which is horribly inefficient and not recommended.
Decapitation kills can be done quicker with the help of your teammates, especially those with incapacitation effects that stun the Fleshpound, making headshots easier. Work with your teammates to pile up damage on the Fleshpound's head for a coordinated take down.
If you choose the melee method, you will have to familiarize yourself with the blocking and parrying mechanics, as you'll need it to interrupt the Fleshpound's attacks and reduce the damage you take.
The Pulverizer does a decent amount of damage to the Fleshpound with its explosive attack - though the Pulverizer usually does not carry enough ammunition for you to solo kill every Fleshpound that spawns in a wave on higher difficulties. Generally, you want to assist the team by piling up the damage with the Pulverizer's explosive attack.
By contrast, the Zweihander does not deal enough damage to kill Fleshpounds in any reasonable amount of time, even via decapitation, as the Fleshpound takes greatly reduced slashing damage.
In a team environment, whether the ranged or melee method is preferred changes depending on the team composition. A team that focuses on headshot damage would benefit more from a ranged Berserker that uses the Eviscerator, while a body damage focused team would benefit from a melee Berserker that uses the Pulverizer. Alternatively, a Berserker usually has enough free weight to carry an off-perk RPG-7 to assist in body shot damage.
Berserkers can throw themselves in front of raging Fleshpounds to block them from catching up to their teammates, giving them time to back off and regroup.
Commando
Since the crossperk update and the subsequent update that buffed the M16 M203, Commandos are very effective in taking down even 6 player HoE Fleshpounds with repeated hits from the M203 grenade launcher. They are able to efficiently time the attacks from a long enough range to kill a raging Fleshpound before it makes contact with a player. When paired with the Commando's HE grenades, the Commando has 19 explosive shots that make it an excellent supporting perk to a demolitionist for taking down Fleshpounds. This extra firepower can be provided without wasting any of a Commando's trashkilling ammunition.
However, in multiplayer games, Commandos should not engage Fleshpounds with assault rifle bullets except to assist in an out-of-control takedown. Their assault rifles lack enough burst damage to kill them safely, and they do not have any sort of incapacitating power aside from a stumble, which usually does not work against raging Fleshpounds.
While the max level Commando can do enough damage to take off a Fleshpound's head within two clips of the SCAR-H Assault Rifle, this requires the player to not miss more than 5-8 shots on the Fleshpound's head. With the Hollow Point Rounds skill, it takes around 50 shots to take off a Fleshpound's head for a level 25 Commando.
Commandos are definitely able to take down Fleshpounds by themselves. However, even more so than Gunslingers and Sharpshooters, the Commando has to be able to track the Fleshpound's head during its raging animation in order to maximize the amount of damage one can do to its head.
A skilled Commando player is capable of taking off a Fleshpound's head with it enraging only once.
Commandos contribute better to a Fleshpound fight by continuing to take out the lesser ZEDs to allow the team's more specialized perks to focus on taking down Fleshpounds. If the team is a body damage focused team, Commandos can assist by throwing grenades, which deal decent explosive damage. In most cases, it is usually more efficient to use grenades over bullets.
The above is especially true for lower level Commandos who lack damage boosting skills, in which case the only effective form of damage they can contribute is through their grenades.
Remember to help the team by contributing headshot damage if the Fleshpound is incapacitated.
Medic
In a Fleshpound fight, the Medic's job is to heal the team and keep them alive; Especially the Berserker who is most likely in front of the team.
Remember to contribute headshot damage whenever possible, especially when the Fleshpound has been stunned by your teammates or EMP'd by the Berserker.
If a low HP teammate is being chased by a raging Fleshpound, you are able to stumble it by pumping lead into its legs. You can cancel the Fleshpound's attacks this way, which can give your teammate enough time to run away and heal up from your medic darts.
Support
Support Specialists are very capable of taking down Fleshpounds too. They are able to do efficiently through both body health or head health damage.
When going for body damage, wildly firing at it with the AA-12 Auto Shotgun or the M4 Combat Shotgun is enough in most cases, though in later waves this can prove problematic as the player will run out of ammunition quickly, even with the team contributing damage.
While Support Specialists can kite Scrakes effectively with the Double-barreled Boomstick, it is nearly impossible to do the same to Fleshpounds, who are a lot more accurate with their blows and rarely miss moving targets. One should only attempt this when the Fleshpound is close to death.
However the more ammo-efficient way to take down Fleshpounds is repeated headshots using the AA-12 Auto Shotgun. Like the other ballistic damage perks, Support Specialists who are able to track the Fleshpound's head during its raging animation can quickly decapitate it with a good aim. In fact, in order to do this, a Support Specialist is required to run up to the Fleshpound as it begins its raging animation (The Fleshpound cannot attack until it finishes its raging animation) to maximize the damage done.
It is entirely possible to decapitate the Fleshpound before it can finish its raging animation, though this is a lot more difficult to do so as compared to perks who specialize in taking down Fleshpounds. Most of the time the Fleshpound will be able to start attacking before it is decapitated.
Do not be afraid to run up to Fleshpound to shoot them in the head when they are incapacitated. Support Specialists deal the most damage when they are close to their targets, and stunned Fleshpounds are sitting ducks. Most of the time, with combined firepower from the team, the Fleshpound will be decapitated before the incapacitation effects end.
SWAT
SWATs have a very valuable tool for Fleshpound extermination in the form of their FlashBang grenades. These grenades will stun a non-raging Fleshpound on demand, allowing a quick coordinated team to decapitate the Fleshpound while it is stunned.
Raging Fleshpounds require about 2-3 Flashbangs to stun. It is usually not worth it to attempt to stun a raging Fleshpound.
High level SWATs with increased magazine capacity for their P90 SMG or Kriss SMG can take down Fleshpounds alone competently with the help of their Flashbangs; Simply toss a Flashbang at a Fleshpound and then spray at it's head. With good recoil control and at close enough range, you are able to deal massive damage to a Fleshpound's head before it can begin raging. Afterwards, a skilled SWAT can continue to track and spray at the Fleshpound's head as it begins its raging animation. The SWAT has a huge window to pile damage onto a Fleshpound's head by himself.
Firebug
The Firebug's role changes based on the team's composition. If the team is a body damage focused team, the Firebug can help in Fleshpound extermination with the Microwave Gun, which does good DPS to Fleshpounds.
If the team is a headshot damage focused team, the Firebug will contribute better by continuing to provide crowd control. Kill the lesser ZEDs and protect your team's more specialized perks to give them the breathing room they need to take down Fleshpounds.
Try not to set Fleshpounds on fire as they are highly resistant to fire. Secondly, when Fleshpounds start to panic from Fire, they will run around erratically with their heads swaying around randomly, making their heads extremely hard for your teammates to hit.
When fleeing from combat or running around corners, the Firebug can provide enough incapacitation effects to stop Fleshpounds from attacking or chasing the fleeing team for a few seconds by setting them on fire.
Gallery
-
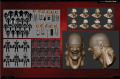
Artbook concept 1
-
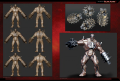
Artbook concept 2
-

Artbook renders


