Template:KF2PerkInfo: Difference between revisions
Jump to navigation
Jump to search
mNo edit summary |
(Optical improvement, changed how achievements are entered (supports now infinite amount of achievements - similar to custom and technical entries which were added too), code optimizations, added PS4 support) |
||
| Line 3: | Line 3: | ||
| colspan="6" style="padding: 0 0 2px;" | <small>''[[Killing Floor 2|<span style="color: #252525;">Killing Floor 2</span>]] perk''</small> | | colspan="6" style="padding: 0 0 2px;" | <small>''[[Killing Floor 2|<span style="color: #252525;">Killing Floor 2</span>]] perk''</small> | ||
|- style="background: #ffffff; color: #ffffff; text-align: center;" | |- style="background: #ffffff; color: #ffffff; text-align: center;" | ||
| colspan="6" style="padding: 0; background: linear-gradient(transparent 50%, #202224 50%), linear-gradient(135deg, transparent 5px, #bd0000 0, #bd0000 60%, transparent 60%) top left, linear-gradient(225deg, transparent 5px, #bd0000 0, #bd0000 60%, transparent 60%) top right; vertical-align: top; position: relative; height: 43px; width: 100%;" | <div style="background: linear-gradient(135deg, transparent | | colspan="6" style="padding: 0; background: linear-gradient(transparent 50%, #202224 50%), linear-gradient(135deg, transparent 5px, #bd0000 0, #bd0000 60%, transparent 60%) top left, linear-gradient(225deg, transparent 5px, #bd0000 0, #bd0000 60%, transparent 60%) top right; vertical-align: top; position: relative; height: 43px; width: 100%;" | <div style="background: linear-gradient(135deg, transparent 6px, #202224 0, #202224 60%, transparent 60%) top left, linear-gradient(225deg, transparent 6px, #202224 0, #202224 60%, transparent 60%) top right; display: table; padding: 0; position: relative; left: 0; top: 5px; height: 30px; width: 350px;"><div style="display: table-cell; vertical-align: middle;">'''{{{PerkName}}}'''</div></div><div style="background: linear-gradient(135deg, transparent 6px, #000000 0, #000000 60%, transparent 60%) top left, linear-gradient(225deg, transparent 6px, #000000 0, #000000 60%, transparent 60%) top right; height: 8px; left: 0; position: absolute; top: 35px; width: 100%;"></div> | ||
|- style="text-align: center;" | |- style="text-align: center;" | ||
| colspan="6" style="padding: 0 111px 12px;" | [[File:{{{PerkImage}}}|128px]] | | colspan="6" style="padding: 0 111px 12px;" | [[File:{{{PerkImage}}}|128px]] | ||
|- style="height: | |- style="height: 8px;" | ||
|- {{#ifexpr: {{#if: {{{XPObjective_0|}}} | |- {{#ifexpr: {{#if: {{{XPObjective_0|}}}{{{XPObjective_1|}}} | 1 | 0}} or ({{#if: {{{StartingLoadout_Weapon_Link|}}} | 1 | 0}} and {{#if: {{{StartingLoadout_Weapon_Name|}}} | 1 | 0}} and {{#if: {{{StartingLoadout_Weapon_Image|}}} | 1 | 0}} and {{#if: {{{StartingLoadout_Pistol_Link|}}} | 1 | 0}} and {{#if: {{{StartingLoadout_Pistol_Name|}}} | 1 | 0}} and {{#if: {{{StartingLoadout_Pistol_Image|}}} | 1 | 0}} and {{#if: {{{StartingLoadout_Knife_Link|}}} | 1 | 0}} and {{#if: {{{StartingLoadout_Knife_Name|}}} | 1 | 0}} and {{#if: {{{StartingLoadout_Knife_Image|}}} | 1 | 0}} and {{#if: {{{StartingLoadout_Grenade_Link|}}} | 1 | 0}} and {{#if: {{{StartingLoadout_Grenade_Name|}}} | 1 | 0}} and {{#if: {{{StartingLoadout_Grenade_Image|}}} | 1 | 0}}) | style="background: #000000; color: #ffffff; text-align: center;" | style="display: none;"}} | ||
| colspan="6" style="padding: 0; background: linear-gradient(transparent 50%, #202224 50%), linear-gradient(135deg, transparent 5px, #bd0000 0, #bd0000 60%, transparent 60%) top left, linear-gradient(225deg, transparent 5px, #bd0000 0, #bd0000 60%, transparent 60%) top right; vertical-align: top; position: relative; top: 2px; height: 43px; width: 100%;" | <div style="background: linear-gradient(135deg, transparent | | colspan="6" style="padding: 0; background: linear-gradient(transparent 50%, #202224 50%), linear-gradient(135deg, transparent 5px, #bd0000 0, #bd0000 60%, transparent 60%) top left, linear-gradient(225deg, transparent 5px, #bd0000 0, #bd0000 60%, transparent 60%) top right; vertical-align: top; position: relative; top: 2px; height: 43px; width: 100%;" | <div style="background: linear-gradient(135deg, transparent 6px, #202224 0, #202224 60%, transparent 60%) top left, linear-gradient(225deg, transparent 6px, #202224 0, #202224 60%, transparent 60%) top right; display: table; padding: 0; position: relative; left: 0; top: 5px; height: 30px; width: 350px;"><div style="display: table-cell; vertical-align: middle;">'''General Information'''</div></div><div style="background: linear-gradient(135deg, transparent 6px, #000000 0, #000000 60%, transparent 60%) top left, linear-gradient(225deg, transparent 6px, #000000 0, #000000 60%, transparent 60%) top right; height: 8px; left: 0; position: absolute; top: 35px; width: 100%;"></div> | ||
|- | |- {{#if: {{{XPObjective_0|}}}{{{XPObjective_1|}}} | style="height: 20px;" | style="display: none;"}} | ||
| colspan="6" style="padding: 0 12px; text-align: center;" | <small>XP Objectives</small> | | colspan="6" style="padding: 0 12px; text-align: center;" | <small>XP Objectives</small> | ||
|- {{#if: {{{XPObjective_0|}}} | style="height: 20px;" | style="display: none;"}} | |- {{#if: {{{XPObjective_0|}}} | style="height: 20px;" | style="display: none;"}} | ||
| Line 15: | Line 15: | ||
|- {{#if: {{{XPObjective_1|}}} | style="height: 20px;" | style="display: none;"}} | |- {{#if: {{{XPObjective_1|}}} | style="height: 20px;" | style="display: none;"}} | ||
| colspan="6" style="padding: 0 12px;" | • {{{XPObjective_1}}} | | colspan="6" style="padding: 0 12px;" | • {{{XPObjective_1}}} | ||
|- {{#ifexpr: ({{#if: {{{XPObjective_0|}}} | 1 | 0}} or {{#if: {{{XPObjective_1|}}} | 1 | 0}}) and ({{#if: {{{StartingLoadout_Weapon_Link|}}} | 1 | 0}} and {{#if: {{{StartingLoadout_Weapon_Name|}}} | 1 | 0}} and {{#if: {{{StartingLoadout_Weapon_Image|}}} | 1 | 0}} and {{#if: {{{StartingLoadout_Pistol_Link|}}} | 1 | 0}} and {{#if: {{{StartingLoadout_Pistol_Name|}}} | 1 | 0}} and {{#if: {{{StartingLoadout_Pistol_Image|}}} | 1 | 0}} and {{#if: {{{StartingLoadout_Knife_Link|}}} | 1 | 0}} and {{#if: {{{StartingLoadout_Knife_Name|}}} | 1 | 0}} and {{#if: {{{StartingLoadout_Knife_Image|}}} | 1 | 0}} and {{#if: {{{StartingLoadout_Grenade_Link|}}} | 1 | 0}} and {{#if: {{{StartingLoadout_Grenade_Name|}}} | 1 | 0}} and {{#if: {{{StartingLoadout_Grenade_Image|}}} | 1 | 0}}) | style="height: | |- {{#ifexpr: ({{#if: {{{XPObjective_0|}}} | 1 | 0}} or {{#if: {{{XPObjective_1|}}} | 1 | 0}}) and ({{#if: {{{StartingLoadout_Weapon_Link|}}} | 1 | 0}} and {{#if: {{{StartingLoadout_Weapon_Name|}}} | 1 | 0}} and {{#if: {{{StartingLoadout_Weapon_Image|}}} | 1 | 0}} and {{#if: {{{StartingLoadout_Pistol_Link|}}} | 1 | 0}} and {{#if: {{{StartingLoadout_Pistol_Name|}}} | 1 | 0}} and {{#if: {{{StartingLoadout_Pistol_Image|}}} | 1 | 0}} and {{#if: {{{StartingLoadout_Knife_Link|}}} | 1 | 0}} and {{#if: {{{StartingLoadout_Knife_Name|}}} | 1 | 0}} and {{#if: {{{StartingLoadout_Knife_Image|}}} | 1 | 0}} and {{#if: {{{StartingLoadout_Grenade_Link|}}} | 1 | 0}} and {{#if: {{{StartingLoadout_Grenade_Name|}}} | 1 | 0}} and {{#if: {{{StartingLoadout_Grenade_Image|}}} | 1 | 0}}) | style="height: 8px;" | style="display: none;"}} | ||
| colspan="6" style="padding: 0; height: | | colspan="6" style="padding: 0; height: 8px;" | | ||
|- {{#ifexpr: {{#if: {{{StartingLoadout_Weapon_Link|}}} | 1 | 0}} and {{#if: {{{StartingLoadout_Weapon_Name|}}} | 1 | 0}} and {{#if: {{{StartingLoadout_Weapon_Image|}}} | 1 | 0}} and {{#if: {{{StartingLoadout_Pistol_Link|}}} | 1 | 0}} and {{#if: {{{StartingLoadout_Pistol_Name|}}} | 1 | 0}} and {{#if: {{{StartingLoadout_Pistol_Image|}}} | 1 | 0}} and {{#if: {{{StartingLoadout_Knife_Link|}}} | 1 | 0}} and {{#if: {{{StartingLoadout_Knife_Name|}}} | 1 | 0}} and {{#if: {{{StartingLoadout_Knife_Image|}}} | 1 | 0}} and {{#if: {{{StartingLoadout_Grenade_Link|}}} | 1 | 0}} and {{#if: {{{StartingLoadout_Grenade_Name|}}} | 1 | 0}} and {{#if: {{{StartingLoadout_Grenade_Image|}}} | 1 | 0}} | style="height: 20px;" | style="display: none;"}} | |- {{#ifexpr: {{#if: {{{StartingLoadout_Weapon_Link|}}} | 1 | 0}} and {{#if: {{{StartingLoadout_Weapon_Name|}}} | 1 | 0}} and {{#if: {{{StartingLoadout_Weapon_Image|}}} | 1 | 0}} and {{#if: {{{StartingLoadout_Pistol_Link|}}} | 1 | 0}} and {{#if: {{{StartingLoadout_Pistol_Name|}}} | 1 | 0}} and {{#if: {{{StartingLoadout_Pistol_Image|}}} | 1 | 0}} and {{#if: {{{StartingLoadout_Knife_Link|}}} | 1 | 0}} and {{#if: {{{StartingLoadout_Knife_Name|}}} | 1 | 0}} and {{#if: {{{StartingLoadout_Knife_Image|}}} | 1 | 0}} and {{#if: {{{StartingLoadout_Grenade_Link|}}} | 1 | 0}} and {{#if: {{{StartingLoadout_Grenade_Name|}}} | 1 | 0}} and {{#if: {{{StartingLoadout_Grenade_Image|}}} | 1 | 0}} | style="height: 20px;" | style="display: none;"}} | ||
| colspan="6" style="padding: 0 12px; text-align: center;" | <small>Starting Loadout</small> | | colspan="6" style="padding: 0 12px; text-align: center;" | <small>Starting Loadout</small> | ||
| Line 25: | Line 25: | ||
| colspan="3" style="padding: 0 6px 0 12px;" | [[File:{{{StartingLoadout_Weapon_Image}}}|156px|link={{{StartingLoadout_Weapon_Link}}}]] | | colspan="3" style="padding: 0 6px 0 12px;" | [[File:{{{StartingLoadout_Weapon_Image}}}|156px|link={{{StartingLoadout_Weapon_Link}}}]] | ||
| colspan="3" style="padding: 0 12px 0 6px; text-align: right;" | [[File:{{{StartingLoadout_Pistol_Image}}}|156px|link={{{StartingLoadout_Pistol_Link}}}]] | | colspan="3" style="padding: 0 12px 0 6px; text-align: right;" | [[File:{{{StartingLoadout_Pistol_Image}}}|156px|link={{{StartingLoadout_Pistol_Link}}}]] | ||
|- {{#ifexpr: {{#if: {{{StartingLoadout_Weapon_Link|}}} | 1 | 0}} and {{#if: {{{StartingLoadout_Weapon_Name|}}} | 1 | 0}} and {{#if: {{{StartingLoadout_Weapon_Image|}}} | 1 | 0}} and {{#if: {{{StartingLoadout_Pistol_Link|}}} | 1 | 0}} and {{#if: {{{StartingLoadout_Pistol_Name|}}} | 1 | 0}} and {{#if: {{{StartingLoadout_Pistol_Image|}}} | 1 | 0}} and {{#if: {{{StartingLoadout_Knife_Link|}}} | 1 | 0}} and {{#if: {{{StartingLoadout_Knife_Name|}}} | 1 | 0}} and {{#if: {{{StartingLoadout_Knife_Image|}}} | 1 | 0}} and {{#if: {{{StartingLoadout_Grenade_Link|}}} | 1 | 0}} and {{#if: {{{StartingLoadout_Grenade_Name|}}} | 1 | 0}} and {{#if: {{{StartingLoadout_Grenade_Image|}}} | 1 | 0}} | style="height: | |- {{#ifexpr: {{#if: {{{StartingLoadout_Weapon_Link|}}} | 1 | 0}} and {{#if: {{{StartingLoadout_Weapon_Name|}}} | 1 | 0}} and {{#if: {{{StartingLoadout_Weapon_Image|}}} | 1 | 0}} and {{#if: {{{StartingLoadout_Pistol_Link|}}} | 1 | 0}} and {{#if: {{{StartingLoadout_Pistol_Name|}}} | 1 | 0}} and {{#if: {{{StartingLoadout_Pistol_Image|}}} | 1 | 0}} and {{#if: {{{StartingLoadout_Knife_Link|}}} | 1 | 0}} and {{#if: {{{StartingLoadout_Knife_Name|}}} | 1 | 0}} and {{#if: {{{StartingLoadout_Knife_Image|}}} | 1 | 0}} and {{#if: {{{StartingLoadout_Grenade_Link|}}} | 1 | 0}} and {{#if: {{{StartingLoadout_Grenade_Name|}}} | 1 | 0}} and {{#if: {{{StartingLoadout_Grenade_Image|}}} | 1 | 0}} | style="height: 8px;" | style="display: none;"}} | ||
| colspan="6" style="padding: 0; height: | | colspan="6" style="padding: 0; height: 8px;" | | ||
|- {{#ifexpr: {{#if: {{{StartingLoadout_Weapon_Link|}}} | 1 | 0}} and {{#if: {{{StartingLoadout_Weapon_Name|}}} | 1 | 0}} and {{#if: {{{StartingLoadout_Weapon_Image|}}} | 1 | 0}} and {{#if: {{{StartingLoadout_Pistol_Link|}}} | 1 | 0}} and {{#if: {{{StartingLoadout_Pistol_Name|}}} | 1 | 0}} and {{#if: {{{StartingLoadout_Pistol_Image|}}} | 1 | 0}} and {{#if: {{{StartingLoadout_Knife_Link|}}} | 1 | 0}} and {{#if: {{{StartingLoadout_Knife_Name|}}} | 1 | 0}} and {{#if: {{{StartingLoadout_Knife_Image|}}} | 1 | 0}} and {{#if: {{{StartingLoadout_Grenade_Link|}}} | 1 | 0}} and {{#if: {{{StartingLoadout_Grenade_Name|}}} | 1 | 0}} and {{#if: {{{StartingLoadout_Grenade_Image|}}} | 1 | 0}} | style="height: 20px; text-align: center;" | style="display: none;"}} | |- {{#ifexpr: {{#if: {{{StartingLoadout_Weapon_Link|}}} | 1 | 0}} and {{#if: {{{StartingLoadout_Weapon_Name|}}} | 1 | 0}} and {{#if: {{{StartingLoadout_Weapon_Image|}}} | 1 | 0}} and {{#if: {{{StartingLoadout_Pistol_Link|}}} | 1 | 0}} and {{#if: {{{StartingLoadout_Pistol_Name|}}} | 1 | 0}} and {{#if: {{{StartingLoadout_Pistol_Image|}}} | 1 | 0}} and {{#if: {{{StartingLoadout_Knife_Link|}}} | 1 | 0}} and {{#if: {{{StartingLoadout_Knife_Name|}}} | 1 | 0}} and {{#if: {{{StartingLoadout_Knife_Image|}}} | 1 | 0}} and {{#if: {{{StartingLoadout_Grenade_Link|}}} | 1 | 0}} and {{#if: {{{StartingLoadout_Grenade_Name|}}} | 1 | 0}} and {{#if: {{{StartingLoadout_Grenade_Image|}}} | 1 | 0}} | style="height: 20px; text-align: center;" | style="display: none;"}} | ||
| colspan="3" style="padding: 0 6px 0 12px;" | [[{{{StartingLoadout_Knife_Link}}}|<span style="color: #a6a7a9;">{{{StartingLoadout_Knife_Name}}}</span>]] | | colspan="3" style="padding: 0 6px 0 12px;" | [[{{{StartingLoadout_Knife_Link}}}|<span style="color: #a6a7a9;">{{{StartingLoadout_Knife_Name}}}</span>]] | ||
| Line 33: | Line 33: | ||
| colspan="3" style="padding: 0 6px 0 12px;" | [[File:{{{StartingLoadout_Knife_Image}}}|156px|link={{{StartingLoadout_Knife_Link}}}]] | | colspan="3" style="padding: 0 6px 0 12px;" | [[File:{{{StartingLoadout_Knife_Image}}}|156px|link={{{StartingLoadout_Knife_Link}}}]] | ||
| colspan="3" style="padding: 0 12px 0 6px; text-align: right;" | [[File:{{{StartingLoadout_Grenade_Image}}}|156px|link={{{StartingLoadout_Grenade_Link}}}]] | | colspan="3" style="padding: 0 12px 0 6px; text-align: right;" | [[File:{{{StartingLoadout_Grenade_Image}}}|156px|link={{{StartingLoadout_Grenade_Link}}}]] | ||
|- {{#ifexpr: {{#if: {{{StartingLoadout_Weapon_Link|}}} | 1 | 0}} and {{#if: {{{StartingLoadout_Weapon_Name|}}} | 1 | 0}} and {{#if: {{{StartingLoadout_Weapon_Image|}}} | 1 | 0}} and {{#if: {{{StartingLoadout_Pistol_Link|}}} | 1 | 0}} and {{#if: {{{StartingLoadout_Pistol_Name|}}} | 1 | 0}} and {{#if: {{{StartingLoadout_Pistol_Image|}}} | 1 | 0}} and {{#if: {{{StartingLoadout_Knife_Link|}}} | 1 | 0}} and {{#if: {{{StartingLoadout_Knife_Name|}}} | 1 | 0}} and {{#if: {{{StartingLoadout_Knife_Image|}}} | 1 | 0}} and {{#if: {{{StartingLoadout_Grenade_Link|}}} | 1 | 0}} and {{#if: {{{StartingLoadout_Grenade_Name|}}} | 1 | 0}} and {{#if: {{{StartingLoadout_Grenade_Image|}}} | 1 | 0}} | style="height: | |- {{#ifexpr: {{#if: {{{StartingLoadout_Weapon_Link|}}} | 1 | 0}} and {{#if: {{{StartingLoadout_Weapon_Name|}}} | 1 | 0}} and {{#if: {{{StartingLoadout_Weapon_Image|}}} | 1 | 0}} and {{#if: {{{StartingLoadout_Pistol_Link|}}} | 1 | 0}} and {{#if: {{{StartingLoadout_Pistol_Name|}}} | 1 | 0}} and {{#if: {{{StartingLoadout_Pistol_Image|}}} | 1 | 0}} and {{#if: {{{StartingLoadout_Knife_Link|}}} | 1 | 0}} and {{#if: {{{StartingLoadout_Knife_Name|}}} | 1 | 0}} and {{#if: {{{StartingLoadout_Knife_Image|}}} | 1 | 0}} and {{#if: {{{StartingLoadout_Grenade_Link|}}} | 1 | 0}} and {{#if: {{{StartingLoadout_Grenade_Name|}}} | 1 | 0}} and {{#if: {{{StartingLoadout_Grenade_Image|}}} | 1 | 0}} | style="height: 8px;" | style="display: none;"}} | ||
| colspan="6" style="padding: 0; height: | | colspan="6" style="padding: 0; height: 8px;" | | ||
|- | |- {{#if: {{{Role_0|}}}{{{Role_1|}}}{{{Role_2|}}}{{{Role_3|}}}{{{Role_4|}}}{{{Strength_0|}}}{{{Strength_1|}}}{{{Strength_2|}}}{{{Strength_3|}}}{{{Strength_4|}}}{{{Weakness_0|}}}{{{Weakness_1|}}}{{{Weakness_2|}}}{{{Weakness_3|}}}{{{Weakness_4|}}}{{{AlphaClot|}}}{{{Slasher|}}}{{{Crawler|}}}{{{Stalker|}}}{{{Gorefast|}}}{{{Bloat|}}}{{{Siren|}}}{{{Husk|}}}{{{Scrake|}}}{{{Fleshpound|}}} | style="background: #000000; color: #ffffff; text-align: center;" | style="display: none;"}} | ||
| colspan="6" style="padding: 0; background: linear-gradient(transparent 50%, #202224 50%), linear-gradient(135deg, transparent 5px, #bd0000 0, #bd0000 60%, transparent 60%) top left, linear-gradient(225deg, transparent 5px, #bd0000 0, #bd0000 60%, transparent 60%) top right; vertical-align: top; position: relative; top: 2px; height: 43px; width: 100%;" | <div style="background: linear-gradient(135deg, transparent | | colspan="6" style="padding: 0; background: linear-gradient(transparent 50%, #202224 50%), linear-gradient(135deg, transparent 5px, #bd0000 0, #bd0000 60%, transparent 60%) top left, linear-gradient(225deg, transparent 5px, #bd0000 0, #bd0000 60%, transparent 60%) top right; vertical-align: top; position: relative; top: 2px; height: 43px; width: 100%;" | <div style="background: linear-gradient(135deg, transparent 6px, #202224 0, #202224 60%, transparent 60%) top left, linear-gradient(225deg, transparent 6px, #202224 0, #202224 60%, transparent 60%) top right; display: table; padding: 0; position: relative; left: 0; top: 5px; height: 30px; width: 350px;"><div style="display: table-cell; vertical-align: middle;">'''Perk Information'''</div></div><div style="background: linear-gradient(135deg, transparent 6px, #000000 0, #000000 60%, transparent 60%) top left, linear-gradient(225deg, transparent 6px, #000000 0, #000000 60%, transparent 60%) top right; height: 8px; left: 0; position: absolute; top: 35px; width: 100%;"></div> | ||
|- | |- {{#if: {{{Role_0|}}}{{{Role_1|}}}{{{Role_2|}}}{{{Role_3|}}}{{{Role_4|}}} | style="height: 20px;" | style="display: none;"}} | ||
| colspan="6" style="padding: 0 12px; text-align: center;" | <small>Role</small> | | colspan="6" style="padding: 0 12px; text-align: center;" | <small>Role</small> | ||
|- {{#if: {{{Role_0|}}} | style="height: 20px;" | style="display: none;"}} | |- {{#if: {{{Role_0|}}} | style="height: 20px;" | style="display: none;"}} | ||
| Line 49: | Line 49: | ||
|- {{#if: {{{Role_4|}}} | style="height: 20px;" | style="display: none;"}} | |- {{#if: {{{Role_4|}}} | style="height: 20px;" | style="display: none;"}} | ||
| colspan="6" style="padding: 0 12px;" | • {{{Role_4}}} | | colspan="6" style="padding: 0 12px;" | • {{{Role_4}}} | ||
|- | |- {{#if: {{{Role_0|}}}{{{Role_1|}}}{{{Role_2|}}}{{{Role_3|}}}{{{Role_4|}}} | style="height: 8px;" | style="display: none;"}} | ||
| colspan="6" style="padding: 0; height: | | colspan="6" style="padding: 0; height: 8px;" | | ||
|- | |- {{#if: {{{Strength_0|}}}{{{Strength_1|}}}{{{Strength_2|}}}{{{Strength_3|}}}{{{Strength_4|}}} | style="height: 20px;" | style="display: none;"}} | ||
| colspan="6" style="padding: 0 12px; text-align: center;" | <small>Strength</small> | | colspan="6" style="padding: 0 12px; text-align: center;" | <small>Strength</small> | ||
|- {{#if: {{{Strength_0|}}} | style="height: 20px;" | style="display: none;"}} | |- {{#if: {{{Strength_0|}}} | style="height: 20px;" | style="display: none;"}} | ||
| Line 63: | Line 63: | ||
|- {{#if: {{{Strength_4|}}} | style="height: 20px;" | style="display: none;"}} | |- {{#if: {{{Strength_4|}}} | style="height: 20px;" | style="display: none;"}} | ||
| colspan="6" style="padding: 0 12px;" | • {{{Strength_4}}} | | colspan="6" style="padding: 0 12px;" | • {{{Strength_4}}} | ||
|- | |- {{#if: {{{Strength_0|}}}{{{Strength_1|}}}{{{Strength_2|}}}{{{Strength_3|}}}{{{Strength_4|}}} | style="height: 8px;" | style="display: none;"}} | ||
| colspan="6" style="padding: 0; height: | | colspan="6" style="padding: 0; height: 8px;" | | ||
|- | |- {{#if: {{{Weakness_0|}}}{{{Weakness_1|}}}{{{Weakness_2|}}}{{{Weakness_3|}}}{{{Weakness_4|}}} | 1 | 0}} | style="height: 20px;" | style="display: none;"}} | ||
| colspan="6" style="padding: 0 12px; text-align: center;" | <small>Weakness</small> | | colspan="6" style="padding: 0 12px; text-align: center;" | <small>Weakness</small> | ||
|- {{#if: {{{Weakness_0|}}} | style="height: 20px;" | style="display: none;"}} | |- {{#if: {{{Weakness_0|}}} | style="height: 20px;" | style="display: none;"}} | ||
| Line 77: | Line 77: | ||
|- {{#if: {{{Weakness_4|}}} | style="height: 20px;" | style="display: none;"}} | |- {{#if: {{{Weakness_4|}}} | style="height: 20px;" | style="display: none;"}} | ||
| colspan="6" style="padding: 0 12px;" | • {{{Weakness_4}}} | | colspan="6" style="padding: 0 12px;" | • {{{Weakness_4}}} | ||
|- | |- {{#if: {{{Weakness_0|}}}{{{Weakness_1|}}}{{{Weakness_2|}}}{{{Weakness_3|}}}{{{Weakness_4|}}} | style="height: 8px;" | style="display: none;"}} | ||
| colspan="6" style="padding: 0; height: | | colspan="6" style="padding: 0; height: 8px;" | | ||
|- | |- {{#if: {{{AlphaClot|}}}{{{Slasher|}}}{{{Crawler|}}}{{{Stalker|}}}{{{Gorefast|}}}{{{Bloat|}}}{{{Siren|}}}{{{Husk|}}}{{{Scrake|}}}{{{Fleshpound|}}} | style="height: 20px;" | style="display: none;"}} | ||
| colspan="6" style="padding: 0 12px; text-align: center;" | <small>Target Priority</small> | | colspan="6" style="padding: 0 12px; text-align: center;" | <small>Target Priority</small> | ||
|- | |- {{#if: {{{AlphaClot|}}}{{{Slasher|}}}{{{Crawler|}}}{{{Stalker|}}}{{{Gorefast|}}}{{{Bloat|}}}{{{Siren|}}}{{{Husk|}}}{{{Scrake|}}}{{{Fleshpound|}}} | style="padding: 0; position: relative; height: 44px;" | style="display: none;"}} | ||
| rowspan="3" style="padding: 0 0 0 12px; height: 180px; width: 17px" | <div style="background: linear-gradient(#00ff00, #ffff00 calc(100% / 3), #ff0000); border: #a6a7a9 solid 2px; border-radius: 9px; height: calc(100% - 4px); width: calc(100% - 4px);"></div> | | rowspan="3" style="padding: 0 0 0 12px; height: 180px; width: 17px" | <div style="background: linear-gradient(#00ff00, #ffff00 calc(100% / 3), #ff0000); border: #a6a7a9 solid 2px; border-radius: 9px; height: calc(100% - 4px); width: calc(100% - 4px);"></div> | ||
| style="padding: 0 12px 0 0; width: 15px;" | <div style="background: #a6a7a9; height: 2px; width: 100%;"></div> | | style="padding: 0 12px 0 0; width: 15px;" | <div style="background: #a6a7a9; height: 2px; width: 100%;"></div> | ||
| Line 94: | Line 94: | ||
| colspan="3" style="padding: 0 12px 0 0;" | {{#ifeq: {{{AlphaClot|}}} | low | [[File:KF2_Zed_AlphaClot_Icon.png|44x44px|link=Alpha Clot]] |}}{{#ifeq: {{{Slasher|}}} | low | [[File:KF2_Zed_Slasher_Icon.png|44x44px|link=Slasher]] |}}{{#ifeq: {{{Crawler|}}} | low | [[File:KF2_Zed_Crawler_Icon.png|44x44px|link=Crawler (Killing Floor 2)]] |}}{{#ifeq: {{{Stalker|}}} | low | [[File:KF2_Zed_Stalker_Icon.png|44x44px|link=Stalker (Killing Floor 2)]] |}}{{#ifeq: {{{Gorefast|}}} | low | [[File:KF2_Zed_Gorefast_Icon.png|44x44px|link=Gorefast (Killing Floor 2)]] |}}{{#ifeq: {{{Bloat|}}} | low | [[File:KF2_Zed_Bloat_Icon.png|44x44px|link=Bloat (Killing Floor 2)]] |}}{{#ifeq: {{{Siren|}}} | low | [[File:KF2_Zed_Siren_Icon.png|44x44px|link=Siren (Killing Floor 2)]] |}}{{#ifeq: {{{Husk|}}} | low | [[File:KF2_Zed_Husk_Icon.png|44x44px|link=Husk (Killing Floor 2)]] |}}{{#ifeq: {{{Scrake|}}} | low | [[File:KF2_Zed_Scrake_Icon.png|44x44px|link=Scrake (Killing Floor 2)]] |}}{{#ifeq: {{{Fleshpound|}}} | low | [[File:KF2_Zed_Fleshpound_Icon.png|44x44px|link=Fleshpound (Killing Floor 2)]] |}} | | colspan="3" style="padding: 0 12px 0 0;" | {{#ifeq: {{{AlphaClot|}}} | low | [[File:KF2_Zed_AlphaClot_Icon.png|44x44px|link=Alpha Clot]] |}}{{#ifeq: {{{Slasher|}}} | low | [[File:KF2_Zed_Slasher_Icon.png|44x44px|link=Slasher]] |}}{{#ifeq: {{{Crawler|}}} | low | [[File:KF2_Zed_Crawler_Icon.png|44x44px|link=Crawler (Killing Floor 2)]] |}}{{#ifeq: {{{Stalker|}}} | low | [[File:KF2_Zed_Stalker_Icon.png|44x44px|link=Stalker (Killing Floor 2)]] |}}{{#ifeq: {{{Gorefast|}}} | low | [[File:KF2_Zed_Gorefast_Icon.png|44x44px|link=Gorefast (Killing Floor 2)]] |}}{{#ifeq: {{{Bloat|}}} | low | [[File:KF2_Zed_Bloat_Icon.png|44x44px|link=Bloat (Killing Floor 2)]] |}}{{#ifeq: {{{Siren|}}} | low | [[File:KF2_Zed_Siren_Icon.png|44x44px|link=Siren (Killing Floor 2)]] |}}{{#ifeq: {{{Husk|}}} | low | [[File:KF2_Zed_Husk_Icon.png|44x44px|link=Husk (Killing Floor 2)]] |}}{{#ifeq: {{{Scrake|}}} | low | [[File:KF2_Zed_Scrake_Icon.png|44x44px|link=Scrake (Killing Floor 2)]] |}}{{#ifeq: {{{Fleshpound|}}} | low | [[File:KF2_Zed_Fleshpound_Icon.png|44x44px|link=Fleshpound (Killing Floor 2)]] |}} | ||
| style="padding: 0 12px 0 0; width: 1px;" | '''<small>LOW</small>''' | | style="padding: 0 12px 0 0; width: 1px;" | '''<small>LOW</small>''' | ||
|- | |- {{#if: {{{AlphaClot|}}}{{{Slasher|}}}{{{Crawler|}}}{{{Stalker|}}}{{{Gorefast|}}}{{{Bloat|}}}{{{Siren|}}}{{{Husk|}}}{{{Scrake|}}}{{{Fleshpound|}}} | style="height: 8px;" | style="display: none;"}} | ||
| colspan="6" style="padding: 0; height: | | colspan="6" style="padding: 0; height: 8px;" | | ||
|- | |- {{#if: {{{Custom_Entries|}}} || style="display: none;"}} | ||
| colspan="6" style="padding: 0; | | colspan="6" style="padding: 0 12px;" | {{{Custom_Entries|}}} | ||
|- {{#if: {{{Custom_Entries|}}} | style="height: 8px;" | style="display: none;"}} | |||
| colspan="6" style="padding: 0; height: 8px;" | | |||
|- {{#if: {{{ | |- {{#if: {{{Technical_Entries|}}} | style="background: #000000; color: #ffffff; text-align: center;" | style="display: none;"}} | ||
| colspan="6" style="padding: 0 | | colspan="6" style="padding: 0; background: linear-gradient(transparent 50%, #202224 50%), linear-gradient(135deg, transparent 5px, #bd0000 0, #bd0000 60%, transparent 60%) top left, linear-gradient(225deg, transparent 5px, #bd0000 0, #bd0000 60%, transparent 60%) top right; vertical-align: top; position: relative; height: 43px; width: 100%;" | <div style="background: linear-gradient(135deg, transparent 6px, #202224 0, #202224 60%, transparent 60%) top left, linear-gradient(225deg, transparent 6px, #202224 0, #202224 60%, transparent 60%) top right; display: table; padding: 0; position: relative; left: 0; top: 5px; height: 30px; width: 100%;"><div style="display: table-cell; vertical-align: middle;">'''Technical Information'''</div></div><div style="background: linear-gradient(135deg, transparent 6px, #000000 0, #000000 60%, transparent 60%) top left, linear-gradient(225deg, transparent 6px, #000000 0, #000000 60%, transparent 60%) top right; height: 8px; left: 0; position: absolute; top: 35px; width: 100%;"></div> | ||
|- {{#if: {{{ | |- {{#if: {{{Technical_Entries|}}} || style="display: none;"}} | ||
| colspan="6" style="padding: 0 | | colspan="6" style="padding: 0 12px;" | {{{Technical_Entries|}}} | ||
|- {{#if: {{{Technical_Entries|}}} | style="height: 8px;" | style="display: none;"}} | |||
| colspan="6" style="padding: 0; height: 8px;" | | |||
|- {{#if: {{{Achievements|}}}{{{Achievements_PS4|}}} | style="background: #000000; color: #ffffff; text-align: center;" | style="display: none;"}} | |||
| colspan="6" style="padding: 0; background: linear-gradient(transparent 50%, #202224 50%), linear-gradient(135deg, transparent 5px, #bd0000 0, #bd0000 60%, transparent 60%) top left, linear-gradient(225deg, transparent 5px, #bd0000 0, #bd0000 60%, transparent 60%) top right; vertical-align: top; position: relative; height: 43px; width: 100%;" | <div style="background: linear-gradient(135deg, transparent 6px, #202224 0, #202224 60%, transparent 60%) top left, linear-gradient(225deg, transparent 6px, #202224 0, #202224 60%, transparent 60%) top right; display: table; padding: 0; position: relative; left: 0; top: 5px; height: 30px; width: 100%;"><div style="display: table-cell; vertical-align: middle;">'''Related Achievements'''</div></div><div style="background: linear-gradient(135deg, transparent 6px, #000000 0, #000000 60%, transparent 60%) top left, linear-gradient(225deg, transparent 6px, #000000 0, #000000 60%, transparent 60%) top right; height: 8px; left: 0; position: absolute; top: 35px; width: 100%;"></div> | |||
|- {{#if: {{{Achievements|}}} || style="display: none;"}} | |||
| colspan="6" style="padding: 0 12px;" | {{{Achievements|}}} | |||
|- {{#if: {{{Achievements|}}} | style="height: 8px;" | style="display: none;"}} | |||
| colspan="6" style="padding: 0; height: 8px;" | | |||
|- {{#if: {{{Achievements_PS4|}}} || style="display: none;"}} | |||
| colspan="6" style="padding: 0 12px; text-align: center;" | <small>PS4 Trophies</small> | |||
|- {{#if: {{{Achievements_PS4|}}} || style="display: none;"}} | |||
| colspan="6" style="padding: 0 12px;" | {{{Achievements_PS4|}}} | |||
|- {{#if: {{{Achievements_PS4|}}} | style="height: 8px;" | style="display: none;"}} | |||
| colspan="6" style="padding: 0; height: 8px;" | | |||
|- style="background: #ffffff; text-align: center;" | |- style="background: #ffffff; text-align: center;" | ||
| colspan="6" style="padding: 0 0 2px; height: 8px;" | <div style="background: linear-gradient(45deg, #ffffff 5px, #000000 0, #000000 60%, transparent 60%) bottom left, linear-gradient(315deg, #ffffff 5px, #000000 0, #000000 60%, transparent 60%) bottom right; height: 8px; position: relative; top: -8px; width: 350px;"></div>{{#if: {{{GameVersion|}}} |<small style="position: relative; top: -8px;>''status as of [[Updates (Killing Floor 2)|<span style="color: #a6a7a9;">game version {{{GameVersion}}}''</span>]]</small>|}} | | colspan="6" style="padding: 0 0 2px; height: 8px;" | <div style="background: linear-gradient(45deg, #ffffff 5px, #000000 0, #000000 60%, transparent 60%) bottom left, linear-gradient(315deg, #ffffff 5px, #000000 0, #000000 60%, transparent 60%) bottom right; height: 8px; position: relative; top: -8px; width: 350px;"></div>{{#if: {{{GameVersion|}}} |<small style="position: relative; top: -8px;>''status as of [[Updates (Killing Floor 2)|<span style="color: #a6a7a9;">game version {{{GameVersion}}}''</span>]]</small>|}} | ||
| Line 187: | Line 165: | ||
| Fleshpound=high | | Fleshpound=high | ||
| | | | ||
| | | Custom_Entries= | ||
| | {{KF2VariousInfo_CustomEntry|'''Custom Entry'''|Custom Value|Custom Description|Last=true}} | ||
| | | | ||
| | | Technical_Entries= | ||
| | {{KF2VariousInfo_CustomEntry|'''Technical Entry'''|Technical Value|Technical Description|Last=true}} | ||
| | | | ||
| | | Achievements= | ||
| | {{KF2VariousInfo_Achievement|30|Reach Level 5 Berserker}} | ||
| | {{KF2VariousInfo_Achievement|31|Reach Level 10 Berserker}} | ||
| | {{KF2VariousInfo_Achievement|32|Reach Level 15 Berserker}} | ||
| | {{KF2VariousInfo_Achievement|33|Reach Level 20 Berserker}} | ||
| | {{KF2VariousInfo_Achievement|34|Reach Level 25 Berserker}} | ||
| | {{KF2VariousInfo_Achievement|65|Normal Berserker}} | ||
| | {{KF2VariousInfo_Achievement|66|Hard Berserker}} | ||
| | {{KF2VariousInfo_Achievement|67|Suicidal Berserker}} | ||
| | {{KF2VariousInfo_Achievement|68|Hellish Berserker}} | ||
| | {{KF2VariousInfo_Achievement|93|Perked Up}} | ||
| | {{KF2VariousInfo_Achievement|137|Mr. Perky 5}} | ||
| | {{KF2VariousInfo_Achievement|138|Mr. Perky 10}} | ||
| | {{KF2VariousInfo_Achievement|139|Mr. Perky 15}} | ||
| | {{KF2VariousInfo_Achievement|140|Mr. Perky 20}} | ||
| | {{KF2VariousInfo_Achievement|141|Mr. Perky 25}} | ||
| | | | ||
| | | Achievements_PS4= | ||
| | {{KF2VariousInfo_Achievement|PS4=true|25|Mr Perky 5|silver}} | ||
| | {{KF2VariousInfo_Achievement|PS4=true|26|Mr Perky 10|silver}} | ||
| | {{KF2VariousInfo_Achievement|PS4=true|27|Mr Perky 15|silver}} | ||
| | {{KF2VariousInfo_Achievement|PS4=true|28|Mr Perky 20|silver}} | ||
| | {{KF2VariousInfo_Achievement|PS4=true|29|Mr Perky 25|gold}} | ||
| | |||
}} | }} | ||
| Line 604: | Line 581: | ||
---- | ---- | ||
|- | |- | ||
| style="font-family: monospace, Courier; vertical-align: top; white-space: nowrap;" | <nowiki>| | | style="font-family: monospace, Courier; vertical-align: top; white-space: nowrap;" | <nowiki>| Custom_Entries=</nowiki><br /><small><nowiki> {{KF2VariousInfo_CustomEntry|1|2|3}}</nowiki><br /><nowiki> {{KF2VariousInfo_CustomEntry|1|2|3}}</nowiki><br /><nowiki> {{KF2VariousInfo_CustomEntry|1|2|3|AddSpaceAfterEntry=true}}</nowiki><br /><nowiki> {{KF2VariousInfo_CustomEntry|1|2|3}}</nowiki><br /><nowiki> {{KF2VariousInfo_CustomEntry|1|2|3|Last=true}}</nowiki></small> | ||
| style="vertical-align: top;" |   | | style="vertical-align: top;" |   | ||
| style="vertical-align: top;" | | | style="vertical-align: top;" | Additional custom entries | ||
''<span style="font-family: monospace, Curier;">1</span> - Entry Title''<br />''<span style="font-family: monospace, Curier;">2</span> - Entry Value''<br />''<span style="font-family: monospace, Curier;">3</span> - Entry Description (optional)'' | |||
''<span style="font-family: monospace, Curier;">AddSpaceAfterEntry=true</span><br />Adds some space between the current custom entry and the following'' | |||
''<span style="font-family: monospace, Curier;">Last=true</span><br />Only if a description is defined and this custom entry is the last one in this section <span style="font-family: monospace, Curier;">Last</span> hast to be set to <span style="font-family: monospace, Curier;">true</span> | |||
| style="vertical-align: top;" |   | | style="vertical-align: top;" |   | ||
| style="vertical-align: top;" | ''Example: '' | | style="vertical-align: top;" | ''Example: '' | ||
| style="vertical-align: top;" | '' | | style="vertical-align: top;" | ''<span style="white-space: nowrap;"><small><nowiki>{{KF2VariousInfo_CustomEntry|'''Custom Entry'''|Custom Value|AddSpaceAfterEntry=true}}</nowiki><br /><nowiki>{{KF2VariousInfo_CustomEntry|'''Heal Amount''' <small>(per second)</small>|5 &#10010;}}</nowiki><br /><nowiki>{{KF2VariousInfo_CustomEntry|'''Heal Duration'''|8s|Custom Description|Last=true}}</nowiki></small></span>'' | ||
|- | |- | ||
| colspan="6" | | | colspan="6" | | ||
---- | ---- | ||
|- | |- | ||
| style="font-family: monospace, Courier; vertical-align: top; white-space: nowrap;" | <nowiki>| | | colspan="6" style="font-family: monospace, Courier; vertical-align: top; white-space: nowrap;" | <nowiki>|</nowiki> | ||
|- | |- | ||
| colspan="6" | | | colspan="6" | | ||
---- | ---- | ||
|- | |- | ||
| | | style="font-family: monospace, Courier; vertical-align: top; white-space: nowrap;" | <nowiki>| Technical_Entries=</nowiki><br /><small><nowiki> {{KF2VariousInfo_CustomEntry|1|2|3}}</nowiki><br /><nowiki> {{KF2VariousInfo_CustomEntry|1|2|3}}</nowiki><br /><nowiki> {{KF2VariousInfo_CustomEntry|1|2|3|AddSpaceAfterEntry=true}}</nowiki><br /><nowiki> {{KF2VariousInfo_CustomEntry|1|2|3}}</nowiki><br /><nowiki> {{KF2VariousInfo_CustomEntry|1|2|3|Last=true}}</nowiki></small> | ||
| style="vertical-align: top;" |   | |||
| style="vertical-align: top;" | Additional technical entries | |||
''<span style="font-family: monospace, Curier;">1</span> - Entry Title''<br />''<span style="font-family: monospace, Curier;">2</span> - Entry Value''<br />''<span style="font-family: monospace, Curier;">3</span> - Entry Description (optional)'' | |||
''<span style="font-family: monospace, Curier;">AddSpaceAfterEntry=true</span><br />Adds some space between the current custom entry and the following'' | |||
''<span style="font-family: monospace, Curier;">Last=true</span><br />Only if a description is defined and this custom entry is the last one in this section <span style="font-family: monospace, Curier;">Last</span> hast to be set to <span style="font-family: monospace, Curier;">true</span> | |||
| style="vertical-align: top;" |   | |||
| style="vertical-align: top;" | ''Example: '' | |||
| style="vertical-align: top;" | ''<span style="white-space: nowrap;"><small><nowiki>{{KF2VariousInfo_CustomEntry|'''Technical Entry'''|Technical Value|Technical Description|Last=true}}</nowiki></small></span>'' | |||
|- | |- | ||
| colspan="6" | | | colspan="6" | | ||
---- | ---- | ||
|- | |- | ||
| colspan="6" style="font-family: monospace, Courier; vertical-align: top; white-space: nowrap;" | <nowiki>| | | colspan="6" style="font-family: monospace, Courier; vertical-align: top; white-space: nowrap;" | <nowiki>|</nowiki> | ||
|- | |- | ||
| colspan="6" | | | colspan="6" | | ||
---- | ---- | ||
|- | |- | ||
| style="font-family: monospace, Courier; vertical-align: top; white-space: nowrap;" | <nowiki>| | | style="font-family: monospace, Courier; vertical-align: top; white-space: nowrap;" | <nowiki>| Achievements=</nowiki><br /><small><nowiki> {{KF2VariousInfo_Achievement|1|2}}</nowiki></small> | ||
| style=" | | style="vertical-align: top;" |   | ||
| style=" | | style="vertical-align: top;" | Related Achievement entrys | ||
| | ''<span style="font-family: monospace, Curier;">1</span> - Achievement Number''<br /><small>''According to [https://steamdb.info/app/232090/stats/ steamdb.info]''</small> | ||
| | |||
''<span style="font-family: monospace, Curier;">2</span> - Achievement Title'' | |||
| style="vertical-align: top;" |   | |||
| style="vertical-align: top;" | ''Example: '' | |||
| style="vertical-align: top;" | ''<span style="white-space: nowrap;"><small><nowiki>{{KF2VariousInfo_Achievement|109|School's Out Forever}}</nowiki></small></span>'' | |||
|- | |- | ||
| colspan="6" | | | colspan="6" | | ||
| Line 722: | Line 706: | ||
| Fleshpound= | | Fleshpound= | ||
| | | | ||
| | | Custom_Entries= | ||
| | {{KF2VariousInfo_CustomEntry|1|2|3}} | ||
| | |||
| Technical_Entries= | |||
| | {{KF2VariousInfo_CustomEntry|1|2|3}} | ||
| | | | ||
| | | Achievements= | ||
| | {{KF2VariousInfo_Achievement|1|2}} | ||
| | | | ||
| | | Achievements_PS4= | ||
| | {{KF2VariousInfo_Achievement|PS4=true|1|2|3}} | ||
| | |||
| | |||
| | |||
| | |||
| | |||
| | |||
| | |||
| | |||
| | |||
| | |||
| | | | ||
| GameVersion= | | GameVersion= | ||
Revision as of 20:39, 30 January 2017
| Killing Floor 2 perk | |||||
Berserker | |||||

| |||||
General Information | |||||
| XP Objectives | |||||
| • Dealing Berserker weapon damage | |||||
| • Killing Zeds near a player with a Berserker weapon | |||||
| Starting Loadout | |||||
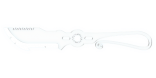
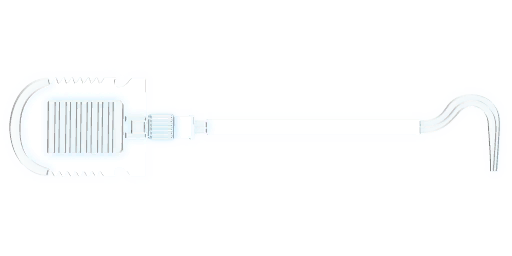
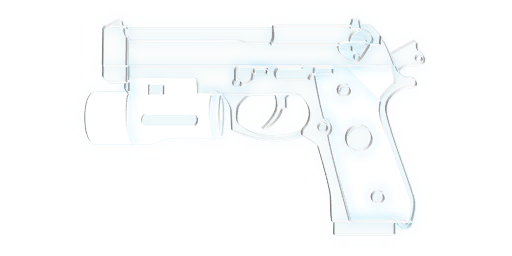
| Crovel Survival Tool | 9mm Pistol | ||||

|

| ||||
| Lawn Mower Blade | EMP Grenade | ||||
|

| ||||
Perk Information | |||||
| Role | |||||
| • Close Combat | |||||
| • Front Line Position | |||||
| • Defend Squad Mates | |||||
| Strength | |||||
| • Survivability | |||||
| • Speed or Toughness | |||||
| • Never Run Out of Ammo | |||||
| • EMP Grenades | |||||
| • Easily Surrounded | |||||
| • Must Parry to Survive | |||||
| Target Priority | |||||
| HIGH | |||||
| MEDIUM | |||||
| LOW | |||||
Custom Entry Custom Value Custom Description
| |||||
Technical Information | |||||
Technical Entry Technical Value Technical Description
| |||||
Related Achievements | |||||
| PS4 Trophies | |||||
Syntax
Parameters
| {{KF2PerkInfo | |||||
|
| |||||
| | PerkName= | Name of the perk | Example: | Berserker | ||
|
| |||||
| | PerkImage= | Name of the image of the perk icon | Example: | KF2_Perk_Berserker_White.png | ||
|
| |||||
| | | |||||
|
| |||||
| | XPObjective_0= | An objective the perk gets XP for | Example: | Dealing Berserker weapon damage | ||
|
| |||||
| | XPObjective_1= | |||||
|
| |||||
| | | |||||
|
| |||||
| | StartingLoadout_Weapon_Link= | Title of the page of the starting weapon | Example: | Crovel Survival Tool | ||
|
| |||||
| | StartingLoadout_Weapon_Name= | Name of the starting weapon | Example: | Crovel Survival Tool | ||
|
| |||||
| | StartingLoadout_Weapon_Image= | Name of the image of the starting weapon | Example: | KF2_Weapon_CrovelSurvivalTool_White.png | ||
|
| |||||
| | StartingLoadout_Pistol_Link= | Title of the page of the starting pistol | Example: | 9mm Pistol (Killing Floor 2) | ||
|
| |||||
| | StartingLoadout_Pistol_Name= | Name of the starting pistol | Example: | 9mm Pistol | ||
|
| |||||
| | StartingLoadout_Pistol_Image= | Name of the image of the starting pistol | Example: | KF2_Weapon_9mmPistol_White.png | ||
|
| |||||
| | StartingLoadout_Knife_Link= | Title of the page of the starting knife | Example: | Lawn Mower Blade | ||
|
| |||||
| | StartingLoadout_Knife_Name= | Name of the starting knife | Example: | Lawn Mower Blade | ||
|
| |||||
| | StartingLoadout_Knife_Image= | Name of the image of the starting knife | Example: | KF2_Weapon_LawnMowerBlade_White.png | ||
|
| |||||
| | StartingLoadout_Grenade_Link= | Title of the page of the starting grenade | Example: | EMP Grenade | ||
|
| |||||
| | StartingLoadout_Grenade_Name= | Name of the starting grenade | Example: | EMP Grenade | ||
|
| |||||
| | StartingLoadout_Grenade_Image= | Name of the image of the starting grenade | Example: | KF2_Weapon_EMPGrenade_White.png | ||
|
| |||||
| | | |||||
|
| |||||
| | Role_0= | A role of the perk | Example: | Close Combat | ||
|
| |||||
| | Role_1= | |||||
|
| |||||
| | . | . | . |
. . . |
. . . | |||
|
| |||||
| | Role_4= | |||||
|
| |||||
| | | |||||
|
| |||||
| | Strength_0= | A strength of the perk | Example: | Survivability | ||
|
| |||||
| | Strength_1= | |||||
|
| |||||
| | . | . | . |
. . . |
. . . | |||
|
| |||||
| | Strength_4= | |||||
|
| |||||
| | | |||||
|
| |||||
| | Weakness_0= | A weakness of the perk | Example: | Easily Surrounded | ||
|
| |||||
| | Weakness_1= | |||||
|
| |||||
| | . | . | . |
. . . |
. . . | |||
|
| |||||
| | Weakness_4= | |||||
|
| |||||
| | | |||||
|
| |||||
| | AlphaClot= | Set this to high, medium or low if the perks target priority for this Zed is high, medium or low | Example: | medium | ||
|
| |||||
| | Slasher= | Set this to high, medium or low if the perks target priority for this Zed is high, medium or low | Example: | medium | ||
|
| |||||
| | Crawler= | Set this to high, medium or low if the perks target priority for this Zed is high, medium or low | Example: | low | ||
|
| |||||
| | Stalker= | Set this to high, medium or low if the perks target priority for this Zed is high, medium or low | Example: | high | ||
|
| |||||
| | Gorefast= | Set this to high, medium or low if the perks target priority for this Zed is high, medium or low | Example: | medium | ||
|
| |||||
| | Bloat= | Set this to high, medium or low if the perks target priority for this Zed is high, medium or low | Example: | low | ||
|
| |||||
| | Siren= | Set this to high, medium or low if the perks target priority for this Zed is high, medium or low | Example: | high | ||
|
| |||||
| | Husk= | Set this to high, medium or low if the perks target priority for this Zed is high, medium or low | Example: | low | ||
|
| |||||
| | Scrake= | Set this to high, medium or low if the perks target priority for this Zed is high, medium or low | Example: | high | ||
|
| |||||
| | Fleshpound= | Set this to high, medium or low if the perks target priority for this Zed is high, medium or low | Example: | high | ||
|
| |||||
| | | |||||
|
| |||||
| | Custom_Entries= {{KF2VariousInfo_CustomEntry|1|2|3}} {{KF2VariousInfo_CustomEntry|1|2|3}} {{KF2VariousInfo_CustomEntry|1|2|3|AddSpaceAfterEntry=true}} {{KF2VariousInfo_CustomEntry|1|2|3}} {{KF2VariousInfo_CustomEntry|1|2|3|Last=true}} |
Additional custom entries
1 - Entry Title AddSpaceAfterEntry=true Last=true |
Example: | {{KF2VariousInfo_CustomEntry|'''Custom Entry'''|Custom Value|AddSpaceAfterEntry=true}} {{KF2VariousInfo_CustomEntry|'''Heal Amount''' <small>(per second)</small>|5 ✚}} {{KF2VariousInfo_CustomEntry|'''Heal Duration'''|8s|Custom Description|Last=true}} | ||
|
| |||||
| | | |||||
|
| |||||
| | Technical_Entries= {{KF2VariousInfo_CustomEntry|1|2|3}} {{KF2VariousInfo_CustomEntry|1|2|3}} {{KF2VariousInfo_CustomEntry|1|2|3|AddSpaceAfterEntry=true}} {{KF2VariousInfo_CustomEntry|1|2|3}} {{KF2VariousInfo_CustomEntry|1|2|3|Last=true}} |
Additional technical entries
1 - Entry Title AddSpaceAfterEntry=true Last=true |
Example: | {{KF2VariousInfo_CustomEntry|'''Technical Entry'''|Technical Value|Technical Description|Last=true}} | ||
|
| |||||
| | | |||||
|
| |||||
| | Achievements= {{KF2VariousInfo_Achievement|1|2}} |
Related Achievement entrys
1 - Achievement Number 2 - Achievement Title |
Example: | {{KF2VariousInfo_Achievement|109|School's Out Forever}} | ||
|
| |||||
| | | |||||
|
| |||||
| | GameVersion= | Version of Killing Floor 2 these stats are taken from | Example: | 1048 | ||
|
| |||||
| }} | |||||
Template
Copy this template for quick usage.
{{KF2PerkInfo
| PerkName=
| PerkImage=
|
| XPObjective_0=
| XPObjective_1=
|
| StartingLoadout_Weapon_Link=
| StartingLoadout_Weapon_Name=
| StartingLoadout_Weapon_Image=
| StartingLoadout_Pistol_Link=
| StartingLoadout_Pistol_Name=
| StartingLoadout_Pistol_Image=
| StartingLoadout_Knife_Link=
| StartingLoadout_Knife_Name=
| StartingLoadout_Knife_Image=
| StartingLoadout_Grenade_Link=
| StartingLoadout_Grenade_Name=
| StartingLoadout_Grenade_Image=
|
| Role_0=
| Role_1=
| Role_2=
| Role_3=
| Role_4=
|
| Strength_0=
| Strength_1=
| Strength_2=
| Strength_3=
| Strength_4=
|
| Weakness_0=
| Weakness_1=
| Weakness_2=
| Weakness_3=
| Weakness_4=
|
| AlphaClot=
| Slasher=
| Crawler=
| Stalker=
| Gorefast=
| Bloat=
| Siren=
| Husk=
| Scrake=
| Fleshpound=
|
| Custom_Entries=
  {{KF2VariousInfo_CustomEntry|1|2|3}}
|
| Technical_Entries=
  {{KF2VariousInfo_CustomEntry|1|2|3}}
|
| Achievements=
  {{KF2VariousInfo_Achievement|1|2}}
|
| Achievements_PS4=
  {{KF2VariousInfo_Achievement|PS4=true|1|2|3}}
|
| GameVersion=
}}