Template:KF2WeaponInfo: Difference between revisions
Jump to navigation
Jump to search
(Added support for hybrid weapons (alternative weapon type), changed secondary starting ammo entry) |
mNo edit summary |
||
| (12 intermediate revisions by 2 users not shown) | |||
| Line 1: | Line 1: | ||
<includeonly>{|style="background: #000000; border-collapse: collapse; color: #a6a7a9; float: right; margin: 0 0 | <includeonly>{|style="background: #000000; border-collapse: collapse; color: #a6a7a9; float: right; margin: 0 0 16px 24px; padding: 0; text-align: left; vertical-align: middle; width: 350px;" | ||
|- style="background: #ffffff; color: # | |- style="background: #ffffff; color: #252525; text-align: center;" | ||
| colspan="4" style="padding: 0 0 2px;" | <small>''[[Killing Floor 2]] item''</small> | | colspan="4" style="padding: 0 0 2px;" | <small>''[[Killing Floor 2|<span style="color: #252525;">Killing Floor 2</span>]] item''</small> | ||
|- style="background: #ffffff; color: #ffffff; text-align: center;" | |- style="background: #ffffff; color: #ffffff; text-align: center;" | ||
| colspan="4" style="padding: 0; | | colspan="4" style="padding: 0; background: linear-gradient(transparent 50%, #202224 50%), linear-gradient(135deg, transparent 5px, #bd0000 0, #bd0000 60%, transparent 60%) top left, linear-gradient(225deg, transparent 5px, #bd0000 0, #bd0000 60%, transparent 60%) top right; vertical-align: top; position: relative; height: 43px; width: 100%;" | <div style="background: linear-gradient(135deg, transparent 6px, #202224 0, #202224 60%, transparent 60%) top left, linear-gradient(225deg, transparent 6px, #202224 0, #202224 60%, transparent 60%) top right; display: table; padding: 0; position: relative; left: 0; top: 5px; height: 30px; width: 100%;"><div style="display: table-cell; vertical-align: middle;">'''{{{Name}}}'''</div><div style="position: absolute; top: 5px; left: 12px;">[[File:{{{PerkImage}}}|20px|top|link={{#if: {{{PerkLink|}}}|{{{PerkLink}}}|}}]]</div></div><div style="background: linear-gradient(135deg, transparent 6px, #000000 0, #000000 60%, transparent 60%) top left, linear-gradient(225deg, transparent 6px, #000000 0, #000000 60%, transparent 60%) top right; height: 8px; left: 0; position: absolute; top: 35px; width: 100%;"></div> | ||
|- style="text-align: center;" | |- style="text-align: center;" | ||
| colspan="4" style="padding: 0 12px | | colspan="4" style="padding: 0 12px {{#if: {{{MagazineSize|}}}{{{AmmoCapacity|}}}{{{Damage|}}}{{{FireRate|}}}{{{Accuracy|}}}{{{Penetration|}}} | 0 | 8px}};" | [[File:{{{WeaponImage}}}|326px]] | ||
|- {{#if: {{{MagazineSize|}}} | style=" | |- {{#if: {{{MagazineSize|}}}{{{AmmoCapacity|}}}{{{Damage|}}}{{{FireRate|}}}{{{Accuracy|}}}{{{Penetration|}}} | style="color: #ffffff; height: 40px; line-height: 40px;" | style="display: none;"}} | ||
| colspan="2" style="padding-left: 12px;" | | | colspan="2" style="padding: 0 0 0 26px; font-size: 180%; position: relative;" | {{#if: {{{Weight|}}} | <div style="position: absolute; top: 13px; left: 12px; height: 14px;">[[File:KF2_Weight_White.png|top|14px|link=]]</div> {{{Weight}}} |}} | ||
| colspan="2" style="padding- | | colspan="2" style="padding: 0 32px 0 0; font-size: 150%; text-align: right; position: relative;" | {{#if: {{{MultiPerkImage|}}} | + <div style="position: absolute; top: 10px; right: 12px; height: 20px;">[[File:{{{MultiPerkImage}}}|20px|top|link={{#if: {{{MultiPerkLink|}}}|{{{MultiPerkLink}}}|}}]]</div> |}} | ||
|- {{#if: {{{ | |- {{#if: {{{MagazineSize|}}} | style="background: #202224; height: 30px; line-height: 30px;" | style="display: none;"}} | ||
| colspan="2" style="padding- | | colspan="2" style="padding: 0 0 0 12px; font-size: 80%; position: relative; top: 1px;" | MAGAZINE SIZE | ||
| colspan="2" style="padding- | | colspan="2" style="padding: 0 12px 0 0; font-size: 100%; text-align: right;" | {{{MagazineSize}}} [[File:KF2_Magazine_Gray.png|baseline|15px|link=]] | ||
|- | |- {{#if: {{{AmmoCapacity|}}} | style="background: #202224; height: 30px; line-height: 30px;" | style="display: none;"}} | ||
| colspan="4" style="height: | | colspan="2" style="padding: 0 0 0 12px; font-size: 80%; position: relative; top: 1px;" | SPARE AMMO CAPACITY | ||
| colspan="2" style="padding: 0 12px 0 0; font-size: 100%; text-align: right;" | {{{AmmoCapacity}}} [[File:KF2_Ammo_Gray.png|baseline|15px|link=]] | |||
|- {{#if: {{{MagazineSize|}}}{{{AmmoCapacity|}}} | style="height: 8px;" | style="display: none;"}} | |||
| colspan="4" style="padding: 0; height: 8px;" | | |||
|- {{#if: {{{Damage|}}} | style="height: 20px;" | style="display: none;"}} | |- {{#if: {{{Damage|}}} | style="height: 20px;" | style="display: none;"}} | ||
| style="padding | | style="padding: 0 0 0 12px; width: 136px;" | '''DAMAGE''' | ||
| colspan="2" style="width: 158px;" | <div style="background: #202224; display: table-cell; height: 12px; margin | | colspan="2" style="padding: 0; width: 158px;" | <div style="background: #202224; display: table-cell; height: 12px; margin: 4px 0 0 0; width: 100px;"><div style="background: #ffffff; height: 12px; position: relative; top: 0; left: 0; width: {{#expr: (({{#ifeq: {{#expr: {{{Damage}}} / 820 <= 1}} | 1 | {{#expr: {{{Damage}}} / 820}} | 1 }}) ^ 0.5) * 100 }}px"></div></div> | ||
| style="padding | | style="padding: 0 12px 0 0; text-align: right;" | {{#expr: {{{Damage}}} round 0}} | ||
|- {{#if: {{{FireRate|}}} | style="height: 20px;" | style="display: none;"}} | |- {{#if: {{{FireRate|}}} | style="height: 20px;" | style="display: none;"}} | ||
| style="padding | | style="padding: 0 0 0 12px; width: 136px;" | '''FIRE RATE''' | ||
| colspan="2" style="width: 158px;" | <div style="background: #202224; display: table-cell; height: 12px; margin | | colspan="2" style="padding: 0; width: 158px;" | <div style="background: #202224; display: table-cell; height: 12px; margin: 4px 0 0 0; width: 100px;"><div style="background: #ffffff; height: 12px; position: relative; top: 0; left: 0; width: {{#expr: ({{#ifeq: {{#expr: {{{FireRate}}} / 800 <= 1}} | 1 | {{#expr: {{{FireRate}}} / 800}} | 1 }}) * 100 }}px"></div></div> | ||
| style="padding | | style="padding: 0 12px 0 0; text-align: right;" | {{#expr: {{{FireRate}}} round 0}} | ||
|- {{#if: {{{Accuracy|}}} | style="height: 20px;" | style="display: none;"}} | |- {{#if: {{{Accuracy|}}} | style="height: 20px;" | style="display: none;"}} | ||
| style="padding | | style="padding: 0 0 0 12px; width: 136px;" | '''ACCURACY''' | ||
| colspan="2" style="width: 158px;" | <div style="background: #202224; display: table-cell; height: 12px; margin | | colspan="2" style="padding: 0; width: 158px;" | <div style="background: #202224; display: table-cell; height: 12px; margin: 4px 0 0 0; width: 100px;"><div style="background: #ffffff; height: 12px; position: relative; top: 0; left: 0; width: {{#expr: (({{#ifeq: {{#expr: {{{Accuracy}}} / 100 <= 1}} | 1 | {{#expr: {{{Accuracy}}} / 100}} | 1 }}) ^ 0.5) * 100 }}px"></div></div> | ||
| style="padding | | style="padding: 0 12px 0 0; text-align: right;" | {{#expr: {{{Accuracy}}} round 0}} | ||
|- {{#if: {{{Penetration|}}} | style="height: 20px;" | style="display: none;"}} | |- {{#if: {{{Penetration|}}} | style="height: 20px;" | style="display: none;"}} | ||
| style="padding | | style="padding: 0 0 0 12px; width: 136px;" | '''PENETRATION''' | ||
| colspan="2" style="width: 158px;" | <div style="background: #202224; display: table-cell; height: 12px; margin | | colspan="2" style="padding: 0; width: 158px;" | <div style="background: #202224; display: table-cell; height: 12px; margin: 4px 0 0 0; width: 100px;"><div style="background: #ffffff; height: 12px; position: relative; top: 0; left: 0; width: {{#expr: ({{#ifeq: {{#expr: {{{Penetration}}} / 4 <= 1}} | 1 | {{#expr: {{{Penetration}}} / 4}} | 1 }}) * 100 }}px"></div></div> | ||
| style="padding | | style="padding: 0 12px 0 0; text-align: right;" | {{#expr: {{{Penetration}}} round 1}} | ||
|- | |- {{#if: {{{Damage|}}}{{{FireRate|}}}{{{Accuracy|}}}{{{Penetration|}}} | style="height: 8px;" | style="display: none;"}} | ||
| colspan="4" style="height: | | colspan="4" style="padding: 0; height: 8px;" | | ||
|- {{#if: {{{Description|}}} || style="display: none;"}} | |- {{#if: {{{Description|}}} || style="display: none;"}} | ||
| colspan="4" style="padding: 0 10px" | {{{Description}}} | | colspan="4" style="padding: 0 10px" | '''{{{Description}}}''' | ||
|- | |- {{#if: {{{Description|}}} | style="height: 8px;" | style="display: none;"}} | ||
| colspan="4" style="height: | | colspan="4" style="padding: 0; height: 8px;" | | ||
|- | |- {{#if: {{{Pricing|}}}{{{AmmoCost|}}}{{{WeaponType|}}}{{{AlternativeWeaponType|}}} | style="background: #000000; color: #ffffff; text-align: center;" | style="display: none;"}} | ||
| colspan="4" style=" | | colspan="4" style="padding: 0; background: linear-gradient(transparent 50%, #202224 50%), linear-gradient(135deg, transparent 5px, #bd0000 0, #bd0000 60%, transparent 60%) top left, linear-gradient(225deg, transparent 5px, #bd0000 0, #bd0000 60%, transparent 60%) top right; vertical-align: top; position: relative; height: 43px; width: 100%;" | <div style="background: linear-gradient(135deg, transparent 6px, #202224 0, #202224 60%, transparent 60%) top left, linear-gradient(225deg, transparent 6px, #202224 0, #202224 60%, transparent 60%) top right; display: table; padding: 0; position: relative; left: 0; top: 5px; height: 30px; width: 100%;"><div style="display: table-cell; vertical-align: middle;">'''General Information'''</div></div><div style="background: linear-gradient(135deg, transparent 6px, #000000 0, #000000 60%, transparent 60%) top left, linear-gradient(225deg, transparent 6px, #000000 0, #000000 60%, transparent 60%) top right; height: 8px; left: 0; position: absolute; top: 35px; width: 100%;"></div> | ||
| | |||
|- {{#if: {{{Pricing|}}} | style="height: 20px;" | style="display: none;"}} | |- {{#if: {{{Pricing|}}} | style="height: 20px;" | style="display: none;"}} | ||
| style="padding | | style="padding: 0 0 0 12px;" | '''Pricing''' | ||
| colspan="3" style="padding | | colspan="3" style="padding: 0 12px 0 0; text-align: right;" | [[File:KF2_Dosh_Gray.png|baseline|10px|link=]] {{{Pricing}}} | ||
|- {{#if: {{{ | |- {{#if: {{{AmmoCost|}}} | style="height: 20px;" | style="display: none;"}} | ||
| style="padding- | | colspan="2" style="padding: 0 0 0 12px; vertical-align: top; white-space: nowrap;" | '''Ammo Cost''' | ||
| colspan=" | | colspan="2" style="padding: 0 12px 0 0; text-align: right;" | [[File:KF2_Dosh_Gray.png|baseline|10px|link=]] {{{AmmoCost}}} | ||
|- | |- {{#if: {{{WeaponType|}}} | style="height: 20px;" | style="display: none;"}} | ||
| colspan=" | | colspan="2" style="padding: 0 0 0 12px; vertical-align: top; white-space: nowrap;" | '''Weapon Type''' | ||
| | | colspan="2" style="padding: 0 12px 0 0; text-align: right;" | {{{WeaponType}}} [[File:KF2_WeaponType_{{{WeaponType}}}_Gray.png|top|20px|link=]] | ||
| colspan="4" style="height: | |- {{#if: {{{AlternativeWeaponType|}}} | style="height: 20px;" | style="display: none;"}} | ||
|- | | colspan="2" style="padding: 0 0 0 12px; vertical-align: top; white-space: nowrap;" | '''Alternative Weapon Type''' | ||
| colspan="2" style="padding: 0 12px 0 0; text-align: right;" | {{{AlternativeWeaponType}}} [[File:KF2_WeaponType_{{{AlternativeWeaponType}}}_Gray.png|top|20px|link=]] | |||
|- {{#if: {{{Pricing|}}}{{{AmmoCost|}}}{{{WeaponType|}}}{{{AlternativeWeaponType|}}} | style="height: 8px;" | style="display: none;"}} | |||
| colspan="4" style="padding: 0; height: 8px;" | | |||
|- {{#if: {{{InitialSpareMags|}}}{{{Block|}}}{{{Parry|}}}{{{SecondaryAmmunition_AmmoType|}}}{{{SecondaryAmmunition_AmmoImage|}}}{{{SecondaryAmmunition_MagazineSize|}}}{{{SecondaryAmmunition_AmmoCapacity|}}}{{{SecondaryAmmunition_Damage|}}}{{{SecondaryAmmunition_FireRate|}}}{{{SecondaryAmmunition_Accuracy|}}}{{{SecondaryAmmunition_Penetration|}}}{{{SecondaryAmmunition_InitialSpareMags|}}}{{{SecondaryAmmunition_AmmoConsumption|}}}{{{SecondaryAmmunition_AmmoCost|}}}{{{HealAmount|}}}{{{HealAmount_Solo|}}}{{{FullRechargeTime|}}}{{{FullRechargeTime_SelfInjection|}}}{{{Custom_Entries|}}} | style="background: #000000; color: #ffffff; text-align: center;" | style="display: none;"}} | |||
| colspan="4" style="padding: 0; background: linear-gradient(transparent 50%, #202224 50%), linear-gradient(135deg, transparent 5px, #bd0000 0, #bd0000 60%, transparent 60%) top left, linear-gradient(225deg, transparent 5px, #bd0000 0, #bd0000 60%, transparent 60%) top right; vertical-align: top; position: relative; height: 43px; width: 100%;" | <div style="background: linear-gradient(135deg, transparent 6px, #202224 0, #202224 60%, transparent 60%) top left, linear-gradient(225deg, transparent 6px, #202224 0, #202224 60%, transparent 60%) top right; display: table; padding: 0; position: relative; left: 0; top: 5px; height: 30px; width: 100%;"><div style="display: table-cell; vertical-align: middle;">'''Weapon Information'''</div></div><div style="background: linear-gradient(135deg, transparent 6px, #000000 0, #000000 60%, transparent 60%) top left, linear-gradient(225deg, transparent 6px, #000000 0, #000000 60%, transparent 60%) top right; height: 8px; left: 0; position: absolute; top: 35px; width: 100%;"></div> | |||
|- {{#if: {{{InitialSpareMags|}}} | style="height: 20px;" | style="display: none;"}} | |- {{#if: {{{InitialSpareMags|}}} | style="height: 20px;" | style="display: none;"}} | ||
| colspan="2" style="padding | | colspan="2" style="padding: 0 0 0 12px; vertical-align: top; white-space: nowrap;" | '''Starting Ammo''' | ||
| colspan="2" style="padding | | colspan="2" style="padding: 0 12px 0 0; text-align: right;" | {{#if: {{{MagazineSize|}}} | {{#ifeq: {{{InitialSpareMags|}}} | 0 | {{{MagazineSize}}} | {{{MagazineSize}}} + {{#expr: {{{InitialSpareMags}}} * {{{MagazineSize}}}}}}} | {{{InitialSpareMags}}}}} [[File:KF2_Ammo_Gray.png|baseline|10px|link=]] | ||
|- {{#if: {{{Block|}}} | style="height: 20px;" | style="display: none;"}} | |- {{#if: {{{Block|}}} | style="height: 20px;" | style="display: none;"}} | ||
| colspan="2" style="padding | | colspan="2" style="padding: 0 0 0 12px; vertical-align: top; white-space: nowrap;" | '''Block''' <small>(damage multiplier)</small> | ||
| colspan="2" style="padding | | colspan="2" style="padding: 0 12px 0 0; text-align: right;" | ×{{#expr: {{{Block}}} round 1}} | ||
|- {{#if: {{{Parry|}}} | style="height: 20px;" | style="display: none;"}} | |- {{#if: {{{Parry|}}} | style="height: 20px;" | style="display: none;"}} | ||
| colspan="2" style="padding | | colspan="2" style="padding: 0 0 0 12px; vertical-align: top; white-space: nowrap;" | '''Parry''' <small>(damage multiplier)</small> | ||
| colspan="2" style="padding | | colspan="2" style="padding: 0 12px 0 0; text-align: right;" | ×{{#expr: {{{Parry}}} round 1}} | ||
|- {{#if: {{{ | |- {{#if: {{{InitialSpareMags|}}}{{{Block|}}}{{{Parry|}}} | style="height: 8px;" | style="display: none;"}} | ||
| colspan=" | | colspan="4" style="padding: 0; height: 8px;" | | ||
| | |- {{#if: {{{SecondaryAmmunition_AmmoType|}}} | style="height: 20px;" | style="display: none;"}} | ||
|- {{#if: {{{ | | colspan="4" style="padding: 0 12px; text-align: center;" | <small>Secondary Ammunition</small> | ||
| colspan="2" style="padding | |- {{#if: {{{SecondaryAmmunition_AmmoType|}}} | style="height: 20px;" | style="display: none;"}} | ||
| colspan="2" style="padding | | colspan="2" style="padding: 0 0 0 12px; vertical-align: top; white-space: nowrap;" | '''Ammo Type''' | ||
| | | colspan="2" style="padding: 0 12px 0 0; text-align: right;" | {{{SecondaryAmmunition_AmmoType}}} | ||
| | |- {{#if: {{{SecondaryAmmunition_AmmoType|}}} | style="height: 8px;" | style="display: none;"}} | ||
|- {{#if: {{{ | | colspan="4" style="padding: 0; height: 8px;" | | ||
| | |- {{#if: {{{SecondaryAmmunition_MagazineSize|}}} | style="height: 20px;" | style="display: none;"}} | ||
| | | colspan="2" style="padding: 0 0 0 12px; vertical-align: top; white-space: nowrap;" | '''Magazine Size''' | ||
| colspan="2" style="padding: 0 12px 0 0; text-align: right;" | {{{SecondaryAmmunition_MagazineSize}}} {{#if: {{{SecondaryAmmunition_AmmoImage|}}} | [[File:{{{SecondaryAmmunition_AmmoImage}}}|baseline|10px|link=]] |}} | |||
|- {{#if: {{{SecondaryAmmunition_AmmoCapacity|}}} | style="height: 20px;" | style="display: none;"}} | |||
| colspan="2" style="padding: 0 0 0 12px; vertical-align: top; white-space: nowrap;" | '''Spare Ammo Capacity''' | |||
| colspan="2" style="padding: 0 12px 0 0; text-align: right;" | {{{SecondaryAmmunition_AmmoCapacity}}} {{#if: {{{SecondaryAmmunition_AmmoImage|}}} | [[File:{{{SecondaryAmmunition_AmmoImage}}}|baseline|10px|link=]] |}} | |||
|- {{#if: {{{SecondaryAmmunition_MagazineSize|}}}{{{SecondaryAmmunition_AmmoCapacity|}}} | style="height: 8px;" | style="display: none;"}} | |||
| colspan="4" style="padding: 0; height: 8px;" | | |||
|- {{#if: {{{SecondaryAmmunition_Damage|}}} | style="height: 20px;" | style="display: none;"}} | |||
| style="padding: 0 0 0 12px; width: 136px;" | '''Damage''' | |||
| colspan="2" style="padding: 0; width: 158px;" | <div style="background: #202224; display: table-cell; height: 12px; margin: 4px 0 0 0; width: 100px;"><div style="background: #ffffff; height: 12px; position: relative; top: 0; left: 0; width: {{#expr: (({{#ifeq: {{#expr: {{{SecondaryAmmunition_Damage}}} / 820 <= 1}} | 1 | {{#expr: {{{SecondaryAmmunition_Damage}}} / 820}} | 1 }}) ^ 0.5) * 100 }}px"></div></div> | |||
| style="padding: 0 12px 0 0; text-align: right;" | {{#expr: {{{SecondaryAmmunition_Damage}}} round 0}} | |||
|- {{#if: {{{SecondaryAmmunition_FireRate|}}} | style="height: 20px;" | style="display: none;"}} | |||
| style="padding: 0 0 0 12px; width: 136px;" | '''Fire Rate''' | |||
| colspan="2" style="padding: 0; width: 158px;" | <div style="background: #202224; display: table-cell; height: 12px; margin: 4px 0 0 0; width: 100px;"><div style="background: #ffffff; height: 12px; position: relative; top: 0; left: 0; width: {{#expr: ({{#ifeq: {{#expr: {{{SecondaryAmmunition_FireRate}}} / 800 <= 1}} | 1 | {{#expr: {{{SecondaryAmmunition_FireRate}}} / 800}} | 1 }}) * 100 }}px"></div></div> | |||
| style="padding: 0 12px 0 0; text-align: right;" | {{#expr: {{{SecondaryAmmunition_FireRate}}} round 0}} | |||
|- {{#if: {{{SecondaryAmmunition_Accuracy|}}} | style="height: 20px;" | style="display: none;"}} | |||
| style="padding: 0 0 0 12px; width: 136px;" | '''Accuracy''' | |||
| colspan="2" style="padding: 0; width: 158px;" | <div style="background: #202224; display: table-cell; height: 12px; margin: 4px 0 0 0; width: 100px;"><div style="background: #ffffff; height: 12px; position: relative; top: 0; left: 0; width: {{#expr: (({{#ifeq: {{#expr: {{{SecondaryAmmunition_Accuracy}}} / 100 <= 1}} | 1 | {{#expr: {{{SecondaryAmmunition_Accuracy}}} / 100}} | 1 }}) ^ 0.5) * 100 }}px"></div></div> | |||
| style="padding: 0 12px 0 0; text-align: right;" | {{#expr: {{{SecondaryAmmunition_Accuracy}}} round 0}} | |||
|- {{#if: {{{SecondaryAmmunition_Penetration|}}} | style="height: 20px;" | style="display: none;"}} | |||
| style="padding: 0 0 0 12px; width: 136px;" | '''Penetration''' | |||
| colspan="2" style="padding: 0; width: 158px;" | <div style="background: #202224; display: table-cell; height: 12px; margin: 4px 0 0 0; width: 100px;"><div style="background: #ffffff; height: 12px; position: relative; top: 0; left: 0; width: {{#expr: ({{#ifeq: {{#expr: {{{SecondaryAmmunition_Penetration}}} / 4 <= 1}} | 1 | {{#expr: {{{SecondaryAmmunition_Penetration}}} / 4}} | 1 }}) * 100 }}px"></div></div> | |||
| style="padding: 0 12px 0 0; text-align: right;" | {{#expr: {{{SecondaryAmmunition_Penetration}}} round 1}} | |||
|- {{#if: {{{SecondaryAmmunition_Damage|}}}{{{SecondaryAmmunition_FireRate|}}}{{{SecondaryAmmunition_Accuracy|}}}{{{SecondaryAmmunition_Penetration|}}} | style="height: 8px;" | style="display: none;"}} | |||
| colspan="4" style="padding: 0; height: 8px;" | | |||
|- {{#if: {{{SecondaryAmmunition_InitialSpareMags|}}} | style="height: 20px;" | style="display: none;"}} | |||
| colspan="2" style="padding: 0 0 0 12px; vertical-align: top; white-space: nowrap;" | '''Starting Ammo''' | |||
| colspan="2" style="padding: 0 12px 0 0; text-align: right;" | {{#if: {{{SecondaryAmmunition_MagazineSize|}}} | {{#ifeq: {{{SecondaryAmmunition_InitialSpareMags|}}} | 0 | {{{SecondaryAmmunition_MagazineSize}}} | {{{SecondaryAmmunition_MagazineSize}}} + {{#expr: {{{SecondaryAmmunition_InitialSpareMags}}} * {{{SecondaryAmmunition_MagazineSize}}}}}}} | {{{SecondaryAmmunition_InitialSpareMags}}}}} {{#if: {{{SecondaryAmmunition_AmmoImage|}}} | [[File:{{{SecondaryAmmunition_AmmoImage}}}|baseline|10px|link=]] |}} | |||
|- {{#if: {{{SecondaryAmmunition_AmmoConsumption|}}} | style="height: 20px;"| style="display: none;"}} | |||
| colspan="3" style="padding: 0 0 0 12px; vertical-align: top; white-space: nowrap;" | '''Ammo Consumption''' <small>(per use)</small> | |||
| style="padding: 0 12px 0 0; text-align: right;" | {{#expr: {{{SecondaryAmmunition_AmmoConsumption}}} round 0}} {{#if: {{{SecondaryAmmunition_AmmoImage|}}} | [[File:{{{SecondaryAmmunition_AmmoImage}}}|baseline|10px|link=]] |}} | |||
|- {{#if: {{{SecondaryAmmunition_AmmoCost|}}} | style="height: 20px;" | style="display: none;"}} | |||
| colspan="2" style="padding: 0 0 0 12px; vertical-align: top; white-space: nowrap;" | '''Ammo Cost''' | |||
| colspan="2" style="padding: 0 12px 0 0; text-align: right;" | [[File:KF2_Dosh_Gray.png|baseline|10px|link=]] {{{SecondaryAmmunition_AmmoCost}}} | |||
|- {{#if: {{{SecondaryAmmunition_InitialSpareMags|}}}{{{SecondaryAmmunition_AmmoCost|}}}{{{SecondaryAmmunition_AmmoConsumption|}}} | style="height: 8px;" | style="display: none;"}} | |||
| colspan="4" style="padding: 0; height: 8px;" | | |||
|- {{#if: {{{HealAmount|}}} | style="height: 20px;" | style="display: none;"}} | |- {{#if: {{{HealAmount|}}} | style="height: 20px;" | style="display: none;"}} | ||
| colspan="2" style="padding | | colspan="2" style="padding: 0 0 0 12px; vertical-align: top; white-space: nowrap;" | '''Heal Amount''' {{#if: {{{HealAmountSolo|}}} | <small>(coop)</small> |}} | ||
| colspan="2" style="padding | | colspan="2" style="padding: 0 12px 0 0; text-align: right;" | {{#expr: {{{HealAmount}}} round 0}} ✚ | ||
|- {{#if: {{{ | |- {{#if: {{{HealAmount_Solo|}}} | style="height: 20px;" | style="display: none;"}} | ||
| colspan="2" style="padding | | colspan="2" style="padding: 0 0 0 12px; vertical-align: top; white-space: nowrap;" | '''Heal Amount''' <small>(solo)</small> | ||
| colspan="2" style="padding | | colspan="2" style="padding: 0 12px 0 0; text-align: right;" | {{#expr: {{{HealAmount_Solo}}} round 0}} ✚ | ||
|- {{#if: {{{ | |- {{#if: {{{FullRechargeTime|}}} | style="height: 20px;" | style="display: none;"}} | ||
| colspan="2" style="padding | | colspan="2" style="padding: 0 0 0 12px; vertical-align: top; white-space: nowrap;" | '''Full Recharge Time''' | ||
| colspan="2" style="padding | | colspan="2" style="padding: 0 12px 0 0; text-align: right;" | {{#expr: {{{FullRechargeTime}}} round 2}}s | ||
|- {{#if: {{{ | |- {{#if: {{{FullRechargeTime_SelfInjection|}}} | style="height: 20px;" | style="display: none;"}} | ||
| colspan=" | | colspan="3" style="padding: 0 0 0 12px; vertical-align: top; white-space: nowrap;" | '''Full Recharge Time''' <small>(self injection)</small> | ||
| | | style="padding: 0 12px 0 0; text-align: right;" | {{#expr: {{{FullRechargeTime_SelfInjection}}} round 2}}s | ||
|- {{#if: {{{ | |- {{#if: {{{HealAmount|}}}{{{HealAmount_Solo|}}}{{{FullRechargeTime|}}}{{{FullRechargeTime_SelfInjection|}}} | style="height: 8px;" | style="display: none;"}} | ||
| colspan=" | | colspan="4" style="padding: 0; height: 8px;" | | ||
| colspan=" | |- {{#if: {{{Custom_Entries|}}} || style="display: none;"}} | ||
|- {{#if: {{{ | | colspan="4" style="padding: 0 12px;" | {{{Custom_Entries|}}} | ||
| colspan=" | |- {{#if: {{{Custom_Entries|}}} | style="height: 8px;" | style="display: none;"}} | ||
| | | colspan="4" style="padding: 0; height: 8px;" | | ||
|- {{#if: {{{Technical_Entries|}}} | style="background: #000000; color: #ffffff; text-align: center;" | style="display: none;"}} | |||
| | | colspan="4" style="padding: 0; background: linear-gradient(transparent 50%, #202224 50%), linear-gradient(135deg, transparent 5px, #bd0000 0, #bd0000 60%, transparent 60%) top left, linear-gradient(225deg, transparent 5px, #bd0000 0, #bd0000 60%, transparent 60%) top right; vertical-align: top; position: relative; height: 43px; width: 100%;" | <div style="background: linear-gradient(135deg, transparent 6px, #202224 0, #202224 60%, transparent 60%) top left, linear-gradient(225deg, transparent 6px, #202224 0, #202224 60%, transparent 60%) top right; display: table; padding: 0; position: relative; left: 0; top: 5px; height: 30px; width: 100%;"><div style="display: table-cell; vertical-align: middle;">'''Technical Information'''</div></div><div style="background: linear-gradient(135deg, transparent 6px, #000000 0, #000000 60%, transparent 60%) top left, linear-gradient(225deg, transparent 6px, #000000 0, #000000 60%, transparent 60%) top right; height: 8px; left: 0; position: absolute; top: 35px; width: 100%;"></div> | ||
|- {{#if: {{{Technical_Entries|}}} || style="display: none;"}} | |||
| colspan="4" style="padding: 0 12px;" | {{{Technical_Entries|}}} | |||
| colspan=" | |- {{#if: {{{Technical_Entries|}}} | style="height: 8px;" | style="display: none;"}} | ||
| colspan=" | | colspan="4" style="padding: 0; height: 8px;" | | ||
|- {{#if: {{{Achievements|}}}{{{Achievements_PS4|}}} | style="background: #000000; color: #ffffff; text-align: center;" | style="display: none;"}} | |||
| colspan=" | | colspan="4" style="padding: 0; background: linear-gradient(transparent 50%, #202224 50%), linear-gradient(135deg, transparent 5px, #bd0000 0, #bd0000 60%, transparent 60%) top left, linear-gradient(225deg, transparent 5px, #bd0000 0, #bd0000 60%, transparent 60%) top right; vertical-align: top; position: relative; height: 43px; width: 100%;" | <div style="background: linear-gradient(135deg, transparent 6px, #202224 0, #202224 60%, transparent 60%) top left, linear-gradient(225deg, transparent 6px, #202224 0, #202224 60%, transparent 60%) top right; display: table; padding: 0; position: relative; left: 0; top: 5px; height: 30px; width: 100%;"><div style="display: table-cell; vertical-align: middle;">'''Related Achievements'''</div></div><div style="background: linear-gradient(135deg, transparent 6px, #000000 0, #000000 60%, transparent 60%) top left, linear-gradient(225deg, transparent 6px, #000000 0, #000000 60%, transparent 60%) top right; height: 8px; left: 0; position: absolute; top: 35px; width: 100%;"></div> | ||
|- {{#if: {{{Achievements|}}} || style="display: none;"}} | |||
| colspan="4" style="padding: 0 12px;" | {{{Achievements|}}} | |||
| | |- {{#if: {{{Achievements|}}} | style="height: 8px;" | style="display: none;"}} | ||
| colspan="4" style="padding: 0; height: 8px;" | | |||
|- {{#if: {{{Achievements_PS4|}}} || style="display: none;"}} | |||
| colspan="4" style="padding: 0 12px; text-align: center;" | <small>PS4 Trophies</small> | |||
|- {{#if: {{{Achievements_PS4|}}} || style="display: none;"}} | |||
| colspan="4" style="padding: 0 12px;" | {{{Achievements_PS4|}}} | |||
| colspan=" | |- {{#if: {{{Achievements_PS4|}}} | style="height: 8px;" | style="display: none;"}} | ||
| | | colspan="4" style="padding: 0; height: 8px;" | | ||
|- {{#if: {{{ | |- style="background: #ffffff; text-align: center;" | ||
| colspan=" | | colspan="4" style="padding: 0 0 2px; height: 8px;" | <div style="background: linear-gradient(45deg, #ffffff 5px, #000000 0, #000000 60%, transparent 60%) bottom left, linear-gradient(315deg, #ffffff 5px, #000000 0, #000000 60%, transparent 60%) bottom right; height: 8px; position: relative; top: -8px; width: 100%;"></div>{{#if: {{{GameVersion|}}} |<small style="position: relative; top: -8px;>''status as of game version [[Update {{{GameVersion}}} (Killing Floor 2)|<span style="color: #a6a7a9;">{{{GameVersion}}}''</span>]]</small>|}} | ||
| colspan=" | |||
|- {{#if: {{{ | |||
| colspan=" | |||
| colspan=" | |||
| | |||
| | |||
|}</includeonly> | |}</includeonly> | ||
<noinclude> | <noinclude> | ||
{{KF2WeaponInfo | {{KF2WeaponInfo | ||
| Name=9mm Pistol | | Name=9mm Pistol | ||
| PerkImage= | | PerkImage=KF2_Off_Perk_White.png | ||
| PerkLink=Perks (Killing Floor 2) | | PerkLink=Perks (Killing Floor 2) | ||
| WeaponImage=KF29mm Pistol.png | | WeaponImage=KF29mm Pistol.png | ||
| MultiPerkImage=KF2_Perk_Gunslinger_White.png | |||
| MultiPerkLink=Gunslinger | |||
| MagazineSize=15 | | MagazineSize=15 | ||
| AmmoCapacity=225 | | AmmoCapacity=225 | ||
| Line 193: | Line 178: | ||
| AlternativeWeaponType=Electric Weapon | | AlternativeWeaponType=Electric Weapon | ||
| | | | ||
| | | SecondaryAmmunition_AmmoType=M203 Grenade | ||
| | | SecondaryAmmunition_AmmoImage=KF2_SecondaryAmmo_Grenade_Gray.png | ||
| SecondaryAmmunition_MagazineSize=1 | |||
| SecondaryAmmunition_AmmoCapacity=12 | |||
| SecondaryAmmunition_Damage=10 | |||
| SecondaryAmmunition_FireRate=300 | |||
| SecondaryAmmunition_Accuracy=25 | |||
| SecondaryAmmunition_Penetration=1 | |||
| SecondaryAmmunition_InitialSpareMags=3 | |||
| SecondaryAmmunition_AmmoConsumption=0 | |||
| SecondaryAmmunition_AmmoCost=13 | |||
| HealAmount=0 | | HealAmount=0 | ||
| | | HealAmount_Solo=0 | ||
| | | FullRechargeTime=0 | ||
| | | FullRechargeTime_SelfInjection=0 | ||
| | | | ||
| | | Custom_Entries= | ||
| | {{KF2VariousInfo_CustomEntry | '''Custom Entry''' | Custom Value | AddSpaceAfterEntry=true }} | ||
| | {{KF2VariousInfo_CustomEntry | '''Heal Amount''' <small>(per second)</small> | 5 ✚ }} | ||
| | {{KF2VariousInfo_CustomEntry | '''Heal Duration''' | 8s | Custom Description | Last=true }} | ||
| | |||
| | |||
| | | | ||
| | | Technical_Entries= | ||
| | {{KF2VariousInfo_CustomEntry | '''Technical Entry''' | Technical Value | Technical Description | Last=true }} | ||
| | | | ||
| | | Achievements= | ||
| | {{KF2VariousInfo_Achievement | 109 | School's Out Forever }} | ||
| | | | ||
| | | Achievements_PS4= | ||
| | {{KF2VariousInfo_Achievement | PS4=true | 0 | Platinum | Platinum }} | ||
| | | | ||
| GameVersion=1050 | |||
| | |||
| | |||
| | |||
| | |||
| | |||
| | |||
| | |||
| | |||
}} | }} | ||
| Line 258: | Line 221: | ||
| style="font-family: monospace, Courier; vertical-align: top; white-space: nowrap;" | <nowiki>| Name=</nowiki> | | style="font-family: monospace, Courier; vertical-align: top; white-space: nowrap;" | <nowiki>| Name=</nowiki> | ||
| style="vertical-align: top;" |   | | style="vertical-align: top;" |   | ||
| style="vertical-align: top | | style="vertical-align: top;" | Name of the weapon | ||
| style="vertical-align: top;" |   | | style="vertical-align: top;" |   | ||
| style="vertical-align: top;" | ''Example: '' | | style="vertical-align: top;" | ''Example: '' | ||
| Line 268: | Line 231: | ||
| style="font-family: monospace, Courier; vertical-align: top; white-space: nowrap;" | <nowiki>| PerkImage=</nowiki> | | style="font-family: monospace, Courier; vertical-align: top; white-space: nowrap;" | <nowiki>| PerkImage=</nowiki> | ||
| style="vertical-align: top;" |   | | style="vertical-align: top;" |   | ||
| style="vertical-align: top | | style="vertical-align: top;" | Name of the image of the corresponding perk | ||
| style="vertical-align: top;" |   | | style="vertical-align: top;" |   | ||
| style="vertical-align: top;" | ''Example: '' | | style="vertical-align: top;" | ''Example: '' | ||
| style="vertical-align: top;" | ''[[Media: | | style="vertical-align: top;" | ''[[Media:KF2_Off_Perk_White.png|KF2_Off_Perk_White.png]]'' | ||
|- | |- | ||
| colspan="6" | | | colspan="6" | | ||
| Line 278: | Line 241: | ||
| style="font-family: monospace, Courier; vertical-align: top; white-space: nowrap;" | <nowiki>| PerkLink=</nowiki> | | style="font-family: monospace, Courier; vertical-align: top; white-space: nowrap;" | <nowiki>| PerkLink=</nowiki> | ||
| style="vertical-align: top;" |   | | style="vertical-align: top;" |   | ||
| style="vertical-align: top | | style="vertical-align: top;" | Name of the page of the corresponding perk | ||
| style="vertical-align: top;" |   | | style="vertical-align: top;" |   | ||
| style="vertical-align: top;" | ''Example: '' | | style="vertical-align: top;" | ''Example: '' | ||
| Line 288: | Line 251: | ||
| style="font-family: monospace, Courier; vertical-align: top; white-space: nowrap;" | <nowiki>| WeaponImage=</nowiki> | | style="font-family: monospace, Courier; vertical-align: top; white-space: nowrap;" | <nowiki>| WeaponImage=</nowiki> | ||
| style="vertical-align: top;" |   | | style="vertical-align: top;" |   | ||
| style="vertical-align: top | | style="vertical-align: top;" | Name of the image of the corresponding weapon | ||
| style="vertical-align: top;" |   | | style="vertical-align: top;" |   | ||
| style="vertical-align: top;" | ''Example: '' | | style="vertical-align: top;" | ''Example: '' | ||
| Line 298: | Line 261: | ||
| style="font-family: monospace, Courier; vertical-align: top; white-space: nowrap;" | <nowiki>| MagazineSize=</nowiki> | | style="font-family: monospace, Courier; vertical-align: top; white-space: nowrap;" | <nowiki>| MagazineSize=</nowiki> | ||
| style="vertical-align: top;" |   | | style="vertical-align: top;" |   | ||
| style="vertical-align: top | | style="vertical-align: top;" | Magazine capacity | ||
| style="vertical-align: top;" |   | | style="vertical-align: top;" |   | ||
| style="vertical-align: top;" | ''Example: '' | | style="vertical-align: top;" | ''Example: '' | ||
| Line 308: | Line 271: | ||
| style="font-family: monospace, Courier; vertical-align: top; white-space: nowrap;" | <nowiki>| AmmoCapacity=</nowiki> | | style="font-family: monospace, Courier; vertical-align: top; white-space: nowrap;" | <nowiki>| AmmoCapacity=</nowiki> | ||
| style="vertical-align: top;" |   | | style="vertical-align: top;" |   | ||
| style="vertical-align: top | | style="vertical-align: top;" | Maximum spare ammo | ||
| style="vertical-align: top;" |   | | style="vertical-align: top;" |   | ||
| style="vertical-align: top;" | ''Example: '' | | style="vertical-align: top;" | ''Example: '' | ||
| Line 318: | Line 281: | ||
| style="font-family: monospace, Courier; vertical-align: top; white-space: nowrap;" | <nowiki>| Damage=</nowiki> | | style="font-family: monospace, Courier; vertical-align: top; white-space: nowrap;" | <nowiki>| Damage=</nowiki> | ||
| style="vertical-align: top;" |   | | style="vertical-align: top;" |   | ||
| style="vertical-align: top | | style="vertical-align: top;" | Damage value of the weapon | ||
| style="vertical-align: top;" |   | | style="vertical-align: top;" |   | ||
| style="vertical-align: top;" | ''Example: '' | | style="vertical-align: top;" | ''Example: '' | ||
| Line 328: | Line 291: | ||
| style="font-family: monospace, Courier; vertical-align: top; white-space: nowrap;" | <nowiki>| FireRate=</nowiki> | | style="font-family: monospace, Courier; vertical-align: top; white-space: nowrap;" | <nowiki>| FireRate=</nowiki> | ||
| style="vertical-align: top;" |   | | style="vertical-align: top;" |   | ||
| style="vertical-align: top | | style="vertical-align: top;" | Fire Rate value of the weapon | ||
| style="vertical-align: top;" |   | | style="vertical-align: top;" |   | ||
| style="vertical-align: top;" | ''Example: '' | | style="vertical-align: top;" | ''Example: '' | ||
| Line 338: | Line 301: | ||
| style="font-family: monospace, Courier; vertical-align: top; white-space: nowrap;" | <nowiki>| Accuracy=</nowiki> | | style="font-family: monospace, Courier; vertical-align: top; white-space: nowrap;" | <nowiki>| Accuracy=</nowiki> | ||
| style="vertical-align: top;" |   | | style="vertical-align: top;" |   | ||
| style="vertical-align: top | | style="vertical-align: top;" | Accuracy value of the weapon | ||
| style="vertical-align: top;" |   | | style="vertical-align: top;" |   | ||
| style="vertical-align: top;" | ''Example: '' | | style="vertical-align: top;" | ''Example: '' | ||
| Line 348: | Line 311: | ||
| style="font-family: monospace, Courier; vertical-align: top; white-space: nowrap;" | <nowiki>| Penetration=</nowiki> | | style="font-family: monospace, Courier; vertical-align: top; white-space: nowrap;" | <nowiki>| Penetration=</nowiki> | ||
| style="vertical-align: top;" |   | | style="vertical-align: top;" |   | ||
| style="vertical-align: top | | style="vertical-align: top;" | Penetration value of the weapon | ||
| style="vertical-align: top;" |   | | style="vertical-align: top;" |   | ||
| style="vertical-align: top;" | ''Example: '' | | style="vertical-align: top;" | ''Example: '' | ||
| Line 358: | Line 321: | ||
| style="font-family: monospace, Courier; vertical-align: top; white-space: nowrap;" | <nowiki>| Description=</nowiki> | | style="font-family: monospace, Courier; vertical-align: top; white-space: nowrap;" | <nowiki>| Description=</nowiki> | ||
| style="vertical-align: top;" |   | | style="vertical-align: top;" |   | ||
| style="vertical-align: top | | style="vertical-align: top;" | Trader descripton of the weapon | ||
| style="vertical-align: top;" |   | | style="vertical-align: top;" |   | ||
| style="vertical-align: top;" | ''Example: '' | | style="vertical-align: top;" | ''Example: '' | ||
| Line 373: | Line 336: | ||
| style="font-family: monospace, Courier; vertical-align: top; white-space: nowrap;" | <nowiki>| PerkName=</nowiki> | | style="font-family: monospace, Courier; vertical-align: top; white-space: nowrap;" | <nowiki>| PerkName=</nowiki> | ||
| style="vertical-align: top;" |   | | style="vertical-align: top;" |   | ||
| style="vertical-align: top | | style="vertical-align: top;" | Name of the corresponding perk | ||
| style="vertical-align: top;" |   | | style="vertical-align: top;" |   | ||
| style="vertical-align: top;" | ''Example: '' | | style="vertical-align: top;" | ''Example: '' | ||
| Line 383: | Line 346: | ||
| style="font-family: monospace, Courier; vertical-align: top; white-space: nowrap;" | <nowiki>| Pricing=</nowiki> | | style="font-family: monospace, Courier; vertical-align: top; white-space: nowrap;" | <nowiki>| Pricing=</nowiki> | ||
| style="vertical-align: top;" |   | | style="vertical-align: top;" |   | ||
| style="vertical-align: top | | style="vertical-align: top;" | How much the weapon costs at the trader | ||
| style="vertical-align: top;" |   | | style="vertical-align: top;" |   | ||
| style="vertical-align: top;" | ''Example: '' | | style="vertical-align: top;" | ''Example: '' | ||
| Line 393: | Line 356: | ||
| style="font-family: monospace, Courier; vertical-align: top; white-space: nowrap;" | <nowiki>| Weight=</nowiki> | | style="font-family: monospace, Courier; vertical-align: top; white-space: nowrap;" | <nowiki>| Weight=</nowiki> | ||
| style="vertical-align: top;" |   | | style="vertical-align: top;" |   | ||
| style="vertical-align: top | | style="vertical-align: top;" | How much the weapon weights | ||
| style="vertical-align: top;" |   | | style="vertical-align: top;" |   | ||
| style="vertical-align: top;" | ''Example: '' | | style="vertical-align: top;" | ''Example: '' | ||
| Line 408: | Line 371: | ||
| style="font-family: monospace, Courier; vertical-align: top; white-space: nowrap;" | <nowiki>| InitialSpareMags=</nowiki> | | style="font-family: monospace, Courier; vertical-align: top; white-space: nowrap;" | <nowiki>| InitialSpareMags=</nowiki> | ||
| style="vertical-align: top;" |   | | style="vertical-align: top;" |   | ||
| style="vertical-align: top | | style="vertical-align: top;" | How much spare magazines you have<br />Displays "Starting Ammo" | ||
| style="vertical-align: top;" |   | | style="vertical-align: top;" |   | ||
| style="vertical-align: top;" | ''Example: '' | | style="vertical-align: top;" | ''Example: '' | ||
| Line 418: | Line 381: | ||
| style="font-family: monospace, Courier; vertical-align: top; white-space: nowrap;" | <nowiki>| AmmoCost=</nowiki> | | style="font-family: monospace, Courier; vertical-align: top; white-space: nowrap;" | <nowiki>| AmmoCost=</nowiki> | ||
| style="vertical-align: top;" |   | | style="vertical-align: top;" |   | ||
| style="vertical-align: top | | style="vertical-align: top;" | How much one magazine costs | ||
| style="vertical-align: top;" |   | | style="vertical-align: top;" |   | ||
| style="vertical-align: top;" | ''Example: '' | | style="vertical-align: top;" | ''Example: '' | ||
| Line 428: | Line 391: | ||
| style="font-family: monospace, Courier; vertical-align: top; white-space: nowrap;" | <nowiki>| Block=</nowiki> | | style="font-family: monospace, Courier; vertical-align: top; white-space: nowrap;" | <nowiki>| Block=</nowiki> | ||
| style="vertical-align: top;" |   | | style="vertical-align: top;" |   | ||
| style="vertical-align: top | | style="vertical-align: top;" | Damage multiplier while blocking | ||
| style="vertical-align: top;" |   | | style="vertical-align: top;" |   | ||
| style="vertical-align: top;" | ''Example: '' | | style="vertical-align: top;" | ''Example: '' | ||
| Line 438: | Line 401: | ||
| style="font-family: monospace, Courier; vertical-align: top; white-space: nowrap;" | <nowiki>| Parry=</nowiki> | | style="font-family: monospace, Courier; vertical-align: top; white-space: nowrap;" | <nowiki>| Parry=</nowiki> | ||
| style="vertical-align: top;" |   | | style="vertical-align: top;" |   | ||
| style="vertical-align: top | | style="vertical-align: top;" | Damage multiplier while parrying | ||
| style="vertical-align: top;" |   | | style="vertical-align: top;" |   | ||
| style="vertical-align: top;" | ''Example: '' | | style="vertical-align: top;" | ''Example: '' | ||
| Line 448: | Line 411: | ||
| style="font-family: monospace, Courier; vertical-align: top; white-space: nowrap;" | <nowiki>| WeaponType=</nowiki> | | style="font-family: monospace, Courier; vertical-align: top; white-space: nowrap;" | <nowiki>| WeaponType=</nowiki> | ||
| style="vertical-align: top;" |   | | style="vertical-align: top;" |   | ||
| style="vertical-align: top | | style="vertical-align: top;" | The weapons weapon type | ||
| style="vertical-align: top;" |   | | style="vertical-align: top;" |   | ||
| style="vertical-align: top;" | ''Example: '' | | style="vertical-align: top;" | ''Example: '' | ||
| Line 458: | Line 421: | ||
| style="font-family: monospace, Courier; vertical-align: top; white-space: nowrap;" | <nowiki>| AlternativeWeaponType=</nowiki> | | style="font-family: monospace, Courier; vertical-align: top; white-space: nowrap;" | <nowiki>| AlternativeWeaponType=</nowiki> | ||
| style="vertical-align: top;" |   | | style="vertical-align: top;" |   | ||
| style="vertical-align: top | | style="vertical-align: top;" | The weapons alternative weapon type | ||
| style="vertical-align: top;" |   | | style="vertical-align: top;" |   | ||
| style="vertical-align: top;" | ''Example: '' | | style="vertical-align: top;" | ''Example: '' | ||
| Line 471: | Line 434: | ||
---- | ---- | ||
|- | |- | ||
| style="font-family: monospace, Courier; vertical-align: top; white-space: nowrap;" | <nowiki>| | | style="font-family: monospace, Courier; vertical-align: top; white-space: nowrap;" | <nowiki>| SecondaryAmmunition_AmmoType=</nowiki> | ||
| style="vertical-align: top;" |   | | style="vertical-align: top;" |   | ||
| style="vertical-align: top | | style="vertical-align: top;" | Ammo Type of the secondary Ammunition | ||
| style="vertical-align: top;" |   | | style="vertical-align: top;" |   | ||
| style="vertical-align: top;" | ''Example: '' | | style="vertical-align: top;" | ''Example: '' | ||
| Line 481: | Line 444: | ||
---- | ---- | ||
|- | |- | ||
| style="font-family: monospace, Courier; vertical-align: top; white-space: nowrap;" | <nowiki>| | | style="font-family: monospace, Courier; vertical-align: top; white-space: nowrap;" | <nowiki>| SecondaryAmmunition_AmmoImage=</nowiki> | ||
| style="vertical-align: top;" |   | | style="vertical-align: top;" |   | ||
| style="vertical-align: top | | style="vertical-align: top;" | Name of the Image of the corresponding Ammo Type | ||
| style="vertical-align: top;" |   | | style="vertical-align: top;" |   | ||
| style="vertical-align: top;" | ''Example: '' | | style="vertical-align: top;" | ''Example: '' | ||
| Line 491: | Line 454: | ||
---- | ---- | ||
|- | |- | ||
| style="font-family: monospace, Courier; vertical-align: top; white-space: nowrap;" | <nowiki>| | | style="font-family: monospace, Courier; vertical-align: top; white-space: nowrap;" | <nowiki>| SecondaryAmmunition_MagazineSize=</nowiki> | ||
| style="vertical-align: top;" |   | | style="vertical-align: top;" |   | ||
| style="vertical-align: top | | style="vertical-align: top;" | Magazine Size of the secondary Ammo Type | ||
| style="vertical-align: top;" |   | | style="vertical-align: top;" |   | ||
| style="vertical-align: top;" | ''Example: '' | | style="vertical-align: top;" | ''Example: '' | ||
| style="vertical-align: top;" | '' | | style="vertical-align: top;" | ''1'' | ||
|- | |- | ||
| colspan="6" | | | colspan="6" | | ||
---- | ---- | ||
|- | |- | ||
| style="font-family: monospace, Courier; vertical-align: top; white-space: nowrap;" | <nowiki>| | | style="font-family: monospace, Courier; vertical-align: top; white-space: nowrap;" | <nowiki>| SecondaryAmmunition_AmmoCapacity=</nowiki> | ||
| style="vertical-align: top;" |   | | style="vertical-align: top;" |   | ||
| style="vertical-align: top | | style="vertical-align: top;" | Maximum ammo of the secondary Ammo Type | ||
| style="vertical-align: top;" |   | | style="vertical-align: top;" |   | ||
| style="vertical-align: top;" | ''Example: '' | | style="vertical-align: top;" | ''Example: '' | ||
| style="vertical-align: top;" | '' | | style="vertical-align: top;" | ''12'' | ||
|- | |- | ||
| colspan="6" | | | colspan="6" | | ||
---- | ---- | ||
|- | |- | ||
| style="font-family: monospace, Courier; vertical-align: top; white-space: nowrap;" | <nowiki>| | | style="font-family: monospace, Courier; vertical-align: top; white-space: nowrap;" | <nowiki>| SecondaryAmmunition_Damage=</nowiki> | ||
| style="vertical-align: top;" |   | | style="vertical-align: top;" |   | ||
| style="vertical-align: top | | style="vertical-align: top;" | Damage value of the secondary Ammo Type | ||
| style="vertical-align: top;" |   | | style="vertical-align: top;" |   | ||
| style="vertical-align: top;" | ''Example: '' | | style="vertical-align: top;" | ''Example: '' | ||
| style="vertical-align: top;" | '' | | style="vertical-align: top;" | ''10.000000'' | ||
|- | |- | ||
| colspan="6" | | | colspan="6" | | ||
---- | ---- | ||
|- | |- | ||
| style="font-family: monospace, Courier; vertical-align: top; white-space: nowrap;" | <nowiki>| | | style="font-family: monospace, Courier; vertical-align: top; white-space: nowrap;" | <nowiki>| SecondaryAmmunition_FireRate=</nowiki> | ||
| style="vertical-align: top;" |   | | style="vertical-align: top;" |   | ||
| style="vertical-align: top | | style="vertical-align: top;" | Fire Rate value of the secondary Ammo Type | ||
| style="vertical-align: top;" |   | | style="vertical-align: top;" |   | ||
| style="vertical-align: top;" | ''Example: '' | | style="vertical-align: top;" | ''Example: '' | ||
| style="vertical-align: top;" | '' | | style="vertical-align: top;" | ''300.000000'' | ||
|- | |- | ||
| colspan="6" | | | colspan="6" | | ||
---- | ---- | ||
|- | |- | ||
| style="font-family: monospace, Courier; vertical-align: top; white-space: nowrap;" | <nowiki>| | | style="font-family: monospace, Courier; vertical-align: top; white-space: nowrap;" | <nowiki>| SecondaryAmmunition_Accuracy=</nowiki> | ||
| style="vertical-align: top;" |   | | style="vertical-align: top;" |   | ||
| style="vertical-align: top | | style="vertical-align: top;" | Accuracy value of the secondary Ammo Type | ||
| style="vertical-align: top;" |   | | style="vertical-align: top;" |   | ||
| style="vertical-align: top;" | ''Example: '' | | style="vertical-align: top;" | ''Example: '' | ||
| style="vertical-align: top;" | '' | | style="vertical-align: top;" | ''25.000000'' | ||
|- | |- | ||
| colspan="6" | | | colspan="6" | | ||
---- | ---- | ||
|- | |- | ||
| style="font-family: monospace, Courier; vertical-align: top; white-space: nowrap;" | <nowiki>| | | style="font-family: monospace, Courier; vertical-align: top; white-space: nowrap;" | <nowiki>| SecondaryAmmunition_Penetration=</nowiki> | ||
| style="vertical-align: top;" |   | | style="vertical-align: top;" |   | ||
| style="vertical-align: top | | style="vertical-align: top;" | Penetration value of the secondary Ammo Type | ||
| style="vertical-align: top;" |   | | style="vertical-align: top;" |   | ||
| style="vertical-align: top;" | ''Example: '' | | style="vertical-align: top;" | ''Example: '' | ||
| style="vertical-align: top;" | '' | | style="vertical-align: top;" | ''1.000000'' | ||
|- | |- | ||
| colspan="6" | | | colspan="6" | | ||
---- | ---- | ||
|- | |- | ||
| style="font-family: monospace, Courier; vertical-align: top; white-space: nowrap;" | <nowiki>| | | style="font-family: monospace, Courier; vertical-align: top; white-space: nowrap;" | <nowiki>| SecondaryAmmunition_InitialSpareMags=</nowiki> | ||
| style="vertical-align: top;" |   | | style="vertical-align: top;" |   | ||
| style="vertical-align: top | | style="vertical-align: top;" | Initial ammo of the secondary Ammo Type | ||
| style="vertical-align: top;" |   | | style="vertical-align: top;" |   | ||
| style="vertical-align: top;" | ''Example: '' | | style="vertical-align: top;" | ''Example: '' | ||
| Line 561: | Line 524: | ||
---- | ---- | ||
|- | |- | ||
| style="font-family: monospace, Courier; vertical-align: top; white-space: nowrap;" | <nowiki>| | | style="font-family: monospace, Courier; vertical-align: top; white-space: nowrap;" | <nowiki>| SecondaryAmmunition_AmmoConsumption=</nowiki> | ||
| style="vertical-align: top;" |   | | style="vertical-align: top;" |   | ||
| style="vertical-align: top | | style="vertical-align: top;" | How much ammo it takes to use one shot / attack with the weapon | ||
| style="vertical-align: top;" |   | | style="vertical-align: top;" |   | ||
| style="vertical-align: top;" | ''Example: '' | | style="vertical-align: top;" | ''Example: '' | ||
| Line 571: | Line 534: | ||
---- | ---- | ||
|- | |- | ||
| style="font-family: monospace, Courier; vertical-align: top; white-space: nowrap;" | <nowiki>| | | style="font-family: monospace, Courier; vertical-align: top; white-space: nowrap;" | <nowiki>| HealAmount=</nowiki> | ||
| style="vertical-align: top;" |   | | style="vertical-align: top;" |   | ||
| style="vertical-align: top | | style="vertical-align: top;" | How much the Healing Dart heals other players | ||
| style="vertical-align: top;" |   | | style="vertical-align: top;" |   | ||
| style="vertical-align: top;" | ''Example: '' | | style="vertical-align: top;" | ''Example: '' | ||
| style="vertical-align: top;" | '' | | style="vertical-align: top;" | ''0'' | ||
|- | |- | ||
| colspan="6" | | | colspan="6" | | ||
---- | ---- | ||
|- | |- | ||
| | | style="font-family: monospace, Courier; vertical-align: top; white-space: nowrap;" | <nowiki>| HealAmount_Solo=</nowiki> | ||
| style="vertical-align: top;" |   | |||
| style="vertical-align: top;" | How much you heal yourself <small>(Syringe only)</small> | |||
| style="vertical-align: top;" |   | |||
| style="vertical-align: top;" | ''Example: '' | |||
| style="vertical-align: top;" | ''0'' | |||
|- | |- | ||
| colspan="6" | | | colspan="6" | | ||
---- | ---- | ||
|- | |- | ||
| style="font-family: monospace, Courier; vertical-align: top; white-space: nowrap;" | <nowiki>| | | style="font-family: monospace, Courier; vertical-align: top; white-space: nowrap;" | <nowiki>| FullRechargeTime=</nowiki> | ||
| style="vertical-align: top;" |   | | style="vertical-align: top;" |   | ||
| style="vertical-align: top | | style="vertical-align: top;" | How long it takes until the Healing Dart / Syringe is fully charged after healing other players | ||
| style="vertical-align: top;" |   | | style="vertical-align: top;" |   | ||
| style="vertical-align: top;" | ''Example: '' | | style="vertical-align: top;" | ''Example: '' | ||
| style="vertical-align: top;" | '' | | style="vertical-align: top;" | ''0'' | ||
|- | |- | ||
| colspan="6" | | | colspan="6" | | ||
---- | ---- | ||
|- | |- | ||
| style="font-family: monospace, Courier; vertical-align: top; white-space: nowrap;" | <nowiki>| | | style="font-family: monospace, Courier; vertical-align: top; white-space: nowrap;" | <nowiki>| FullRechargeTime_SelfInjection=</nowiki> | ||
| style="vertical-align: top;" |   | | style="vertical-align: top;" |   | ||
| style="vertical-align: top | | style="vertical-align: top;" | How long it takes until the Syringe is fully charged after healing yourself <small>(Syringe only)</small> | ||
| style="vertical-align: top;" |   | | style="vertical-align: top;" |   | ||
| style="vertical-align: top;" | ''Example: '' | | style="vertical-align: top;" | ''Example: '' | ||
| style="vertical-align: top;" | '' | | style="vertical-align: top;" | ''0'' | ||
|- | |- | ||
| colspan="6" | | | colspan="6" | | ||
---- | ---- | ||
|- | |- | ||
| | | style="font-family: monospace, Courier; vertical-align: top; white-space: nowrap;" | <nowiki>| SecondaryAmmunition_AmmoCost=</nowiki> | ||
| style="vertical-align: top;" |   | |||
| style="vertical-align: top;" | How much one magazine costs of the secondary Ammo Type | |||
| style="vertical-align: top;" |   | |||
| style="vertical-align: top;" | ''Example: '' | |||
| style="vertical-align: top;" | ''13'' | |||
|- | |- | ||
| colspan="6" | | | colspan="6" | | ||
---- | ---- | ||
|- | |- | ||
| colspan="6" style="font-family: monospace, Courier; vertical-align: top; white-space: nowrap;" | <nowiki>| | | colspan="6" style="font-family: monospace, Courier; vertical-align: top; white-space: nowrap;" | <nowiki>|</nowiki> | ||
|- | |- | ||
| colspan="6" | | | colspan="6" | | ||
---- | ---- | ||
|- | |- | ||
| style="font-family: monospace, Courier; vertical-align: top; white-space: nowrap;" | <nowiki>| | | style="font-family: monospace, Courier; vertical-align: top; white-space: nowrap;" | <nowiki>| Custom_Entries=</nowiki><br /><small><nowiki> {{KF2VariousInfo_CustomEntry|1|2|3}}</nowiki><br /><nowiki> {{KF2VariousInfo_CustomEntry|1|2|3}}</nowiki><br /><nowiki> {{KF2VariousInfo_CustomEntry|1|2|3|AddSpaceAfterEntry=true}}</nowiki><br /><nowiki> {{KF2VariousInfo_CustomEntry|1|2|3}}</nowiki><br /><nowiki> {{KF2VariousInfo_CustomEntry|1|2|3|Last=true}}</nowiki></small> | ||
| style=" | | style="vertical-align: top;" |   | ||
| style=" | | style="vertical-align: top;" | Additional custom entries | ||
| | ''<span style="font-family: monospace, Curier;">1</span> - Entry Title''<br />''<span style="font-family: monospace, Curier;">2</span> - Entry Value''<br />''<span style="font-family: monospace, Curier;">3</span> - Entry Description (optional)'' | ||
''<span style="font-family: monospace, Curier;">AddSpaceAfterEntry=true</span><br />Adds some space between the current custom entry and the following'' | |||
''<span style="font-family: monospace, Curier;">Last=true</span><br />Only if a description is defined and this custom entry is the last one in this section <span style="font-family: monospace, Curier;">Last</span> hast to be set to <span style="font-family: monospace, Curier;">true</span> | |||
| style="vertical-align: top;" |   | |||
| style="vertical-align: top;" | ''Example: '' | |||
| style="vertical-align: top;" | ''<span style="white-space: nowrap;"><small><nowiki>{{KF2VariousInfo_CustomEntry|'''Custom Entry'''|Custom Value|AddSpaceAfterEntry=true}}</nowiki><br /><nowiki>{{KF2VariousInfo_CustomEntry|'''Heal Amount''' <small>(per second)</small>|5 &#10010;}}</nowiki><br /><nowiki>{{KF2VariousInfo_CustomEntry|'''Heal Duration'''|8s|Custom Description|Last=true}}</nowiki></small></span>'' | |||
|- | |- | ||
| colspan="6" | | | colspan="6" | | ||
---- | ---- | ||
|- | |- | ||
| colspan="6" style="font-family: monospace, Courier; vertical-align: top; white-space: nowrap;" | <nowiki>| | | colspan="6" style="font-family: monospace, Courier; vertical-align: top; white-space: nowrap;" | <nowiki>|</nowiki> | ||
|- | |- | ||
| colspan="6" | | | colspan="6" | | ||
---- | ---- | ||
|- | |- | ||
| | | style="font-family: monospace, Courier; vertical-align: top; white-space: nowrap;" | <nowiki>| Technical_Entries=</nowiki><br /><small><nowiki> {{KF2VariousInfo_CustomEntry|1|2|3}}</nowiki><br /><nowiki> {{KF2VariousInfo_CustomEntry|1|2|3}}</nowiki><br /><nowiki> {{KF2VariousInfo_CustomEntry|1|2|3|AddSpaceAfterEntry=true}}</nowiki><br /><nowiki> {{KF2VariousInfo_CustomEntry|1|2|3}}</nowiki><br /><nowiki> {{KF2VariousInfo_CustomEntry|1|2|3|Last=true}}</nowiki></small> | ||
| style="vertical-align: top;" |   | |||
| style="vertical-align: top;" | Additional technical entries | |||
''<span style="font-family: monospace, Curier;">1</span> - Entry Title''<br />''<span style="font-family: monospace, Curier;">2</span> - Entry Value''<br />''<span style="font-family: monospace, Curier;">3</span> - Entry Description (optional)'' | |||
''<span style="font-family: monospace, Curier;">AddSpaceAfterEntry=true</span><br />Adds some space between the current custom entry and the following'' | |||
''<span style="font-family: monospace, Curier;">Last=true</span><br />Only if a description is defined and this custom entry is the last one in this section <span style="font-family: monospace, Curier;">Last</span> hast to be set to <span style="font-family: monospace, Curier;">true</span> | |||
| style="vertical-align: top;" |   | |||
| style="vertical-align: top;" | ''Example: '' | |||
| style="vertical-align: top;" | ''<span style="white-space: nowrap;"><small><nowiki>{{KF2VariousInfo_CustomEntry|'''Technical Entry'''|Technical Value|Technical Description|Last=true}}</nowiki></small></span>'' | |||
|- | |- | ||
| colspan="6" | | | colspan="6" | | ||
| Line 640: | Line 631: | ||
---- | ---- | ||
|- | |- | ||
| style="font-family: monospace, Courier; vertical-align: top; white-space: nowrap;" | <nowiki>| | | style="font-family: monospace, Courier; vertical-align: top; white-space: nowrap;" | <nowiki>| Achievements=</nowiki><br /><small><nowiki> {{KF2VariousInfo_Achievement|1|2}}</nowiki></small> | ||
| style="vertical-align: top;" |   | | style="vertical-align: top;" |   | ||
| style="vertical-align: top; | | style="vertical-align: top;" | Related Achievement entrys | ||
''<span style="font-family: monospace, Curier;">1</span> - Achievement Number''<br /><small>''According to [https://steamdb.info/app/232090/stats/ steamdb.info]''</small> | |||
''<span style="font-family: monospace, Curier;">2</span> - Achievement Title'' | |||
| style="vertical-align: top;" |   | | style="vertical-align: top;" |   | ||
| style="vertical-align: top;" | ''Example: '' | | style="vertical-align: top;" | ''Example: '' | ||
| style="vertical-align: top;" | '' | | style="vertical-align: top;" | ''<span style="white-space: nowrap;"><small><nowiki>{{KF2VariousInfo_Achievement|109|School's Out Forever}}</nowiki></small></span>'' | ||
|- | |- | ||
| colspan="6" | | | colspan="6" | | ||
---- | ---- | ||
|- | |- | ||
| style="font-family: monospace, Courier; vertical-align: top; white-space: nowrap;" | <nowiki>| | | colspan="6" style="font-family: monospace, Courier; vertical-align: top; white-space: nowrap;" | <nowiki>|</nowiki> | ||
|- | |- | ||
| colspan="6" | | | colspan="6" | | ||
---- | ---- | ||
|- | |- | ||
| | | style="font-family: monospace, Courier; vertical-align: top; white-space: nowrap;" | <nowiki>| GameVersion=</nowiki> | ||
| | | style="vertical-align: top;" |   | ||
| style="vertical-align: top;" | Version of Killing Floor 2 these stats are taken from | |||
| style="vertical-align: top;" |   | |||
| style="vertical-align: top;" | ''Example: '' | |||
| style="vertical-align: top;" | ''1050'' | |||
| style=" | |||
| style=" | |||
| style=" | |||
| style=" | |||
|- | |- | ||
| colspan="6" | | | colspan="6" | | ||
| Line 694: | Line 665: | ||
=== Weapon Types === | === Weapon Types === | ||
There are 10 specific choices for this section. | There are 10 specific choices for this section. | ||
{| | {{KF2Table | ||
| th_0_0=Weapon Type | |||
| | |||
| | | th_0_1=Corresponding Image | ||
| Pistol | | | ||
| | | th_1_0=Pistol | ||
| | | td_1_1_image=KF2_WeaponType_Pistol_Black.png | ||
| Shotgun | | td_1_1_imageWidth=20 | ||
| | | td_1_1_imageHeight=20 | ||
| | | | ||
| Rifle | | th_2_0=Shotgun | ||
| | | td_2_1_image=KF2_WeaponType_Shotgun_Black.png | ||
| | | td_2_1_imageWidth=20 | ||
| Projectile | | td_2_1_imageHeight=20 | ||
| | | | ||
| | | th_3_0=Rifle | ||
| Flame Weapon | | td_3_1_image=KF2_WeaponType_Rifle_Black.png | ||
| | | td_3_1_imageWidth=20 | ||
| | | td_3_1_imageHeight=20 | ||
| Electric Weapon | | | ||
| | | th_4_0=Projectile | ||
| | | td_4_1_image=KF2_WeaponType_Projectile_Black.png | ||
| Explosive | | td_4_1_imageWidth=20 | ||
| | | td_4_1_imageHeight=20 | ||
| | | | ||
| Assault Rifle | | th_5_0=Flame Weapon | ||
| | | td_5_1_image=KF2_WeaponType_Flame_Weapon_Black.png | ||
| | | td_5_1_imageWidth=20 | ||
| Melee Weapon | | td_5_1_imageHeight=20 | ||
| | | | ||
| | | th_6_0=Electric Weapon | ||
| SMG | | td_6_1_image=KF2_WeaponType_Electric_Weapon_Black.png | ||
| | | td_6_1_imageWidth=20 | ||
| td_6_1_imageHeight=20 | |||
| | |||
| th_7_0=Explosive | |||
| td_7_1_image=KF2_WeaponType_Explosive_Black.png | |||
| td_7_1_imageWidth=20 | |||
| td_7_1_imageHeight=20 | |||
| | |||
| th_8_0=Assault Rifle | |||
| td_8_1_image=KF2_WeaponType_Assault_Rifle_Black.png | |||
| td_8_1_imageWidth=20 | |||
| td_8_1_imageHeight=20 | |||
| | |||
| th_9_0=Melee Weapon | |||
| td_9_1_image=KF2_WeaponType_Melee_Weapon_Black.png | |||
| td_9_1_imageWidth=20 | |||
| td_9_1_imageHeight=20 | |||
| | |||
| th_10_0=SMG | |||
| td_10_1_image=KF2_WeaponType_SMG_Black.png | |||
| td_10_1_imageWidth=20 | |||
| td_10_1_imageHeight=20 | |||
}} | |||
== Template == | == Template == | ||
| Line 755: | Line 747: | ||
| AlternativeWeaponType= | | AlternativeWeaponType= | ||
| | | | ||
| | | SecondaryAmmunition_AmmoType= | ||
| | | SecondaryAmmunition_AmmoImage= | ||
| SecondaryAmmunition_MagazineSize= | |||
| SecondaryAmmunition_AmmoCapacity= | |||
| SecondaryAmmunition_Damage= | |||
| SecondaryAmmunition_FireRate= | |||
| SecondaryAmmunition_Accuracy= | |||
| SecondaryAmmunition_Penetration= | |||
| SecondaryAmmunition_InitialSpareMags= | |||
| SecondaryAmmunition_AmmoConsumption= | |||
| SecondaryAmmunition_AmmoCost= | |||
| HealAmount= | | HealAmount= | ||
| | | HealAmount_Solo= | ||
| | | FullRechargeTime= | ||
| | | FullRechargeTime_SelfInjection= | ||
| | | | ||
| | | Custom_Entries= | ||
| | {{KF2VariousInfo_CustomEntry|1|2|3}} | ||
| | | | ||
| | | Technical_Entries= | ||
{{KF2VariousInfo_CustomEntry|1|2|3}} | |||
| | |||
| Achievements= | |||
{{KF2VariousInfo_Achievement|1|2}} | |||
| | | | ||
| | | Achievements_PS4= | ||
| | {{KF2VariousInfo_Achievement|PS4=true|1|2|3}} | ||
| | |||
| | |||
| | |||
| | | | ||
| | | GameVersion= | ||
}}</pre> | }}</pre> | ||
{{KF2NavBox}} | {{KF2NavBox}} | ||
</noinclude> | </noinclude> | ||
Latest revision as of 15:14, 24 January 2018
| Killing Floor 2 item | |||
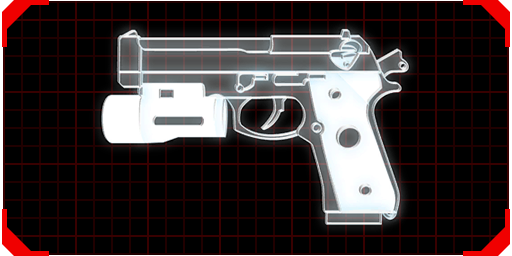
9mm Pistol | |||

| |||
| + | |||
| MAGAZINE SIZE | 15 | ||
| SPARE AMMO CAPACITY | 225 | ||
| DAMAGE | 15 | ||
| FIRE RATE | 343 | ||
| ACCURACY | 50 | ||
| PENETRATION | 0 | ||
| • Fire mode is semi-auto only. • This is the standard 9mm pistol. Simple and cheap (very cheap, frankly, to you), it is the basic sidearm for all Horzine operatives. | |||
General Information | |||
| Pricing | |||
| Ammo Cost | |||
| Weapon Type | Pistol | ||
| Alternative Weapon Type | Electric Weapon | ||
Weapon Information | |||
| Starting Ammo | 15 + 105 | ||
| Block (damage multiplier) | ×1 | ||
| Parry (damage multiplier) | ×1 | ||
| Secondary Ammunition | |||
| Ammo Type | M203 Grenade | ||
| Magazine Size | 1 | ||
| Spare Ammo Capacity | 12 | ||
| Damage | 10 | ||
| Fire Rate | 300 | ||
| Accuracy | 25 | ||
| Penetration | 1 | ||
| Starting Ammo | 1 + 3 | ||
| Ammo Consumption (per use) | 0 | ||
| Ammo Cost | |||
| Heal Amount | 0 ✚ | ||
| Heal Amount (solo) | 0 ✚ | ||
| Full Recharge Time | 0s | ||
| Full Recharge Time (self injection) | 0s | ||
Custom Entry Custom Value Heal Amount (per second) 5 ✚ Heal Duration 8s Custom Description
| |||
Technical Information | |||
Technical Entry Technical Value Technical Description
| |||
Related Achievements | |||
| PS4 Trophies | |||
| status as of game version 1050 | |||
Syntax
Parameters
| {{KF2WeaponInfo | |||||
|
| |||||
| | Name= | Name of the weapon | Example: | 9mm Pistol | ||
|
| |||||
| | PerkImage= | Name of the image of the corresponding perk | Example: | KF2_Off_Perk_White.png | ||
|
| |||||
| | PerkLink= | Name of the page of the corresponding perk | Example: | Perks (Killing Floor 2) | ||
|
| |||||
| | WeaponImage= | Name of the image of the corresponding weapon | Example: | KF29mm Pistol.png | ||
|
| |||||
| | MagazineSize= | Magazine capacity | Example: | 15 | ||
|
| |||||
| | AmmoCapacity= | Maximum spare ammo | Example: | 225 | ||
|
| |||||
| | Damage= | Damage value of the weapon | Example: | 15.000000 | ||
|
| |||||
| | FireRate= | Fire Rate value of the weapon | Example: | 342.857147 | ||
|
| |||||
| | Accuracy= | Accuracy value of the weapon | Example: | 50.000000 | ||
|
| |||||
| | Penetration= | Penetration value of the weapon | Example: | 0.000000 | ||
|
| |||||
| | Description= | Trader descripton of the weapon | Example: | • Fire mode is semi-auto only. • This is the standard 9mm pistol. Simple and cheap (very cheap, frankly, to you), it is the basic sidearm for all Horzine operatives. | ||
|
| |||||
| | | |||||
|
| |||||
| | PerkName= | Name of the corresponding perk | Example: | All | ||
|
| |||||
| | Pricing= | How much the weapon costs at the trader | Example: | 0 | ||
|
| |||||
| | Weight= | How much the weapon weights | Example: | 0 | ||
|
| |||||
| | | |||||
|
| |||||
| | InitialSpareMags= | How much spare magazines you have Displays "Starting Ammo" |
Example: | 7 | ||
|
| |||||
| | AmmoCost= | How much one magazine costs | Example: | 8 | ||
|
| |||||
| | Block= | Damage multiplier while blocking | Example: | 1 | ||
|
| |||||
| | Parry= | Damage multiplier while parrying | Example: | 1 | ||
|
| |||||
| | WeaponType= | The weapons weapon type | Example: | Pistol | ||
|
| |||||
| | AlternativeWeaponType= | The weapons alternative weapon type | Example: | Electric Weapon | ||
|
| |||||
| | | |||||
|
| |||||
| | SecondaryAmmunition_AmmoType= | Ammo Type of the secondary Ammunition | Example: | M203 Grenade | ||
|
| |||||
| | SecondaryAmmunition_AmmoImage= | Name of the Image of the corresponding Ammo Type | Example: | KF2_SecondaryAmmo_Grenade_Gray.png | ||
|
| |||||
| | SecondaryAmmunition_MagazineSize= | Magazine Size of the secondary Ammo Type | Example: | 1 | ||
|
| |||||
| | SecondaryAmmunition_AmmoCapacity= | Maximum ammo of the secondary Ammo Type | Example: | 12 | ||
|
| |||||
| | SecondaryAmmunition_Damage= | Damage value of the secondary Ammo Type | Example: | 10.000000 | ||
|
| |||||
| | SecondaryAmmunition_FireRate= | Fire Rate value of the secondary Ammo Type | Example: | 300.000000 | ||
|
| |||||
| | SecondaryAmmunition_Accuracy= | Accuracy value of the secondary Ammo Type | Example: | 25.000000 | ||
|
| |||||
| | SecondaryAmmunition_Penetration= | Penetration value of the secondary Ammo Type | Example: | 1.000000 | ||
|
| |||||
| | SecondaryAmmunition_InitialSpareMags= | Initial ammo of the secondary Ammo Type | Example: | 4 | ||
|
| |||||
| | SecondaryAmmunition_AmmoConsumption= | How much ammo it takes to use one shot / attack with the weapon | Example: | 0 | ||
|
| |||||
| | HealAmount= | How much the Healing Dart heals other players | Example: | 0 | ||
|
| |||||
| | HealAmount_Solo= | How much you heal yourself (Syringe only) | Example: | 0 | ||
|
| |||||
| | FullRechargeTime= | How long it takes until the Healing Dart / Syringe is fully charged after healing other players | Example: | 0 | ||
|
| |||||
| | FullRechargeTime_SelfInjection= | How long it takes until the Syringe is fully charged after healing yourself (Syringe only) | Example: | 0 | ||
|
| |||||
| | SecondaryAmmunition_AmmoCost= | How much one magazine costs of the secondary Ammo Type | Example: | 13 | ||
|
| |||||
| | | |||||
|
| |||||
| | Custom_Entries= {{KF2VariousInfo_CustomEntry|1|2|3}} {{KF2VariousInfo_CustomEntry|1|2|3}} {{KF2VariousInfo_CustomEntry|1|2|3|AddSpaceAfterEntry=true}} {{KF2VariousInfo_CustomEntry|1|2|3}} {{KF2VariousInfo_CustomEntry|1|2|3|Last=true}} |
Additional custom entries
1 - Entry Title AddSpaceAfterEntry=true Last=true |
Example: | {{KF2VariousInfo_CustomEntry|'''Custom Entry'''|Custom Value|AddSpaceAfterEntry=true}} {{KF2VariousInfo_CustomEntry|'''Heal Amount''' <small>(per second)</small>|5 ✚}} {{KF2VariousInfo_CustomEntry|'''Heal Duration'''|8s|Custom Description|Last=true}} | ||
|
| |||||
| | | |||||
|
| |||||
| | Technical_Entries= {{KF2VariousInfo_CustomEntry|1|2|3}} {{KF2VariousInfo_CustomEntry|1|2|3}} {{KF2VariousInfo_CustomEntry|1|2|3|AddSpaceAfterEntry=true}} {{KF2VariousInfo_CustomEntry|1|2|3}} {{KF2VariousInfo_CustomEntry|1|2|3|Last=true}} |
Additional technical entries
1 - Entry Title AddSpaceAfterEntry=true Last=true |
Example: | {{KF2VariousInfo_CustomEntry|'''Technical Entry'''|Technical Value|Technical Description|Last=true}} | ||
|
| |||||
| | | |||||
|
| |||||
| | Achievements= {{KF2VariousInfo_Achievement|1|2}} |
Related Achievement entrys
1 - Achievement Number 2 - Achievement Title |
Example: | {{KF2VariousInfo_Achievement|109|School's Out Forever}} | ||
|
| |||||
| | | |||||
|
| |||||
| | GameVersion= | Version of Killing Floor 2 these stats are taken from | Example: | 1050 | ||
|
| |||||
| }} | |||||
Weapon Types
There are 10 specific choices for this section.
Weapon Type |
Corresponding Image |
|---|---|
Pistol |
|
Shotgun |
|
Rifle |
|
Projectile |
|
Flame Weapon |
|
Electric Weapon |
|
Explosive |
|
Assault Rifle |
|
Melee Weapon |
|
SMG |
Template
Copy this template for quick usage.
{{KF2WeaponInfo
| Name=
| PerkImage=
| PerkLink=
| WeaponImage=
| MagazineSize=
| AmmoCapacity=
| Damage=
| FireRate=
| Accuracy=
| Penetration=
| Description=
|
| PerkName=
| Pricing=
| Weight=
|
| InitialSpareMags=
| AmmoCost=
| Block=
| Parry=
| WeaponType=
| AlternativeWeaponType=
|
| SecondaryAmmunition_AmmoType=
| SecondaryAmmunition_AmmoImage=
| SecondaryAmmunition_MagazineSize=
| SecondaryAmmunition_AmmoCapacity=
| SecondaryAmmunition_Damage=
| SecondaryAmmunition_FireRate=
| SecondaryAmmunition_Accuracy=
| SecondaryAmmunition_Penetration=
| SecondaryAmmunition_InitialSpareMags=
| SecondaryAmmunition_AmmoConsumption=
| SecondaryAmmunition_AmmoCost=
| HealAmount=
| HealAmount_Solo=
| FullRechargeTime=
| FullRechargeTime_SelfInjection=
|
| Custom_Entries=
  {{KF2VariousInfo_CustomEntry|1|2|3}}
|
| Technical_Entries=
  {{KF2VariousInfo_CustomEntry|1|2|3}}
|
| Achievements=
  {{KF2VariousInfo_Achievement|1|2}}
|
| Achievements_PS4=
  {{KF2VariousInfo_Achievement|PS4=true|1|2|3}}
|
| GameVersion=
}}