Red Orchestra 2: Heroes Of Stalingrad/LevelDesign/OptimizationGuide: Difference between revisions
| Line 206: | Line 206: | ||
*Per Object shadows | *Per Object shadows | ||
*Preshadows | *Preshadows | ||
*Adjusted FPS | *Adjusted FPS = 1000/Max(DrawTime, GPUTime). This is the effective FPS you'll get when you are bound by rendering. This basically elimiates the GameTime from the equation, since the posed players do not give an accurate representation of GameTime. | ||
==Store Results for Future Profiles== | ==Store Results for Future Profiles== | ||
Revision as of 21:06, 6 July 2012
Recommended Reading
If you are new to optimizing in general for Unreal 3 games please have a look through the below web pages so you are up to speed with the grunt work.
Epic's Unreal Development Network - UDN
Epic's Performance UDN Page
Epic's Profiling UDN Page
Epic's Memory Profiling UDN Page
Epic's Rendering Thread Profiling UDN Page
Introduction
The purpose of this document is to give information on the guidelines used to optimize the maps inside RO2. These guidelines worked for us. If you are a community level designer and/or artist you may find this document useful. This document will cover the various approaches and the reasoning behind decisions so that the reader may be able to avoid pitfalls when making levels for Red Orchestra 2.
The following is a list of items that LDs and Environment Artists should follow for a map to perform well. Most of these were lessons learnt while optimizing RO2 and should also serve as a guideline for modders to make sure that they don't run into the same pitfalls.
Level Performance Guidelines
Terrain
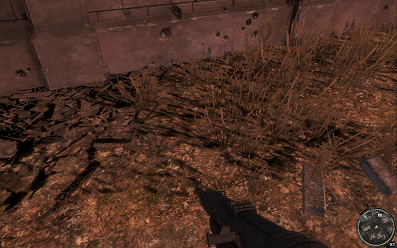
bCastDynamicShadow
This flag should be OFF. Setting this flag to ON will cast dynamic preshadows by the terrain for both per-object shadows and whole scene dynamic shadows, which can be very expensive depending on the number of dynamic primitives in the scene. Preshadows (which are dynamic shadows from the static environment onto dynamic objects) only make sense if the terrain has hills and valleys throughout the scene. If the scene just has a few mounds here and there it might be worth modeling the mounds with static meshes and have the terrain blend in at the bottom. The side effect of disabling bCastDynamicShadow is that terrain deco layers (e.g. grass) will not cast whole scene dynamic shadows. But considering that shadows from deco layers usually are low-res and don't look great, it is a good price to pay for a substantial performance boost.
Terrain Layers
The RO2 engine allows for a maximum of 12 textures to be blended for terrain. These 12 textures could be part of 2 terrain layers (6 textures each), 3 terrain layers (4 textures each), or any other combination thereof. This is a hard limit for the engine, and exceeding this limit will result in rainbow colored terrain patches. However, fetching and accessing so many textures is not cheap and since the terrain usually takes up a large portion of the screen, it is recommended that you keep the number of blend textures to a minimum.
One example for this is that say you have a terrain which comprises or dirt, rubble and snow and one part of the terrain is solid concrete. Instead of making 4 terrain layers of dirt, rubble, snow and concrete and blending between them it is more optimized if the terrain uses 3 layers of dirt, rubble and snow, and the concrete portion is modeled separately as BSP, static mesh or even another terrain actor. Doing this will reduce the overall cost of rendering the entire terrain since the concrete layer texture fetches are eliminated for the rest of the terrain that doesn't need it.
Static Meshes
bCastDynamicShadow
When placing a static mesh in the level, you should decide whether you want it to cast dynamic preshadows or not. Preshadows are dynamic shadows from the static environment onto dynamic objects, and can be very expensive depending on the number of dynamic primitives in the scene. Turning off this flag for a lot of static meshes in the environment in the scene such as debris, rubble, etc. will improve the dynamic shadow performance.
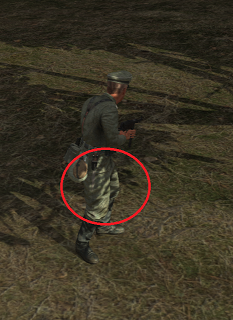
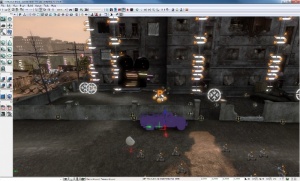
Once the lighting in a map is finalized, you can also go through and set bCastDynamicShadow to false for all static meshes that are already in shadow (such as the truck in the following image, which is is shadow of the building) since any dynamic shadow cast by it will be drowned by the static shadow cast by the environment.
Distance Culling
Using distance culling effectively will allow you to have a lot of detail in your environment whilst still allowing the map to perform well. There are 2 ways to do this :
- You can either put a CullDistanceVolume around the map and the let the map build process choose the appropriate cull distances for the placed static meshes in the level. This method is not ideal though, and might cause certain cover objects, etc. to disappear at a distance (which is not desirable).
- Or, you can manually set the MaxDrawDistance for each object.
Materials
Using Material LODs
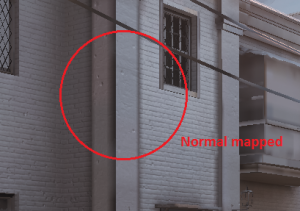
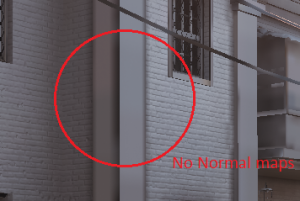
In order to make the best looking environment materials as well as keep the overall performance cost low, consider using material LODs. The concept is very simple - assign the best looking/highest instruction count material to the base LOD for a static mesh, and then create another LOD for the static mesh (this can have the exact same triangle count as the base LOD) and assign it a simple material that does not have expensive operations such as depth biased alpha, specularity, cube maps or even normal maps. Such subtle lighting effects cannot be perceived from a distance anyway, and will make improve the fill rate for the rendered scene.
Dynamic Actors
bDisablePerObjectShadows
If you place an actor onto a level that casts dynamic shadows, the shadowing cost for it is one per object shadow and in certain cases a preshadow as well. If bDisablePerObjectShadows is set it will only cast dynamic shadows for the primitive if it is within the whole scene dominant shadow radius. This reduces the cost associated with shadowing for the primitive. If whole scene dominant shadows are not enabled, the primitive will not cast any dynamic shadows.

bAllowMergedDynamicShadows
If this flag is set, any primitive that allows per object dynamic shadows will be considered for being merged with other primitives that allow merged per object dynamic shadows and are close enough. As a consequence, the number of dynamic shadows in the scene are reduced.
The radius used to merge primitives is dynamically adjusted based on the distance of the primitives from the viewer. It starts at MinShadowGroupRadius (when the primitive is closest to the viewer) and increases up to MaxShadowGroupRadius (when the primitive is ShadowGroupRampCutoff away from the viewer). The rate of increase is determined by ShadowGroupRadiusRampUpFactor. For anything beyond ShadowGroupRampCutoff, the MaxShadowGroupRadius will be used. All these settings are available in the engine INI.

Draw Calls
About Draw Calls
As the UE3 rendering engine is a Direct X 9.0 renderer, it is limited to one CPU core to tell the GPU about what to draw. It does this via a Draw Call. Each object you place in the world is at least one draw call (if not more due to shadows). The CPU can become the bottleneck of a level if it is trying to tell the GPU to draw a detailed scene and chokes on the amount of draw calls. This is why it is best to limit the amount in any given scene. With the Red Orchestra SDK it is very easy to make many types of levels, from wide open plains (or with rolling hills) to detailed interior settings and building to building fighting. However, depending on what the scale of your map is, you will be limited in the amount of "detail" you can place in the level.
Limiting Draw Calls Per Scene
Suggested Maximum Draw Call Limit: 2000
Using the console command Stat d3d9rhi" a Level Designer/Artist (or anyone) can go through a level and find out the amount of Draw Calls and optimize based on areas where it has increased beyond the suggested maximum.
The details settings for both users and in the SDK allows Level Designers to put some objects on different levels of the setting so those with faster computers (in this case CPU core speed) can see more details without harming performance for those with slower machines. It is best to do this with "fluff" detail that is not gameplay important but just makes the level look better overall.
Profiling Preliminary Work
There is a small amount of setup work that must be completed.
RODebugPosedPlayer
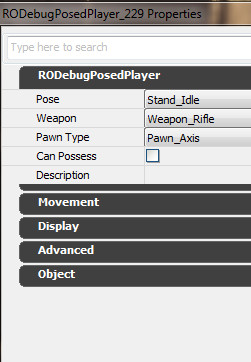
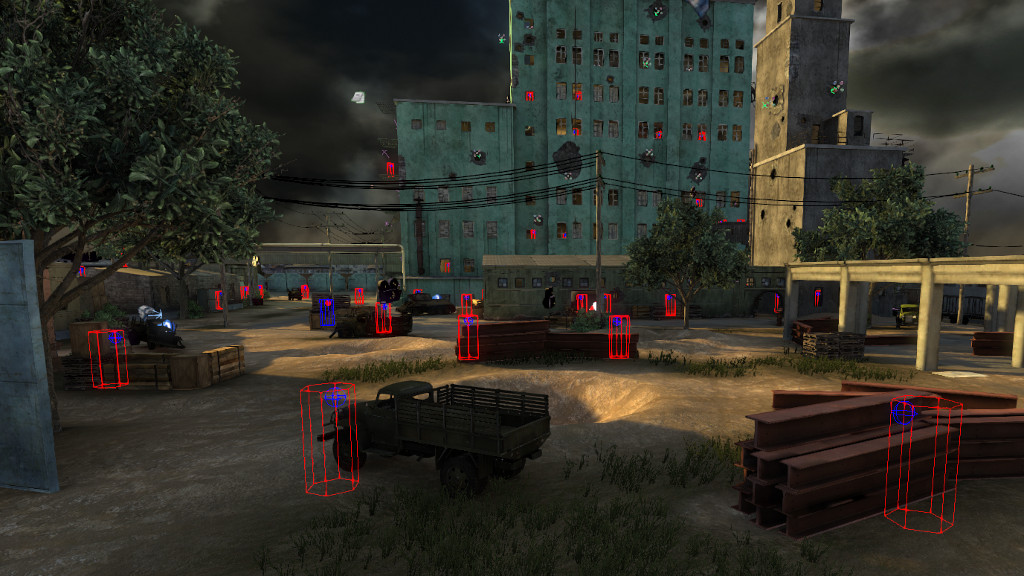
We have made a tool for level designers and artists that are used to gather statistical data about maps called Posed Players. The purpose of the Posed Player is to have a placeable actor to simulate a player in a scene. It has the capability to be used as a camera during profile stage. All of which I will go over now.
Actor In Tree
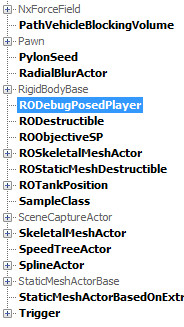
The RODebugPosedPlayer actor is found at Actor -> RODebugPosedPlayer
Properties
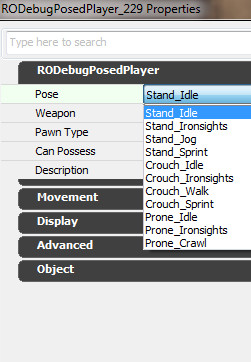
- Pose: The pose, or stance, the posed player will be in when spawned
- Weapon: The weapon the posed player will be using when posed
- Pawn Type: German or Russian
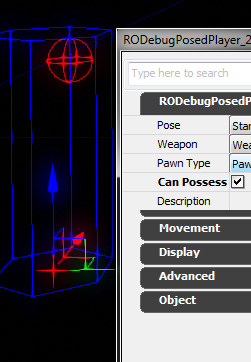
- Can Possess: Allows the user to possess this posed player using the PossessPosedPlayer console command
- Description: Small description on what this posed player is - OPTIONAL
Available Poses
The pose will not make a difference in regards to performance and optimization. It was added so if you wanted to stage a scene for screen shots or something along those lines, this allows you to put the posed player into various positions.
Can Possess
Placing RODebugPosedPlayer Actor in Map
Posed Player Placement Guideline
- Expected player count is 64 player which would be the worse case scenario in regards to performance
- Use Can Possess on posed players that have vantage view on a particular high traffic area/areas of performance pits
- Any particular player SHOULD NOT see 100% of the map nor players
- Place the actors where players will be
- Do not unnaturally bunch up the posed players
- Distribute the posed players evenly across scene
- More actors near objective spaces, spawn areas, and known fight spaces
- Position RODebugPosedPlayers ~16 Unreal Units above surface to avoid posed player clipping/failure to spawn
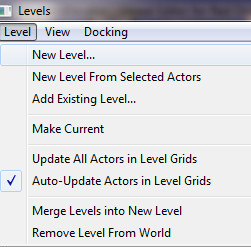
Create a NEW sublevel
Naming the Sub Level
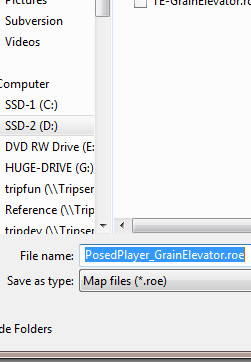
Give the sub level a name. It really doesn't matter what you call it as long as you know what it is.
Setting Streaming Method
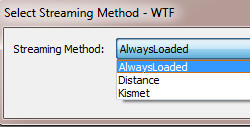
We always use Always Loaded so that every time the persistent is loaded, so is this sublevel. Done this way there is no need to have Kismet handle it.
Options:
- Kismet- Used when you want to use a Kismet node to stream in the sub level.
- Distance- Used when you want to use a certain distance.
- Always Loaded- Used when you want the sub level always loaded when the persistent is loaded.
Making New Sub Level Current
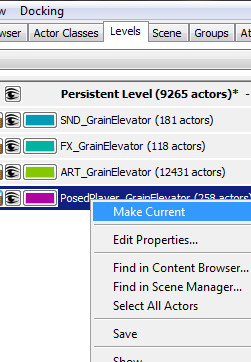
Make the new sub level current and we are ready to start placing actors.
Results
Doing the Profile
I will document what was done at TWI. Our profiling parameters and data gathering points were specific to our needs for our designs.
The process outlined below is for measuring rendering performance only. In order to profile gameplay performance you will have to actually jump in game and play around to see how it performs. The idea is to create a consistently reproducible setting so that we can monitor the rendering performance after each optimization pass.
Profiling Machine Hardware Specifications
These are the specifications of the test machine used at TWI
- Intel Quad 2.40GHz
- 4GB RAM
- ATI Radeon HD 5800
- Test Done on High Settings
Prerequisites
Make sure you profile the game in the same PC every time and with the same graphics setting (High in this case). Also make sure you are running at the same resolution each time you profile. Usually this is the native resolution of your monitor. You do not have to be in full screen mode
Console Commands
- SpawnPosedPlayers
- PossessPosedPlayer
Profiling Process
- After you spawn into a map, type ‘SpawnPosedPlayers’ to get the posed characters into the map
- After the characters are spawned, type ‘StopPosedPlayerUpdates’ to stop the posed players from updating so that the game time is not artificially inflated by the ticking of all the additional posed players
- Use ‘PossesPosedPlayer’ to assume one of the posed players in the map which is our target for profiling. Typing ‘PossessPosedPlayer’ again will cycle through all the posed players in the level.
Polling the Results
- Location @
- Frame Time
- Game Time
- FPS
- Draw Time (ms)
- GPU Time (ms)
- DrawPrimitive Calls
- Triangles Drawn
- Static Mesh Tris
- Skel Mesh Draw Calls
- Per Object shadows
- Preshadows
- Adjusted FPS = 1000/Max(DrawTime, GPUTime). This is the effective FPS you'll get when you are bound by rendering. This basically elimiates the GameTime from the equation, since the posed players do not give an accurate representation of GameTime.
Store Results for Future Profiles
If you are able to get the profiling tools in sooner than later, you can run the profile process at various stages of development. We did this at TWI allowing us to postmortem the design process with useful data on hand.
RO2 Static Mesh Combining Tool
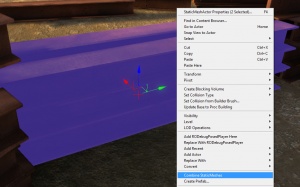
This tool allows for you to combine similar staticmeshes into one staticmesh allowing you to reduce the overall draw calls per scene frame. We had a number of guidelines that we worked with to get the best results that we could.
NOTE: When you are combining meshes it's a good idea to keep an eye on Properties -> Static Mesh Component -> Override Light Map Res and it's Boolean bit as well. Having a non default value will result in lightmap errors.
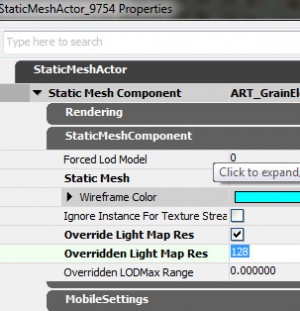
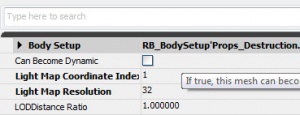
To override the lightmap of combined meshes, do it at the asset itself in the package. StaticMesh Asset Properties -> Light Map Resolution -> [INTEGER]
Combining Tool Guidelines
- Do not combine meshes that do not share that same material(s) in the same slots
- Do not combine too many meshes that you fight with the natural occlusion systems as even the smallest of pixel of a mesh being rendered will render the entirety of the mesh
- Do not combine meshes that will give you exceedingly high poly counts. (>5000)
- Do not combine meshes that you cannot use over and over as this fights with the engine's instancing capability
- Culling > Occlusion
Combining Process
Combine Mesh Context Menu
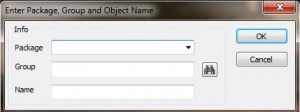
Create New Asset Location
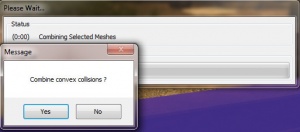
Combine Convex Collision
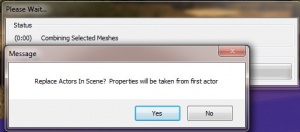
Replace Actors in Scene
UnCombining Process
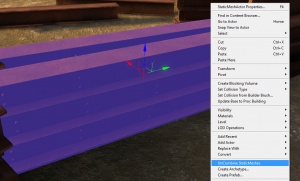
RMB -> UnCombine Mesh
This will simply uncombine the meshes and replace them with the stored reference of the original assets in the combined mesh. Do not uncombine more than one combined mesh at a time.
Procedural bCastDynamicShow System
Every static mesh object in the map has the capability to cast a dynamic shadow. A dynamic shadow uses the cascade shadowing system to make nice crisp shadows for the world objects when the player gets near them. The down side is that they can be an expensive render, relatively, when the engine must cast a dynamic shadow into an already shadowed space. To save from having to check this on each and every object in the world a new system was introduced that traces a line from the 8 corners of the bounding box of the static mesh actor back to the DominantDirectionalLight in the map. If ANY of the traces hit the DominantDirectionalLight, the bCaseDynamicShadow Boolean variable is set to TRUE. If none of the traces touches the DominantDirectionalLight then the variable is set to FALSE.
Some times you can get a false readings in situations where all 8 corners of the bounding box are contained in another mesh (such as walls with a pillar on each side of each section of wall). In this case we've given the capability for the Level Designer to override the procedural system.
StaticMeshActor Properties -> StaticMeshComponent -> Lighting -> Allow Auto Cast Dynamic Shadow Override
